Buttery Pie Crust Recipe for Perfect Flaky Pastry Every Time
Few baked goods hold as much importance in home baking as pie crust, the foundation that can make or break any pie.
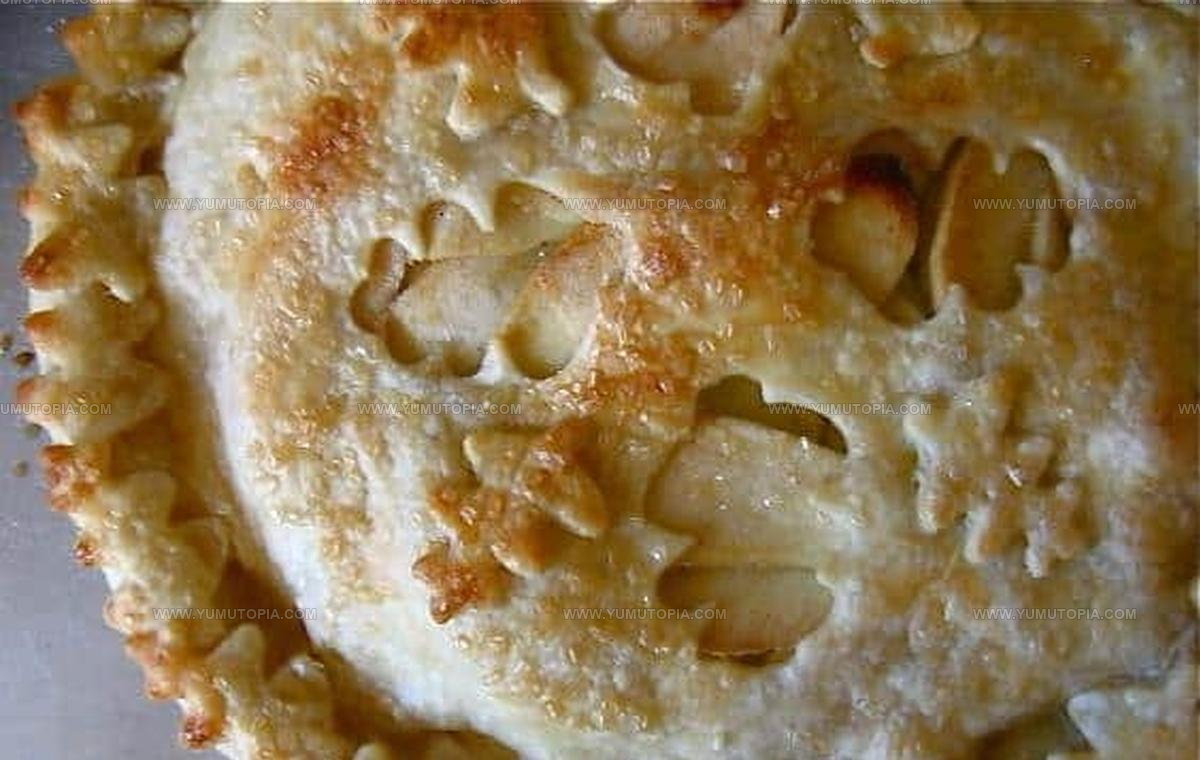
Flaky, tender, and golden brown when done right, it serves as both structure and flavor component in countless sweet and dessert creations.
Many home bakers feel intimidated by the process, but mastering it opens up a world of baking confidence.
The difference between a homemade version and store-bought is remarkable in both taste and texture.
Simple techniques yield professional results that impress at any gathering or holiday celebration.
What looks complicated is actually quite manageable when broken down into straightforward steps, and the satisfaction of creating something from scratch makes every moment worthwhile.
Standout Features Of Perfect Pie Crust
Perfect Pie Crust Ingredient List
Flour Base:Fat Component:Liquid Binding:Tools To Have Ready for Perfect Pie Crust
The Process for Making the Perfect Pie Crust
Mix Dry Ingredients
Grab a large mixing bowl and toss in the flour, salt, and sugar. Give everything a good stir until the ingredients are evenly distributed throughout your bowl.
Prepare Cold Butter
Slice your cold butter into tiny half-inch cubes. Sprinkle these little butter pieces across the top of your flour mixture.
Create Crumbly Texture
Using your fingers or a pastry cutter, work the butter into the flour. Keep pressing and mixing until the whole batch looks like rough, sandy crumbs. Don’t worry about making it perfect – some small butter chunks are totally okay.
Add Water Carefully
Start drizzling in the ice water, one tablespoon at a time. Gently mix after each addition. You’re looking for the dough to just barely start holding together – not too wet, not too dry.
Shape Dough Disks
Divide the dough into two equal portions. Use your hands to shape each piece into a flat, round disk about the size of a small plate.
Chill The Dough
Wrap each disk completely in plastic wrap. Slide them into the refrigerator for at least 1 hour. This helps the butter firm up and lets the gluten relax, which makes rolling way easier later.
Warm Dough Slightly
Take the dough disks out of the fridge and let them sit on the counter for 5-10 minutes. You want them slightly softened but still cool.
Roll Out The Crust
Dust your countertop with a light sprinkle of flour. Roll each disk into a thin circle, about 1/8-inch thick. Rotate the dough as you roll to keep it from sticking, and add more flour if needed.
Finishing Touches For The Perfect Pie Crust In Eight Steps
Possible Adjustments for Perfect Pie Crust
Serving And Pairing Ideas For Perfect Pie Crust
Smart Storage Tips for The Perfect Pie Crust
Perfect Pie Crust Common Questions Answered
Can I make this pie crust ahead of time?
Yes, the dough can be prepared and refrigerated up to 3 days before rolling out. You can also freeze the disks for up to 2 months, which helps when planning baking in advance.
What if my butter gets too warm?
Cold butter is crucial for flaky texture. If your butter softens, stop and refrigerate the mixture for 15 minutes to keep everything chilled. Your patience ensures a perfect crust.
How do I know when the dough is mixed correctly?
When the butter breaks down into pea-sized crumbs and the mixture looks like coarse sand, you’re on the right track. Don’t overmix, or your crust will become tough.
Can I use a food processor instead of hand mixing?
Absolutely! Pulse the ingredients in short bursts to prevent overworking the dough. The goal is keeping butter cold and creating a crumbly texture.
Why is ice water important?
Cold water helps keep butter solid and prevents gluten from developing too much. This ensures your crust stays tender and flaky instead of becoming dense and chewy.

All-Butter Pie Crust Recipe
- Total Time: 15 minutes
- Yield: 8 1x
Description
Mastering The Perfect Pie Crust can turn your baking from good to absolutely delicious, giving you confidence to create flaky, tender crusts that will impress family and friends at any gathering. Grab your rolling pin and follow these simple techniques to elevate your pastry skills from novice to pro in just eight easy steps.
Ingredients
Primary Ingredients:
- 2 ½ cups all-purpose flour
- 1 cup unsalted butter
Supporting Ingredients:
- 1 teaspoon salt
- 2 tablespoons granulated sugar
Liquid Ingredients:
- 6–8 tablespoons ice water
Instructions
- Grab a large mixing bowl and combine 2 ½ cups flour, 1 teaspoon salt, and 2 tablespoons sugar. Whisk these dry ingredients together thoroughly.
- Retrieve your cold butter and slice it into tiny ½-inch cubes. Scatter these cubes across your flour mixture.
- Use your fingertips or a pastry cutter to press and crumble the butter pieces into the flour. Keep working until the mixture looks like rough, uneven breadcrumbs.
- Drizzle 6 tablespoons of ice-cold water over the crumbly mixture. Gently fold and press the liquid into the dough until it just barely holds together.
- Divide the dough into two equal portions. Shape each portion into a flat, round disk about 1-inch thick.
- Wrap each disk completely in plastic wrap. Chill in the refrigerator for exactly 1 hour to help the butter solidify and allow the gluten to relax.
- Remove the dough disks from the refrigerator. Let them rest at room temperature for 7 minutes to soften slightly.
- Dust your work surface with flour. Roll each disk into a thin round, approximately ⅛-inch thick. Rotate the dough frequently and add extra flour to prevent sticking.
- Transfer your delicate pie crust to your baking dish, trimming any excess edges for a clean, professional finish.
Notes
- Cold butter is the key to flaky, tender crust, so keep it chilled until the moment you need it.
- Work quickly and handle the dough as little as possible to prevent tough pastry from developing.
- A pastry cutter helps distribute butter evenly, but fingertips work just as well if done gently and swiftly.
- Refrigerating the dough allows butter to solidify and gluten to relax, creating a more tender, manageable crust.
- Prep Time: 15 minutes
- Cook Time: 0 minutes
- Category: Pies
- Method: Rolling
- Cuisine: American
Nutrition
- Serving Size: 8
- Calories: 350
- Sugar: 3 g
- Sodium: 150 mg
- Fat: 27 g
- Saturated Fat: 17 g
- Unsaturated Fat: 9 g
- Trans Fat: 0.5 g
- Carbohydrates: 28 g
- Fiber: 1 g
- Protein: 3 g
- Cholesterol: 60 mg
Madison Wyman
Recipe Developer & Food Storyteller
Expertise
Recipe Research and Adaptation, Food Writing and Cultural Storytelling, Sustainable and Ethical Sourcing, Dietary Adaptations (e.g., gluten-free, plant-based)
Education
Oregon Health & Science University
Portland Community College
Madison’s passion for flavor and culture ignited amidst the rich Southern cooking traditions of her upbringing, where cherished family recipes told delicious tales.
Armed with a Master’s in Food Systems and Society from Oregon Health & Science University and a Culinary Arts Certificate from Portland Community College, Madison truly excels at transforming rich, intricate flavors into dishes that are both approachable and heartfelt.
For her, cooking is a vibrant blend of science, art, and heritage – a powerful way to connect us to our roots and each other. Her recipes invite you to delve deeper, uncovering the fascinating stories woven into every ingredient.