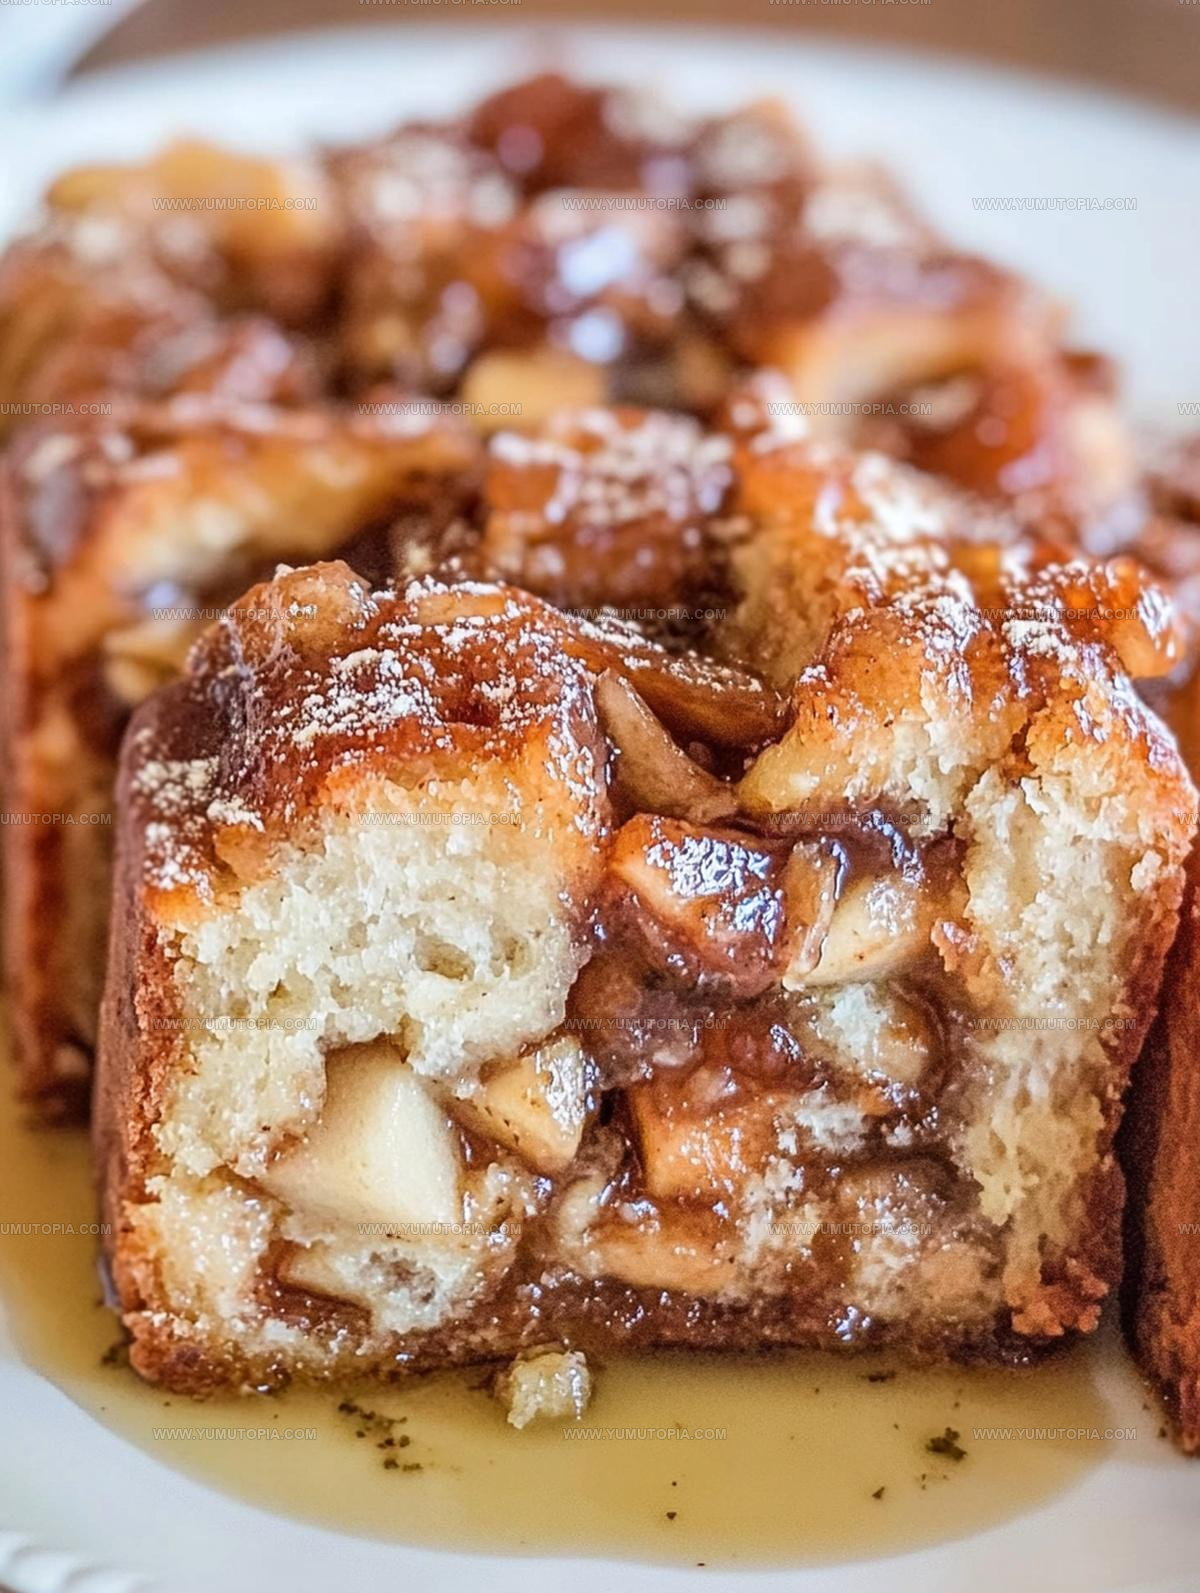
Homemade Apple Fritter Bread Recipe with Cinnamon Glaze
Apple fritter bread combines the beloved flavors of a classic bakery treat in a form that’s simple to slice and share.
Moist, tender loaves capture that same sweet appeal as the fried favorites from your local donut shop, but in a way that feels just right for breakfast or an afternoon snack.
The beauty here is how comforting and familiar everything tastes, like autumn mornings or weekend baking sessions when the house smells amazing.
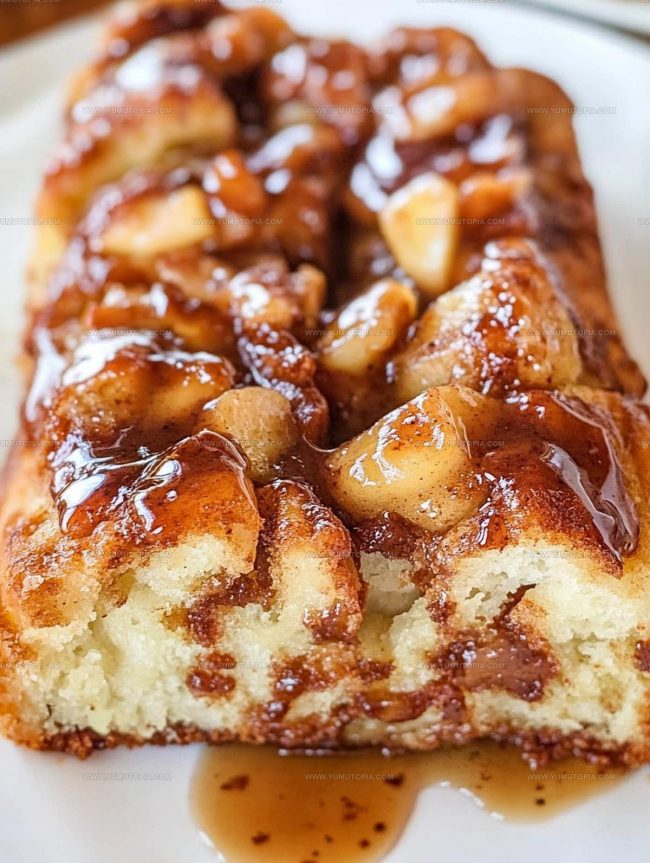
Swirls of cinnamon sugar and a drizzle of glaze make every bite feel special without requiring any fancy techniques.
You can serve it warm or at room temperature, making it versatile for any occasion.
Perfect for cozy gatherings or just treating yourself, this loaf turns an ordinary day into something a bit more delightful.
What Makes Apple Fritter Bread Worth Making

Core Ingredients in Apple Fritter Bread
Base Ingredients:Dry Ingredients:Apple and Topping Ingredients:Tools For Apple Fritter Bread
Steps for Making Apple Fritter Bread
Warm Up the Oven
Crank your oven to 350°F and grab a 9×5-inch loaf pan. Grease it generously with butter or cooking spray so nothing sticks.
Cream the Base
Grab your electric mixer and blend 1/2 cup butter with 1 cup sugar until the mixture looks fluffy and light. This creates the perfect foundation for your bread.
Build the Wet Mixture
Drop in 2 large eggs one at a time, mixing thoroughly after each. Splash in 1 tsp vanilla extract and 1/3 cup milk, stirring until everything looks smooth and well combined.
Prepare the Dry Ingredients
Whisk together 2 cups all-purpose flour, 2 tsp baking powder, and 1/2 tsp salt in a separate bowl. These dry ingredients will give your bread structure.
Combine Wet and Dry
Slowly fold the dry ingredients into your wet mixture. Mix gently until everything looks uniform and there are no flour lumps.
Prepare the Apples
Peel and chop 2 large apples into tiny, neat cubes. Aim for pieces about the same size so they bake evenly.
Create the Cinnamon Sugar
Blend 1/3 cup brown sugar and 2 tsp ground cinnamon in a small bowl. This will add a warm, sweet layer to your bread.
First Batter Layer
Pour half the batter into your prepared pan. Spread it evenly across the bottom.
First Apple and Spice Layer
Sprinkle half the apple cubes and half the cinnamon-sugar mixture over the first batter layer.
Final Batter and Topping
Add the remaining batter on top, then scatter the rest of the apple cubes and cinnamon-sugar mixture.
Create Marble Effect
Take a knife and gently swirl through the layers. This creates a beautiful marbled pattern.
Bake the Bread
Slide the pan into the 350°F oven and bake for 50-60 minutes. Check doneness by inserting a toothpick – it should come out clean.
Cool in Pan
Once baked, let the bread rest in the pan for 10 minutes. This helps it settle and makes removing easier.
Complete Cooling
Transfer the bread to a wire rack and let it cool completely. Patience matters here!
Make the Glaze
Whisk 1/4 cup powdered sugar with 1-2 tbsp milk until you have a smooth, drizzling consistency.
Finish and Serve
Drizzle the glaze over the cooled bread. Slice and serve whenever you’re ready to enjoy!
Good To Know Before Cooking Apple Fritter Bread
Flavorful Options for Apple Fritter Bread
Serving Notes For Apple Fritter Bread
Best Storage Method for Apple Fritter Bread
Apple Fritter Bread Frequently Asked Questions
Can I use different types of apples?
Some apples work better than others. Firm varieties like Granny Smith, Honeycrisp, or Braeburn hold their shape and provide nice texture during baking.
How do I prevent the apples from sinking to the bottom?
Toss diced apples in a little flour before adding them to the batter. This helps them stay suspended throughout the bread instead of settling at the bottom.
Does the bread freeze well?
Absolutely seal the bread tightly in plastic wrap and freeze for up to 3 months. Thaw at room temperature and warm slightly before serving.
Can I make this recipe gluten-free?
Replace the all-purpose flour with a gluten-free flour blend designed for baking. Make sure to use a blend that includes xanthan gum for better texture.
What if my batter seems too thick or thin?
Adjust consistency by adding small amounts of milk to thin it out or extra flour to thicken. The batter should have a smooth, spreadable texture similar to cake batter.
How ripe should the apples be?
Select apples that are firm with minimal soft spots. Avoid overly soft or bruised apples, which can make your bread mushy.
Apple Fritter Bread Recipe
- Total Time: 1 hour 10 minutes – 1 hour 20 minutes
- Yield: 8 1x
Description
Whipping up Apple Fritter Bread brings pure comfort straight from your kitchen, delivering sweet cinnamon-apple goodness in each delightful slice. Warm, tender crumbs packed with chunky apple bits and a crackly cinnamon glaze make this quick bread a total crowd-pleaser you cannot resist.
Ingredients
Base Ingredients:
- 2 cups all-purpose flour
- 1 cup sugar
- ½ cup butter
- 2 large eggs
- ⅓ cup milk
- 2 tsp baking powder
- 2 tsp vanilla extract
- ½ tsp salt
Fruit and Spice Additions:
- 2 large apples
- ⅓ cup brown sugar
- 2 tsp ground cinnamon
Finishing Touches:
- ¼ cup powdered sugar
- 1–2 tablespoons milk
Instructions
- Warm your oven to 350°F and coat a 9×5-inch loaf pan thoroughly with butter or cooking spray.
- Cream ½ cup butter with 1 cup sugar using an electric mixer until the mixture becomes airy and pale.
- Beat in 2 large eggs individually, ensuring each is fully incorporated before adding the next.
- Pour 1 tsp vanilla extract and ⅓ cup milk into the butter mixture, stirring until smooth.
- Combine 2 cups flour, 2 tsp baking powder, and ½ tsp salt in a separate bowl.
- Fold dry ingredients into the wet mixture gently, mixing just until a consistent batter forms.
- Carefully peel and dice 2 large apples into small, consistent cubes.
- Blend ⅓ cup brown sugar with 2 tsp ground cinnamon in a small bowl.
- Pour half the batter into the prepared loaf pan, spreading evenly.
- Scatter half the apple pieces and sprinkle half the cinnamon-sugar mixture over the first batter layer.
- Add remaining batter on top, then distribute the rest of the apple pieces and cinnamon-sugar.
- Use a knife to create gentle swirls through the layers, creating a marbled pattern.
- Slide the pan into the preheated oven and bake for 55 minutes, checking doneness with a toothpick.
- After baking, let the bread rest in the pan for 10 minutes to settle.
- Transfer the loaf to a wire rack and allow it to cool completely.
- Whisk ¼ cup powdered sugar with 1-2 tbsp milk until a smooth glaze forms.
- Drizzle the glaze over the cooled bread in an artistic pattern before serving.
Notes
- Use very cold butter for the fluffiest, most tender crumb in the batter.
- Dice apples into small, uniform pieces to ensure even distribution and consistent baking.
- Let the bread cool completely before glazing to prevent the sugar from melting and becoming runny.
- For a gluten-free version, swap all-purpose flour with a cup-for-cup gluten-free baking blend and add an extra teaspoon of baking powder.
- Prep Time: 20 minutes
- Cook Time: 50 minutes – 1 hour
- Category: Breads
- Method: Baking
- Cuisine: American
Nutrition
- Serving Size: 8
- Calories: 310 kcal
- Sugar: 24 g
- Sodium: 190 mg
- Fat: 14 g
- Saturated Fat: 8 g
- Unsaturated Fat: 6 g
- Trans Fat: 0.2 g
- Carbohydrates: 42 g
- Fiber: 2 g
- Protein: 4 g
- Cholesterol: 55 mg
Logan Lemaster
Founder & Culinary Innovator
Expertise
Recipe Development and Innovation, Menu Design and Optimization, Fine Dining Techniques, Ingredient Pairing and Flavor Science
Education
Metropolitan Culinary Arts Institute
Logan’s culinary journey kicked off in his vibrant Chicago family kitchen, where fresh, seasonal ingredients and bold flavors were always front and center.
After graduating from the Metropolitan Culinary Arts Institute in Arlington, Virginia, and honing his skills in renowned restaurants, Logan mastered the art of blending classic techniques with exciting, modern twists.
His kitchen is a dynamic lab for flavor exploration. Through Yum Utopia, Logan aims to empower you to cook with both confidence and creativity, turning simple ingredients into spectacular meals.