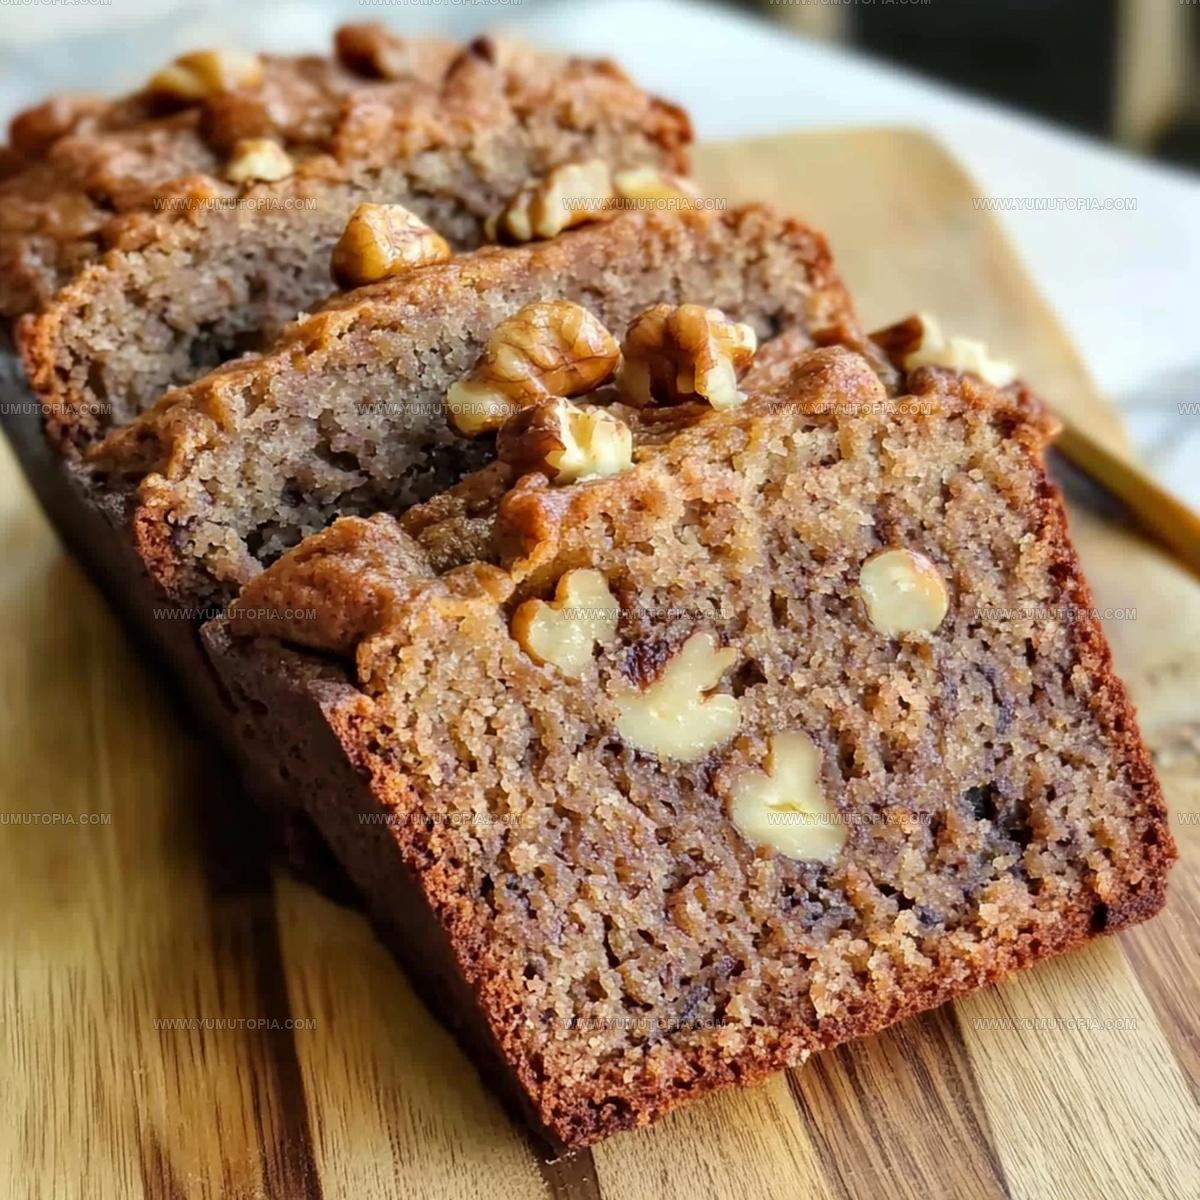
Moist Banana Nut Bread Recipe With Walnuts
Banana nut bread recipe fans know that few baked goods create such a warm welcome in any kitchen.
The aroma alone fills your home with comfort and makes everyone feel instantly at peace.
Soft, moist, and naturally sweet, it works beautifully for breakfast alongside coffee or as an afternoon snack when cravings hit.
You can serve it plain or lightly toasted with a smear of butter for pure satisfaction.
It also travels well, making it ideal for lunchboxes, potlucks, or thoughtful gifts to neighbors and friends.
Both experienced bakers and newcomers find success with it because the process is straightforward and forgiving.
There’s something deeply rewarding about slicing into a golden loaf that you baked from scratch.
Pull out your mixing bowl and preheat the oven for a treat that never goes out of style.
Highlights That Make Banana Nut Bread a Go To
What Are All the Ingredients for Banana Nut Bread?
Dry Ingredients:Wet Ingredients:Nutty Addition:Best Tools for Banana Nut Bread
Best Baking Method for Moist Banana Nut Bread
Prep Your Oven and Pan
Heat the oven to 350°F and grab your 9×5 inch loaf pan. Give it a quick spray of cooking spray or brush with a thin layer of butter so your banana bread doesn’t stick.
Mix Dry Ingredients
Grab a medium bowl and whisk together these dry ingredients:
Set this bowl aside for a moment.
Cream Butter and Sugar
In a large mixing bowl, grab your electric mixer and blend these ingredients until they’re super smooth:
Keep mixing until the texture looks light and fluffy.
Add Eggs
Crack your eggs into the butter mixture one at a time. Mix thoroughly after each egg goes in to make sure everything blends perfectly.
Banana Mashing
Take those ripe bananas and smash them completely. You want 2 1/3 cups of smooth banana goodness with zero large chunks.
Combine Wet Ingredients
Pour the mashed bananas into your butter mixture. Stir until everything looks well combined.
Add Dry Ingredients
Slowly add your flour mixture to the wet ingredients. Stir gently until just mixed – don’t overmix or your bread will get tough.
Fold in Nuts
Sprinkle in 1/2 cup chopped walnuts and fold them through the batter carefully.
Prepare for Baking
Pour the batter into your prepared loaf pan. Spread it evenly with a spatula so it bakes smoothly.
Bake the Bread
Slide the pan into the 350°F oven. Bake for 55-60 minutes. Check doneness by inserting a toothpick – it should come out clean when the bread is ready.
Cool and Rest
Pull the bread from the oven. Let it sit in the pan for 10 minutes to settle down.
Final Cooling
Transfer the bread to a wire rack. Wait until it’s completely cool before slicing. This helps the bread hold its shape and makes clean, perfect slices.
Extra Kitchen Insight for Banana Nut Bread
Banana Nut Bread Texture Adjustments
Classic Ways to Enjoy Banana Nut Bread
How Long Does Banana Nut Bread Keep
Banana Nut Bread Frequently Asked Questions
Can I use other nuts instead of walnuts?
Absolutely! Pecans or almonds work great. Choose your favorite nut or what you have in your pantry.
What if my bananas aren’t super ripe?
Slightly underripe bananas can still work, but very ripe bananas with brown spots create the best flavor and sweetness for banana bread.
Is this bread good for freezing?
Wrap the bread tightly in plastic wrap and then aluminum foil. It freezes perfectly for up to 3 months.
Do I need a stand mixer for this recipe?
No worries – a hand mixer or even mixing by hand with a wooden spoon will work just fine.
Can I make this bread gluten-free?
Swap the regular flour for a gluten-free all-purpose flour blend. The texture might be slightly different, but it should still taste delicious.
What makes banana bread so moist?
Overripe bananas are the secret. They add natural moisture and sweetness that keeps the bread soft and tender.

Banana Nut Bread Recipe
- Total Time: 1 hour 10 minutes – 1 hour 15 minutes
- Yield: 8 1x
Description
Banana nut bread from Grandma’s kitchen wraps your senses in warm, comforting memories. Tender crumbs packed with ripe bananas and toasted nuts make this classic recipe a guaranteed family favorite that sparks joy at first bite.
Ingredients
Main Ingredients:
- 2 ⅓ cups mashed overripe bananas
- 2 large eggs
- ½ cup chopped walnuts
Dry Ingredients:
- 2 cups all-purpose flour
- 1 teaspoon baking soda
- ¼ teaspoon salt
Wet and Sweet Ingredients:
- ½ cup unsalted butter
- ¾ cup brown sugar
Instructions
- Prepare your oven by heating it precisely to 350°F and coating a 9×5 inch loaf pan with a thin layer of butter or cooking spray.
- Grab a medium bowl and thoroughly combine 2 cups flour, 1 tsp baking soda, and ¼ tsp salt using a whisk.
- In a large mixing bowl, cream ½ cup unsalted butter with ¾ cup brown sugar until the mixture becomes silky and peaks form easily.
- Incorporate 2 large eggs into the butter mixture one at a time, ensuring each is fully blended before adding the next.
- Take 2 ⅓ cups of overripe bananas and mash them completely, eliminating all substantial lumps.
- Gently blend the mashed bananas into your butter mixture until they are evenly distributed.
- Slowly introduce the dry ingredient mixture into the wet ingredients, stirring minimally to prevent overmixing.
- Carefully fold ½ cup chopped walnuts throughout the batter, distributing them evenly.
- Transfer the batter into your prepared loaf pan, smoothing the top with a spatula to create an even surface.
- Place the pan in the preheated 350°F oven and bake for 55-60 minutes, checking doneness with a toothpick inserted in the center.
- After removing from the oven, allow the bread to rest inside the pan for 10 minutes to stabilize its structure.
- Delicately lift the bread from the pan and position it on a wire rack, letting it cool completely before slicing.
Notes
- Overripe bananas create the most flavorful and moist banana bread, so save those browning bananas on your counter.
- Toasting walnuts before adding them to the batter enhances their nutty flavor and adds a delightful crunch to your bread.
- Avoid overmixing the batter after adding dry ingredients, as this can lead to a tough and dense bread texture.
- For a gluten-free version, swap the all-purpose flour with a cup-for-cup gluten-free flour blend and ensure all other ingredients are gluten-free.
- Prep Time: 15 minutes
- Cook Time: 55 minutes – 1 hour
- Category: Breads
- Method: Baking
- Cuisine: American
Nutrition
- Serving Size: 8
- Calories: 275 kcal
- Sugar: 15 g
- Sodium: 150 mg
- Fat: 13 g
- Saturated Fat: 5 g
- Unsaturated Fat: 7 g
- Trans Fat: 0.3 g
- Carbohydrates: 36 g
- Fiber: 2 g
- Protein: 4 g
- Cholesterol: 45 mg
Logan Lemaster
Founder & Culinary Innovator
Expertise
Recipe Development and Innovation, Menu Design and Optimization, Fine Dining Techniques, Ingredient Pairing and Flavor Science
Education
Metropolitan Culinary Arts Institute
Logan’s culinary journey kicked off in his vibrant Chicago family kitchen, where fresh, seasonal ingredients and bold flavors were always front and center.
After graduating from the Metropolitan Culinary Arts Institute in Arlington, Virginia, and honing his skills in renowned restaurants, Logan mastered the art of blending classic techniques with exciting, modern twists.
His kitchen is a dynamic lab for flavor exploration. Through Yum Utopia, Logan aims to empower you to cook with both confidence and creativity, turning simple ingredients into spectacular meals.