Classic Berry Pie Recipe for Summer Gatherings
Berry pie recipe collections celebrate one of summer’s greatest pleasures, bringing together fruit at peak ripeness in a classic dessert that has graced tables for generations.
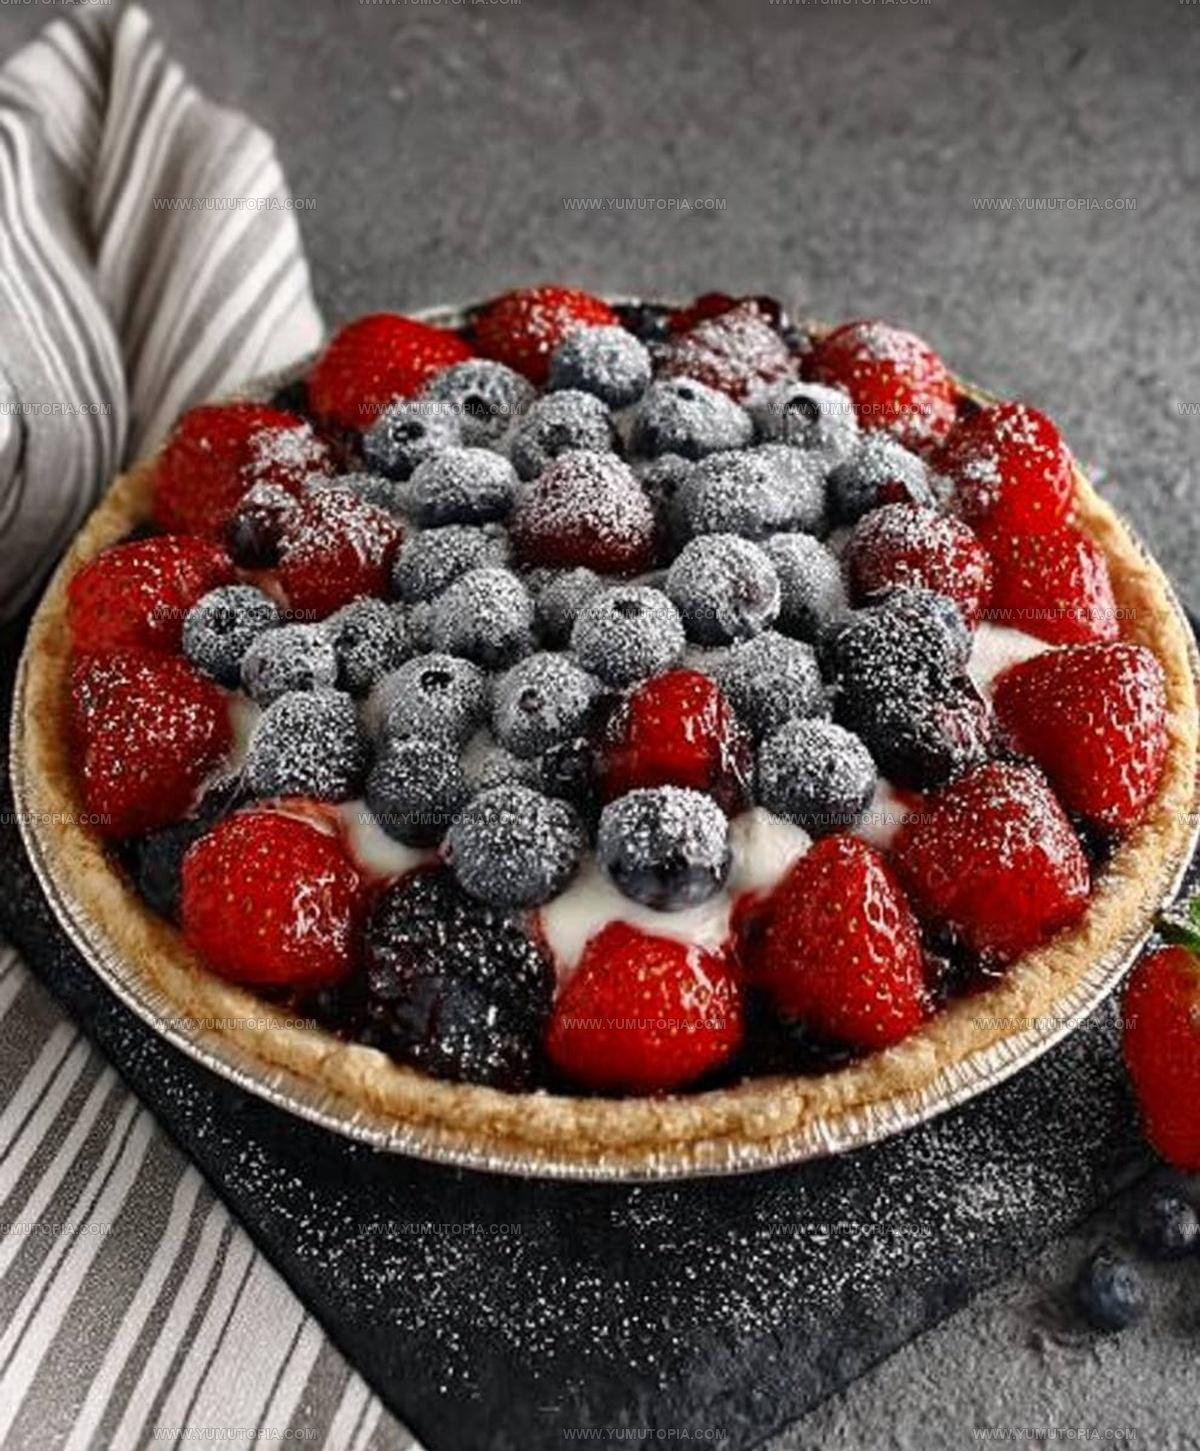
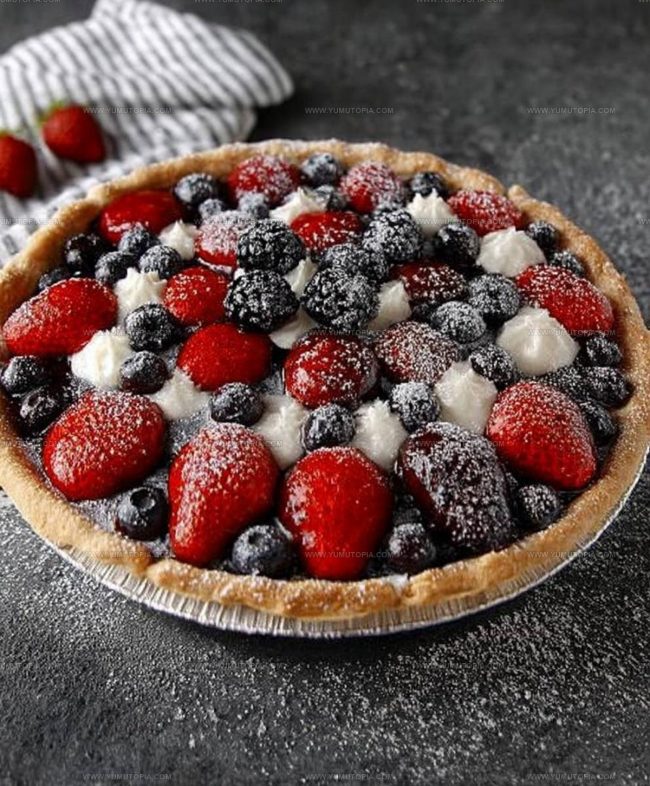
Whether you prefer a traditional double-crust style or something with a lattice top, pies filled with mixed berries deliver sweetness balanced by natural tartness that never disappoints.
Summer gatherings feel incomplete without a freshly baked pie cooling on the counter, filling the kitchen with an aroma that draws everyone closer.
Home bakers appreciate how forgiving pie dough can be once you understand a few key techniques.
Cool whipped cream or vanilla ice cream alongside a warm slice creates a contrast that makes every bite memorable.
When berry season arrives, there’s no better way to make the most of the harvest than by mastering a go-to recipe that becomes a household favorite.
Why Berry Pie Never Goes Out of Style
What You’ll Be Using for Berry Pie
Main Ingredients:Filling Ingredients:Finishing Ingredients:What Tools Bake Berry Pie
Baking Directions for Berry Pie
Prepare Pie Dough
Grab a large bowl and whisk 2 1/2 cups all-purpose flour with 1 teaspoon salt. Toss in cold butter and shortening, then break it down using your fingers until the mixture looks like rough pebbles. Sprinkle in ice water, one tablespoon at a time, and gently mix until the dough just comes together. Divide the dough into two equal discs, wrap them in plastic, and chill in the refrigerator for at least 2 hours.
Create Berry Filling
Toss 4 cups of mixed berries with 3/4 cup granulated sugar and let them hang out for 15-20 minutes. Mix in 1/4 cup cornstarch, 1 tablespoon lemon juice, 1/2 teaspoon lemon zest, and a pinch of ground cinnamon if you’re feeling fancy. Dot the top with 2 tablespoons of butter pieces.
Prepare Pie Plate
Heat the oven to 400F. Slide a baking sheet onto the lower rack. Roll out one dough disc into a 12-inch circle and drape it into a 9-inch pie plate. Trim and crimp the edges to make it look pretty.
Add Berry Filling
Pour the berry mixture into the crust, spreading it out evenly. This is where the magic happens!
Create Top Crust
Roll out the second dough disc into another 12-inch circle. Lay it gently over the filling. Trim and crimp the edges to seal in all that berry goodness. Cut a few slits on top to let steam escape.
Finish and Bake
Whisk 1 large egg with 1 tablespoon milk or water. Brush this mixture over the top crust and sprinkle with turbinado or granulated sugar. Bake for 45-55 minutes until the crust turns golden and the filling bubbles. If the crust browns too quickly, cover it with foil.
Cool and Serve
Let the pie cool completely on a wire rack before slicing. This waiting part is tough, but trust me, it’s worth it!
Which Tips Set Berry Pie Filling
Classic Berry Pie Variations to Make
How to Serve Berry Pie for Any Occasion
How to Store Berry Pie Without a Soggy Crust
Berry Pie Common Baking Questions
What makes the perfect pie crust?
Cold ingredients are key. Chilled butter and ice water help create a flaky, tender crust that separates into delicate layers when you bite into it.
How do I prevent a soggy bottom crust?
Letting the berry mixture sit helps release excess liquid, and placing the baking sheet in the lower oven rack helps crisp the bottom crust by providing direct heat.
Can I use frozen berries instead of fresh?
Absolutely! Thaw and drain frozen berries completely before using. Pat them dry to remove extra moisture that could make your filling runny.
Why do I need to let the filling sit before baking?
Resting allows the sugar to draw out berry juices and helps the cornstarch activate, which thickens the filling and prevents a watery pie.
How can I tell if the pie is fully baked?
Look for a golden-brown crust and bubbling filling. The bubbles indicate the filling has reached the right temperature to thicken properly.
What if my pie dough seems too dry or crumbly?
Add ice water one tablespoon at a time, mixing gently until the dough just comes together. Overworking can make the crust tough.

Berry Pie Recipe
- Total Time: 2 hours 65 minutes
- Yield: 8 1x
Description
Summer nights get sweeter with Mixed Berry Pie, where ripe berries dance inside a buttery, flaky crust that whispers homemade comfort. Grab your rolling pin and fresh seasonal berries for a dessert that connects family and friends around the table.
Ingredients
Main Ingredients:
- 4 cups mixed berries
- 2 ½ cups all-purpose flour
- 1 cup unsalted butter
- ½ cup vegetable shortening
Filling Ingredients:
- ¾ cup granulated sugar
- ¼ cup cornstarch
- 1 tablespoon lemon juice
- ½ teaspoon lemon zest
- ¼ teaspoon ground cinnamon
Finishing Ingredients:
- 1 large egg
- 1 tablespoon milk
- 1 tablespoon unsalted butter
- 1 teaspoon salt
- 6–8 tablespoons ice water
- Turbinado sugar
Instructions
- Mix 2 ½ cups flour and 1 teaspoon salt in a large bowl, creating a soft, powdery base for your pie crust.
- Incorporate 1 cup very cold, cubed butter and ½ cup cold shortening into the flour mixture using your fingertips until it looks like rough, uneven crumbs.
- Drizzle 6-8 tablespoons ice water into the dough, gently blending until the mixture barely holds together without crumbling.
- Split the dough into two equal portions, shape each into a flat disc, and wrap with plastic. Refrigerate for 2 hours to let the gluten relax.
- Combine 4 cups mixed berries with ¾ cup sugar in a bowl, allowing the fruit to macerate and release its natural juices for 15-20 minutes.
- Fold ¼ cup cornstarch, 1 tablespoon lemon juice, ½ teaspoon lemon zest, and a pinch of cinnamon into the berry mixture.
- Scatter 2 tablespoons small butter pieces across the top of the berry filling for extra richness.
- Position a baking sheet on the lower oven rack and preheat to 400F.
- Roll one dough disc into a 12-inch circle and drape carefully into a 9-inch pie plate, trimming excess edges.
- Pour the berry mixture evenly into the prepared crust, spreading to create a smooth surface.
- Transform the second dough disc into a 12-inch circle and lay gently over the filling, sealing the edges with a decorative crimp.
- Slice 4-5 vents across the top crust to allow steam to escape during baking.
- Whisk 1 egg with 1 tablespoon milk and brush delicately over the entire top crust.
- Dust the surface with turbinado sugar for a sparkling, crisp finish.
- Bake at 400F for 45-55 minutes until the crust turns golden and the filling bubbles vigorously. Protect with foil if browning too quickly.
- Rest the pie on a wire rack for complete cooling, allowing the filling to set before slicing.
Notes
- Keep butter and shortening extremely cold to ensure a flaky, tender crust that doesn’t become tough or chewy.
- Allow the dough to rest in the refrigerator for at least two hours, which helps the gluten relax and prevents shrinkage during baking.
- Mix berries gently to avoid breaking them, preserving their shape and preventing a mushy filling that can make your crust soggy.
- Use a baking sheet under the pie to catch any drips and help the bottom crust cook evenly, preventing a soggy bottom that can ruin the texture.
- Prep Time: 2 hours 20 minutes
- Cook Time: 45-55 minutes
- Category: Pies
- Method: Baking
- Cuisine: American
Nutrition
- Serving Size: 8
- Calories: 323 kcal
- Sugar: 20 g
- Sodium: 151 mg
- Fat: 19 g
- Saturated Fat: 9 g
- Unsaturated Fat: 10 g
- Trans Fat: 0.2 g
- Carbohydrates: 38 g
- Fiber: 3 g
- Protein: 3 g
- Cholesterol: 41 mg
Madison Wyman
Recipe Developer & Food Storyteller
Expertise
Recipe Research and Adaptation, Food Writing and Cultural Storytelling, Sustainable and Ethical Sourcing, Dietary Adaptations (e.g., gluten-free, plant-based)
Education
Oregon Health & Science University
Portland Community College
Madison’s passion for flavor and culture ignited amidst the rich Southern cooking traditions of her upbringing, where cherished family recipes told delicious tales.
Armed with a Master’s in Food Systems and Society from Oregon Health & Science University and a Culinary Arts Certificate from Portland Community College, Madison truly excels at transforming rich, intricate flavors into dishes that are both approachable and heartfelt.
For her, cooking is a vibrant blend of science, art, and heritage – a powerful way to connect us to our roots and each other. Her recipes invite you to delve deeper, uncovering the fascinating stories woven into every ingredient.