
Cherry Pie Bombs Recipe That Bursts With Sweet Filling
Sweet cherry pie bombs promise pure dessert magic that defies ordinary expectations.
Bursting with fruity goodness, these delightful treats redefine classic pastry experiences.
Dessert enthusiasts will find themselves captivated by the unexpected combination of crispy exterior and luscious inner core.
Perfect for summer gatherings or spontaneous sweet cravings, cherry pie bombs deliver pure comfort in every single bite.
Bakers seeking something extraordinary beyond traditional pie presentations will adore this playful twist on a beloved classic.
Minimal effort produces maximum deliciousness, making these cherry pie bombs an absolute crowd-pleaser for any occasion.
Why Cherry Pie Bombs Are Always A Hit
What Ingredients Do You Need to Make Cherry Pie Bombs
Kitchen Tools Needed for Cherry Pie Bombs
Simple Way to Make Cherry Pie Bombs
Prepare Dough
Grab a big mixing bowl and toss in 2 cups of flour and 1/2 teaspoon salt. Mix them together so the salt spreads evenly. Chop 1/2 cup cold butter into tiny cubes and work it into the flour with a pastry cutter until the mixture looks like rough breadcrumbs. Pour in 1/4 cup cold water and blend until the dough comes together in a nice ball. Wrap the dough in plastic and park it in the refrigerator for 30 minutes to chill out.
Make Cherry Filling
Remove the pits from 2 cups of fresh cherries and chop them into small pieces. Toss the cherries into a saucepan with these ingredients:
Cook the mixture over medium heat for 5-7 minutes, stirring constantly until it thickens up. Take the pan off the heat and let the filling cool completely.
Roll Out Dough
Warm up your oven to 375°F and line a baking sheet with parchment paper. Sprinkle some flour on your counter and roll the chilled dough out to 1/8-inch thickness. Grab a round cookie cutter and cut out 3-inch circles.
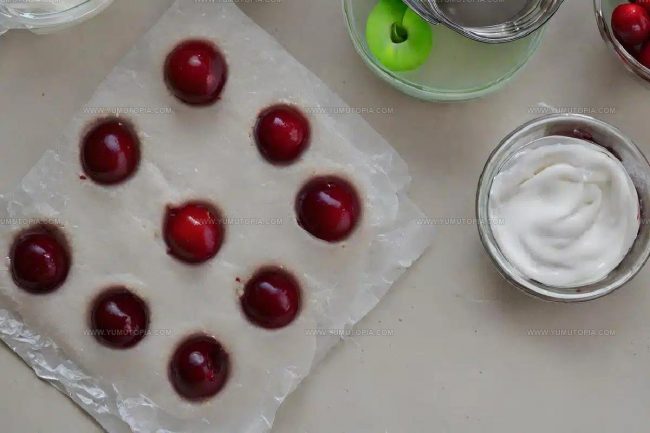
Fill Dough Circles
Place a small spoonful of cooled cherry filling right in the center of each dough circle. Fold the edges of the dough over the filling, creating cute little sealed balls.
Prepare Egg Wash
Whisk together 1 egg and 2 tbsp milk to make an egg wash. Brush this mixture over each dough ball, making sure they get a nice even coating.
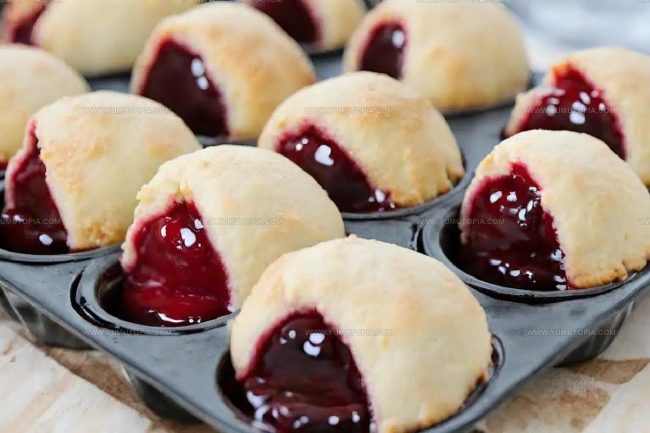
Bake Cherry Bombs
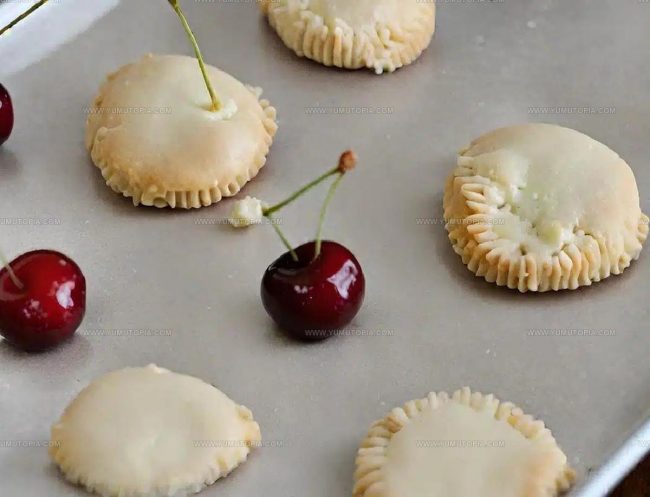
Slide the baking sheet into the preheated oven and bake for 18-22 minutes until the bombs turn a gorgeous golden brown. Pull them out and let them rest for 10 minutes.
Final Touch
Dust the cooled cherry bombs with 1/4 cup powdered sugar. Serve and watch everyone’s eyes light up!
Tried-And-True Notes for Cherry Pie Bombs
Creative Cherry Pie Bombs Options
Sweet Serving Ideas For Cherry Pie Bombs
Recommended Storage Method For Cherry Pie Bombs
Cherry Pie Bombs Common Questions
Can I use frozen cherries instead of fresh ones?
Frozen cherries work perfectly! Thaw and drain them completely before cooking to prevent excess liquid in the filling.
How do I prevent the dough from sticking while rolling?
Dust your work surface and rolling pin with flour generously. This keeps the dough from clinging and makes rolling smooth and easy.
What if my dough feels too crumbly?
Add cold water one teaspoon at a time. Mix gently until the dough holds together without becoming too wet or sticky.
Can these cherry bombs be made ahead of time?
Prepare the dough and filling a day before. Assemble and bake right before serving to keep the pastry crisp and fresh.
How do I know the filling is thick enough?
The cherry mixture should coat the back of a spoon and leave a clear path when you run your finger through it. This ensures a perfect, non-runny filling.
Is almond extract necessary?
While it adds depth, you can skip it or substitute with vanilla extract if almond isn’t your preference.

Bite-Size Cherry Pie Bombs Recipe
- Total Time: 1 hour 3 minutes – 1 hour 7 minutes
- Yield: 6 1x
Description
Whip up Cherry Pie Bombs when your sweet tooth craves something special and your kitchen needs a burst of fruity fun. These little treats pack a punch of cherry goodness that’ll make your dessert game seriously delightful.
Ingredients
Main Ingredients:
- 2 cups all-purpose flour
- 2 cups fresh cherries
- ½ cup cold butter
- 1 egg
Supporting Ingredients:
- ¼ cup sugar
- 2 tablespoons cornstarch
- ½ teaspoon salt
- 1 tablespoon lemon juice
- ¼ teaspoon almond extract
Finishing Ingredients:
- ¼ cup cold water
- 2 tablespoons milk
- ¼ cup powdered sugar
Instructions
- Blend flour and salt thoroughly in a mixing bowl, ensuring no salt clumps remain.
- Dice ½ cup cold butter into tiny cubes and integrate into flour using a pastry cutter until mixture resembles rough breadcrumbs.
- Pour ¼ cup cold water gradually into dough, kneading until a compact dough ball forms.
- Wrap dough in plastic and refrigerate for 30 minutes to firm up.
- Remove stems and pit 2 cups fresh cherries, then chop into small pieces.
- Combine chopped cherries with ¼ cup sugar, 2 tbsp cornstarch, 1 tbsp lemon juice, and ¼ tsp almond extract in a saucepan.
- Cook cherry mixture over medium heat for 5-7 minutes, stirring constantly until thickened and glossy.
- Transfer cherry filling to a separate bowl and allow to cool completely at room temperature.
- Preheat oven to 375°F and line a baking sheet with parchment paper.
- Roll chilled dough to ⅛-inch thickness on a flour-dusted surface.
- Cut dough into 3-inch diameter circles using a round cookie cutter.
- Place 1 teaspoon cooled cherry filling in the center of each dough circle.
- Carefully fold dough edges over filling, pinching to create sealed spherical shapes.
- Whisk 1 egg and 2 tbsp milk together to create an egg wash.
- Brush each dough ball’s surface evenly with egg wash.
- Bake at 375°F for 18-22 minutes until surfaces turn golden brown.
- Remove from oven and let rest for 10 minutes.
- Dust with ¼ cup powdered sugar using a fine sifter before serving.
Notes
- Use cold butter and work quickly to keep the pastry dough flaky and tender.
- Choose ripe, sweet cherries for the most intense flavor in your filling.
- Seal the edges of the dough balls completely to prevent filling from leaking during baking.
- Sprinkle a little extra sugar on top before baking to create a sparkling, crisp exterior.
- Prep Time: 45 minutes
- Cook Time: 18-22 minutes
- Category: Pies
- Method: Baking
- Cuisine: American
Nutrition
- Serving Size: 6
- Calories: 243 kcal
- Sugar: 14 g
- Sodium: 95 mg
- Fat: 11 g
- Saturated Fat: 6 g
- Unsaturated Fat: 5 g
- Trans Fat: 0.2 g
- Carbohydrates: 33 g
- Fiber: 2 g
- Protein: 3 g
- Cholesterol: 40 mg
Madison Wyman
Recipe Developer & Food Storyteller
Expertise
Recipe Research and Adaptation, Food Writing and Cultural Storytelling, Sustainable and Ethical Sourcing, Dietary Adaptations (e.g., gluten-free, plant-based)
Education
Oregon Health & Science University
Portland Community College
Madison’s passion for flavor and culture ignited amidst the rich Southern cooking traditions of her upbringing, where cherished family recipes told delicious tales.
Armed with a Master’s in Food Systems and Society from Oregon Health & Science University and a Culinary Arts Certificate from Portland Community College, Madison truly excels at transforming rich, intricate flavors into dishes that are both approachable and heartfelt.
For her, cooking is a vibrant blend of science, art, and heritage – a powerful way to connect us to our roots and each other. Her recipes invite you to delve deeper, uncovering the fascinating stories woven into every ingredient.