Classic Boston Cream Poke Cake Recipe for Dessert Lovers
Boston cream poke cake unlocks all the joy of the classic dessert in a format that feeds a crowd with minimal fuss.
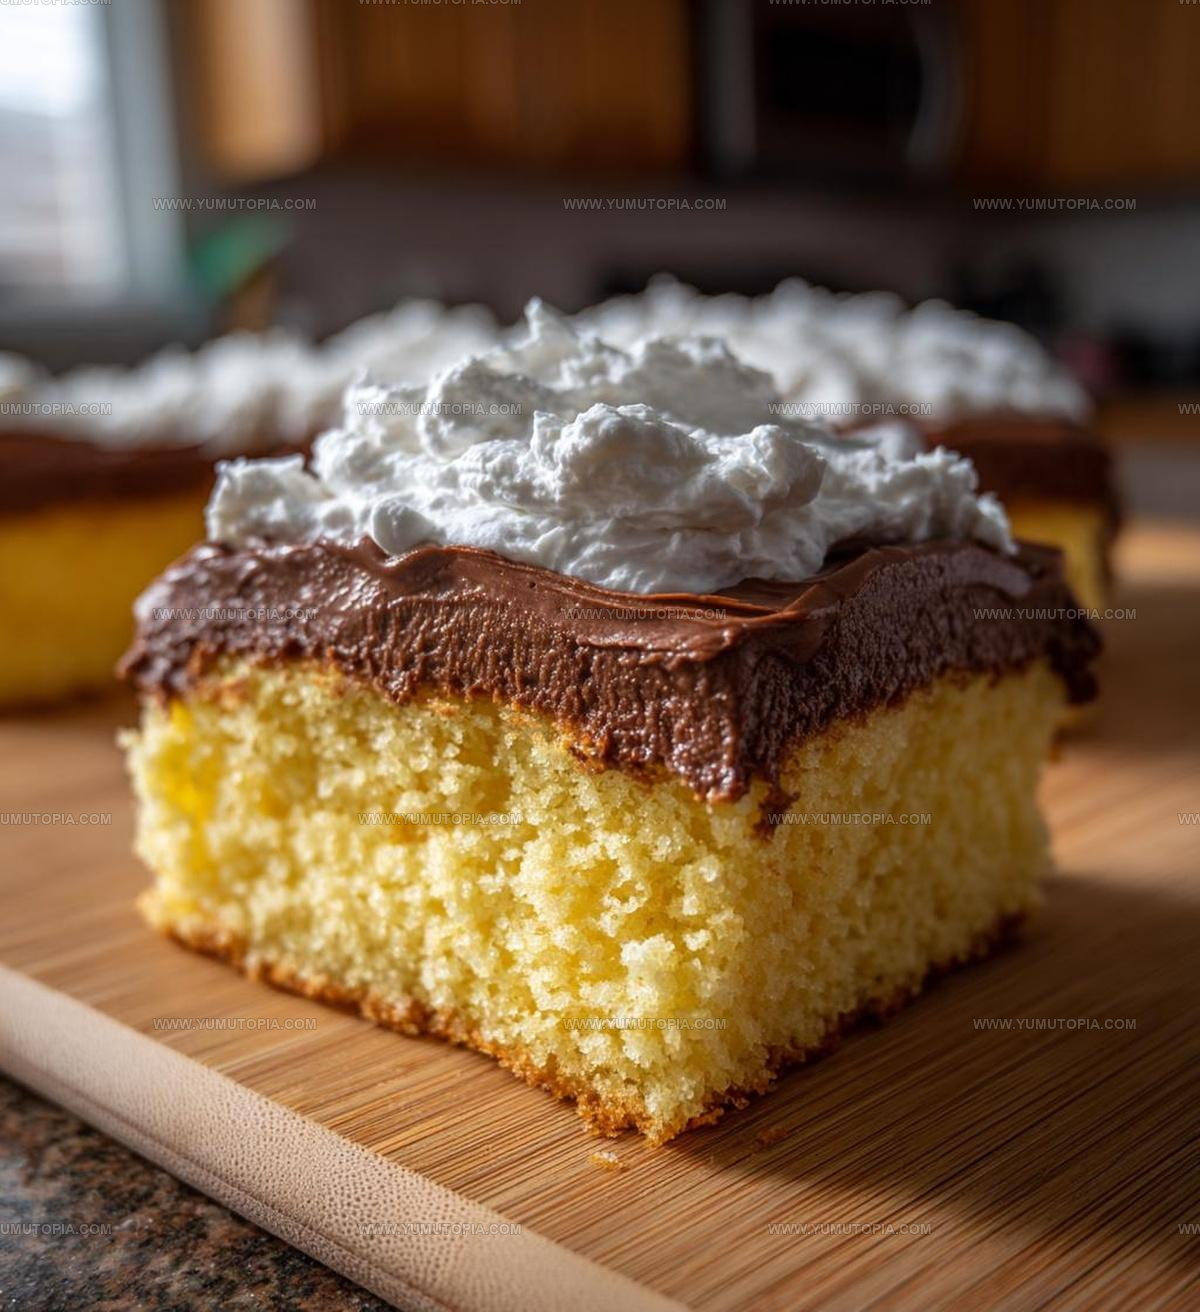
Light yellow cake becomes wonderfully moist when poked and filled with smooth vanilla pudding that seeps into every tender crumb.
A glossy chocolate topping completes the experience, adding richness that balances beautifully with the sweet custard below.
Potlucks, birthday celebrations, and casual weekend gatherings all benefit from having something so satisfying and visually appealing on the dessert table.
The contrast between soft cake, creamy filling, and silky chocolate creates an irresistible combination that disappears quickly wherever it lands.
Preparation requires less precision than traditional layered versions while delivering equally delightful results that look impressive without demanding hours in the kitchen.
When you need something special that won’t stress you out, turning to a dessert with familiar flavors presented in an accessible way makes perfect sense.
Check out the full recipe below and see how simple it can be to serve something truly memorable.
Why Boston Cream Poke Cake Always Impresses
Boston Cream Poke Cake Complete Ingredient List
Cake Base:Cake Filling:Topping Ingredients:Complete Baking Tools for Boston Cream Poke Cake
How to Prepare Boston Cream Poke Cake
Prepare Oven and Cake Pan
Preheat the oven to 350F. Grab a 9×13 inch baking pan and lightly spray it with cooking spray so your cake won’t stick. This sets you up for baking success right from the start.
Mix Cake Batter
Grab your yellow cake mix and combine it with:
Whisk everything together until the batter looks smooth and has no lumps. Pour the batter into the prepared pan, spreading it evenly.
Bake the Cake
Slide the pan into the preheated oven and bake for 25-30 minutes. Check doneness by inserting a toothpick in the center – it should come out clean when the cake is ready.
Create Cake Holes
After removing the cake from the oven, let it cool for 10 minutes. Take a fork and poke holes all across the cake’s surface. These little holes will help the filling soak right into the cake.
Add Creamy Filling
In a small bowl, mix together:
Pour this mixture slowly over the cake, making sure it seeps into all those lovely holes.
Prepare Whipped Cream Layer
Grab a mixing bowl and combine:
Whip these ingredients until they form stiff, fluffy peaks. Spread this creamy layer evenly across the cake.
Chocolate Topping
Warm the chocolate frosting slightly to make it easier to spread. Drizzle and spread the frosting over the whipped cream layer.
Chill and Serve
Refrigerate the cake for at least 30 minutes before serving. This helps all the flavors meld together and makes the cake easier to slice.
Which Tips Perfect Boston Cream Poke Cake
Which Are Classic Boston Cream Poke Cake Variations
Boston Cream Poke Cake Serving Styles
Storage Guidance for Boston Cream Poke Cake
Boston Cream Poke Cake Frequently Asked Questions
What if my cake mix is different from the recipe?
Follow the package instructions for your specific cake mix, keeping the pan size the same and adjusting baking time if needed.
Can I use a different milk for the soaking liquid?
Whole milk works best, but 2% or half-and-half will also create a delicious result in your cake.
How deep should the holes be when poking the cake?
Poke holes about halfway through the cake’s thickness using a fork, spacing them evenly across the surface.
What if I don’t have powdered sugar for the whipped cream?
Regular granulated sugar can work, but powdered sugar helps stabilize the cream and create a smoother texture.
Can this cake be made ahead of time?
Absolutely! Prepare the cake a day in advance and store covered in the refrigerator for maximum flavor absorption.
Do I need any special equipment to make this cake?
A 9×13 inch baking pan, fork, mixing bowls, and electric mixer are the main tools you’ll need for this recipe.

Boston Cream Poke Cake Recipe
- Total Time: 55 minutes
- Yield: 8 1x
Description
Boston Cream Poke Cake brings creamy vanilla pudding magic straight to your family dinner table. Sweet layers of cake and custard create a crowd-pleasing treat your guests will absolutely adore.
Ingredients
Main Ingredients:
- 1 box yellow cake mix
- 3 eggs
- 1 cup water
Supporting Ingredients:
- 1 cup heavy cream
- 1 cup powdered sugar
- 1 teaspoon vanilla extract
- 1 cup chocolate frosting
- ½ cup milk
Instructions
- Fire up your oven to 350°F and prepare a 9×13 inch baking pan with cooking spray.
- Combine 1 box yellow cake mix with 3 eggs and 1 cup water, mixing until smooth and creamy.
- Pour the batter into the prepared pan and bake for 25-30 minutes until a toothpick comes out clean.
- Remove the cake from the oven and let it rest for 10 minutes on a cooling rack.
- Use a fork to poke deep, evenly spaced holes across the entire surface of the warm cake.
- Whisk ½ cup milk with 1 teaspoon vanilla extract in a small bowl.
- Slowly drizzle the milk mixture over the cake, ensuring it seeps into every hole.
- Refrigerate the cake for 15 minutes to help the liquid absorb.
- Whip 1 cup heavy cream with 1 cup powdered sugar until stiff, glossy peaks form.
- Spread the whipped cream evenly across the cake’s surface.
- Warm 1 cup chocolate frosting for 15 seconds in the microwave to make it pourable.
- Drizzle the melted frosting over the whipped cream layer in a decorative pattern.
- Chill the cake for at least 1 hour before serving to set the layers and enhance flavors.
Notes
- Check cake mix box for precise liquid and egg measurements to ensure a moist texture.
- Use the handle end of a wooden spoon to make uniform holes across the entire cake surface for even milk absorption.
- Make chocolate ganache from scratch if store-bought frosting seems too sweet, which helps control sugar levels.
- Let the cake chill for at least two hours so flavors can meld and cream can set properly before serving.
- Prep Time: 15 minutes
- Cook Time: 30 minutes
- Category: Cakes
- Method: Baking
- Cuisine: American
Nutrition
- Serving Size: 8
- Calories: 455
- Sugar: 38 g
- Sodium: 220 mg
- Fat: 25 g
- Saturated Fat: 15 g
- Unsaturated Fat: 8 g
- Trans Fat: 0.5 g
- Carbohydrates: 53 g
- Fiber: 1 g
- Protein: 5 g
- Cholesterol: 95 mg
Madison Wyman
Recipe Developer & Food Storyteller
Expertise
Recipe Research and Adaptation, Food Writing and Cultural Storytelling, Sustainable and Ethical Sourcing, Dietary Adaptations (e.g., gluten-free, plant-based)
Education
Oregon Health & Science University
Portland Community College
Madison’s passion for flavor and culture ignited amidst the rich Southern cooking traditions of her upbringing, where cherished family recipes told delicious tales.
Armed with a Master’s in Food Systems and Society from Oregon Health & Science University and a Culinary Arts Certificate from Portland Community College, Madison truly excels at transforming rich, intricate flavors into dishes that are both approachable and heartfelt.
For her, cooking is a vibrant blend of science, art, and heritage – a powerful way to connect us to our roots and each other. Her recipes invite you to delve deeper, uncovering the fascinating stories woven into every ingredient.