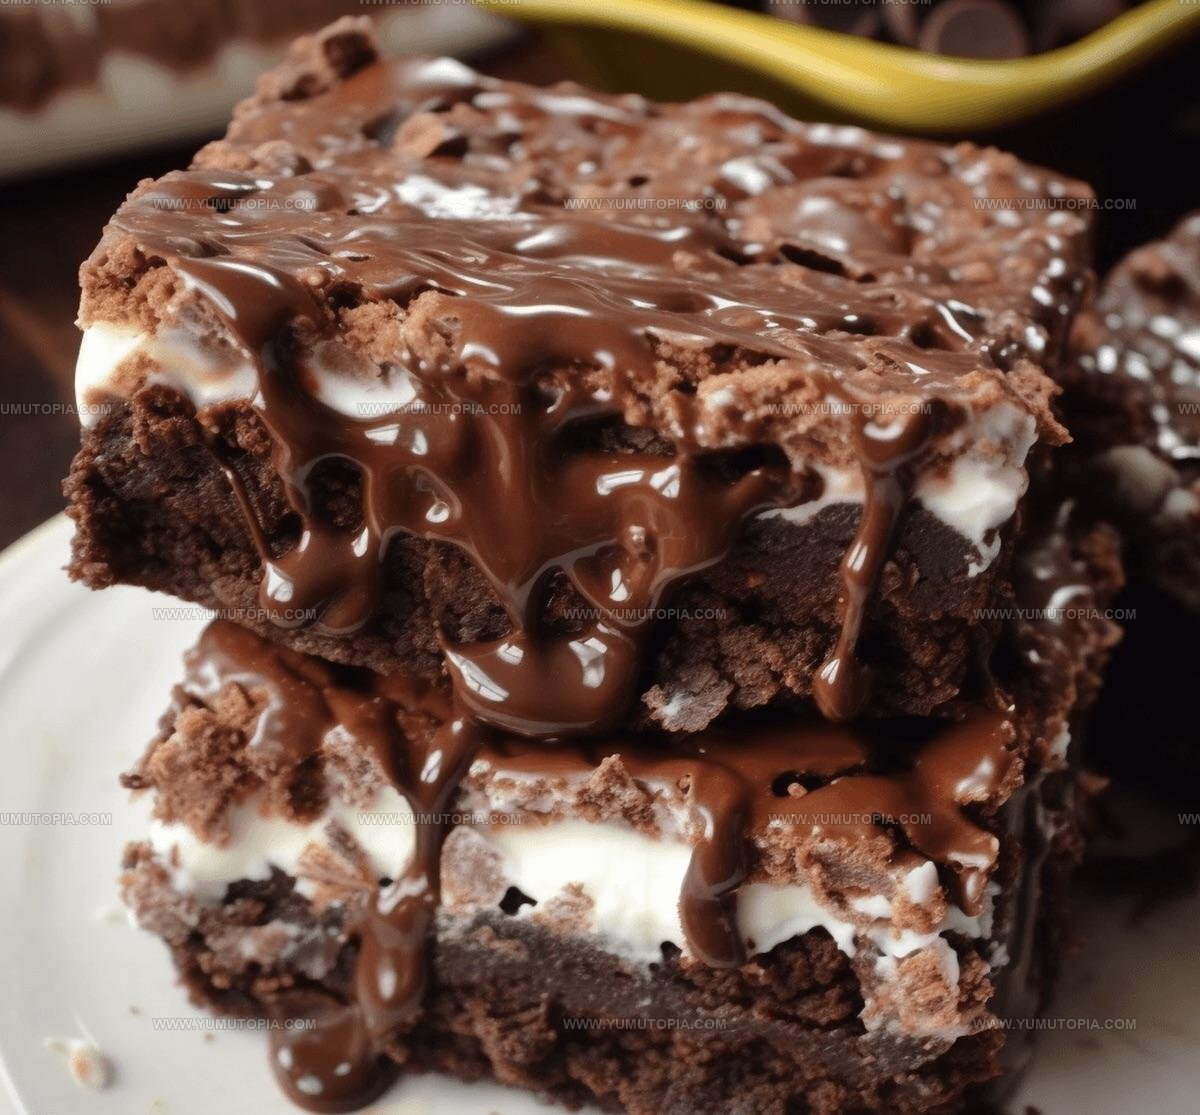
Brownie Bomb Bars Recipe For Chocolate Fans
Brownie bomb bars combine everything you love about fudgy brownies with an explosion of rich, decadent flavors in every bite.
You know that feeling when chocolate cravings hit and only something seriously indulgent will do?
That’s exactly what makes these bars so satisfying and fun to share at parties, potlucks, or casual weekend gatherings.
They’re surprisingly simple to pull together, making them perfect for both seasoned bakers and anyone just starting to experiment in the kitchen.
The bars slice beautifully into neat portions, so serving a crowd becomes effortless while still looking impressive on any dessert table.
Dense, gooey, and packed with chocolatey goodness, they satisfy sweet tooths of all ages without requiring fancy equipment or complicated techniques.
Each square delivers pure comfort in a handheld treat that disappears fast wherever they land.
Go grab your baking pan and treat yourself to something truly special today.
Why Brownie Bomb Bars Hits The Spot
What Goes Into Brownie Bomb Bars
Brownie Layer:Marshmallow Layer:Chocolate-Peanut Butter Crunch Layer:Everyday Kitchen Equipment for Brownie Bomb Bars
Steps for Making Brownie Bomb Bars
Prepare Brownie Base
Preheat the oven to 350°F. Grab a 9×13-inch pan and line it with foil, then give it a quick spray of cooking oil. Mix the brownie mix according to the box instructions, but remember to cut back on the oil by about a fifth. Pour the batter into the pan and bake for 25-28 minutes until a toothpick comes out mostly clean.
Cool Down
Let those brownies cool completely. Patience is key here – rushing means a messy dessert! Give them a good 30-45 minutes to reach room temperature.
Marshmallow Layer
Open that 7 oz. jar of marshmallow cream and spread it evenly across the cooled brownie base. Make sure you cover every inch for maximum gooey goodness.
Melt Chocolate-Peanut Butter
Grab a microwave-safe bowl and get ready to create magic. Combine:
Microwave in 30-second bursts, stirring between each interval until the mixture is completely smooth and glossy.
Add Crunch
Stir in 3 cups of Rice Krispies into the melted chocolate-peanut butter mixture. Mix until every single crispy piece is coated.
Layer and Smooth
Spread the crunchy chocolate-peanut butter mixture over the marshmallow layer. Use a spatula to create an even surface that looks absolutely perfect.
Chill Out
Pop the entire pan into the refrigerator for 2 hours. This helps everything set and makes cutting way easier.
Slice and Enjoy
Remove from the fridge and cut into bars. These are awesome straight from the fridge or after sitting at room temperature for a few minutes.
Serve with Flair
Want to take these bars to the next level? Serve alongside a scoop of vanilla ice cream. Each bite is a total flavor explosion that’ll have everyone asking for the recipe!
Key Cooking Notes For Brownie Bomb Bars
Popular Variations for Brownie Bomb Bars
Best Ways To Serve Brownie Bomb Bars
Keeping Brownie Bomb Bars Fresh
Brownie Bomb Bars Common Questions
Can I use homemade brownies instead of a mix?
Absolutely! Homemade brownies work perfectly. Just ensure they’re cooled completely before adding the next layers.
How do I know if the chocolate-peanut butter mixture is properly melted?
Stir after each microwave increment and stop when it’s smooth and glossy with no lumps. No burnt chocolate allowed!
What if my marshmallow cream doesn’t spread evenly?
Use a spatula or the back of a spoon to gently smooth the layer. Warm the spatula slightly for easier spreading.
Can these bars be frozen for later?
Definitely! Wrap tightly in plastic wrap, then place in a freezer-safe container. They’ll keep for up to 3 weeks.
Are Rice Krispies necessary for the recipe?
Rice Krispies create that signature crunch, but you could substitute with crushed graham crackers or nuts if needed.
How should I store these bars?
Keep them refrigerated in an airtight container. They’ll stay fresh for about 5-7 days – if they last that long!
Brownie Bomb Bars Recipe
- Total Time: 2 hours 40-45 minutes including chilling)
- Yield: 12 1x
Description
Brownie bomb bars bring pure chocolate bliss right to your kitchen counter, melding rich fudgy layers with creamy indulgence. Guaranteed to make dessert lovers swoon, these bars pack serious chocolate punch that disappears faster than you can slice them.
Ingredients
Main Ingredients:
- 1 box brownie mix
- 1 cup semi-sweet chocolate chips
- 1 cup peanut butter
Supporting Ingredients:
- 3 cups Rice Krispies
- 1 jar marshmallow cream
Binding/Preparation Ingredients:
- Eggs
- Oil
- Water
Instructions
- Preheat the oven to 350°F. Line a 9×13-inch pan with foil and spray lightly with cooking spray.
- Mix the brownie mix with 2 eggs, ⅓ cup oil, and water according to package instructions. Reduce oil by 20%.
- Pour the brownie batter into the prepared pan. Bake for 25-28 minutes until a toothpick comes out clean.
- Allow the brownies to cool completely at room temperature for 1 hour.
- Open the 7 oz jar of marshmallow cream. Spread it evenly across the cooled brownie surface using an offset spatula.
- Combine 1 cup semi-sweet chocolate chips and 1 cup peanut butter in a microwave-safe bowl.
- Microwave the chocolate and peanut butter mixture for 30-second intervals, stirring between each, until completely smooth.
- Add 3 cups Rice Krispies to the melted chocolate-peanut butter mixture. Stir until cereal is fully coated.
- Carefully spread the chocolate-peanut butter crunch layer over the marshmallow layer, creating an even surface.
- Refrigerate the dessert for 2-3 hours until the top layer is completely set and firm.
- Remove from refrigerator and cut into 16-20 rectangular bars using a sharp knife.
- Serve chilled or let sit at room temperature for 10 minutes before enjoying.
Notes
- Reduce oil in brownies for a slightly healthier twist that keeps the rich, fudgy texture intact.
- Use a sharp knife dipped in hot water to slice clean, precise bars without dragging the layers.
- For gluten-free version, swap regular brownie mix with gluten-free mix and use gluten-free Rice Krispies.
- Let bars sit at room temperature for 10 minutes before serving to soften the chocolate layer slightly and enhance flavor blending.
- Prep Time: 15 minutes
- Cook Time: 25-30 minutes (baking brownies)
- Category: Dessert Bars
- Method: Baking
- Cuisine: American
Nutrition
- Serving Size: 12
- Calories: 320
- Sugar: 22 g
- Sodium: 140 mg
- Fat: 18 g
- Saturated Fat: 6 g
- Unsaturated Fat: 9 g
- Trans Fat: 0.1 g
- Carbohydrates: 35 g
- Fiber: 2 g
- Protein: 6 g
- Cholesterol: 25 mg
Logan Lemaster
Founder & Culinary Innovator
Expertise
Recipe Development and Innovation, Menu Design and Optimization, Fine Dining Techniques, Ingredient Pairing and Flavor Science
Education
Metropolitan Culinary Arts Institute
Logan’s culinary journey kicked off in his vibrant Chicago family kitchen, where fresh, seasonal ingredients and bold flavors were always front and center.
After graduating from the Metropolitan Culinary Arts Institute in Arlington, Virginia, and honing his skills in renowned restaurants, Logan mastered the art of blending classic techniques with exciting, modern twists.
His kitchen is a dynamic lab for flavor exploration. Through Yum Utopia, Logan aims to empower you to cook with both confidence and creativity, turning simple ingredients into spectacular meals.