
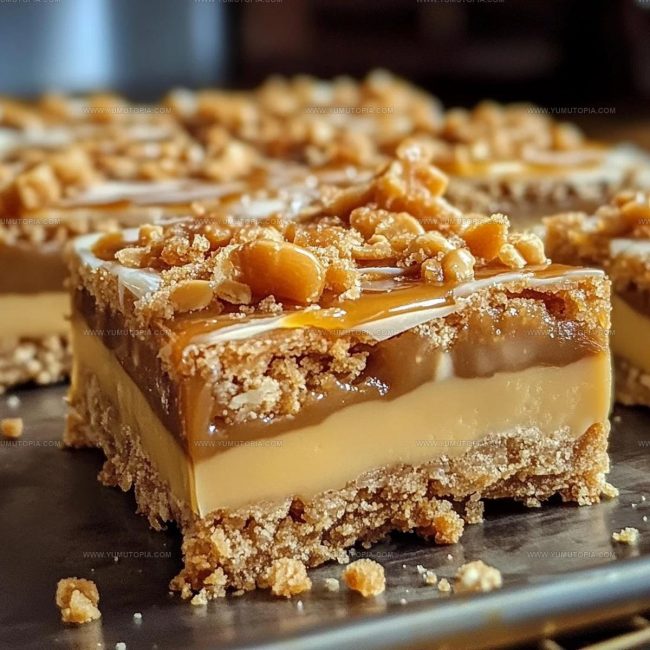
Chewy Butterscotch Bars Recipe for Sweet Tooth Cravings
Butterscotch bars emerge as a delightful sweet treat that captures pure comfort and nostalgia.
Rich caramel undertones create an instant connection with dessert lovers seeking something extraordinary.
Sweet memories of childhood bakeries rush back with every single bite of these decadent bars.
Smooth butterscotch flavor promises a remarkable experience that feels simultaneously familiar and special.
Homemade desserts represent more than just sugar and flour – they symbolize warmth and connection.
Baking enthusiasts and casual snack lovers alike will adore the simplicity and depth of this classic recipe.
Your kitchen will soon smell like pure happiness when preparing these scrumptious bars that everyone will absolutely crave.
Reasons Butterscotch Bars Deserve a Spot on Your Table
Everything Needed for Butterscotch Bars
Butter Base:Binding Ingredients:Dry Ingredients:Flavor Booster:Handy Kitchen Tools for Butterscotch Bars
Directions for Making Butterscotch Bars
Prepare the Oven
Crank up your oven to 350°F and grab a 9×13-inch baking pan. Grease that pan thoroughly so nothing sticks later.
Cream the Sugars and Butter
Grab a large mixing bowl and toss in 1 cup unsalted butter, 1 cup light brown sugar, and 1 cup granulated sugar. Whip these together until the mixture looks fluffy and light, almost like a cloud.
Add the Eggs
Drop in 2 large eggs, one at a time. After each egg, mix well. Then splash in 2 teaspoons vanilla extract and blend until everything looks smooth.
Prepare Dry Ingredients
In another bowl, combine your dry ingredients:
Whisk these together until they’re perfectly blended.
Combine Wet and Dry Mixtures
Slowly add your dry ingredient mixture into the butter mixture. Stir gently until everything just comes together. No need to overmix.
Add Butterscotch Chips
Fold in 1 cup butterscotch chips. Stir them through the batter carefully so they’re evenly distributed.
Bake the Bars
Spread the batter into your prepared pan, making sure it’s even. Slide the pan into the 350°F oven and bake for 20-25 minutes. You’ll know they’re done when the top turns golden and a toothpick comes out with just a few moist crumbs.
Cool and Serve
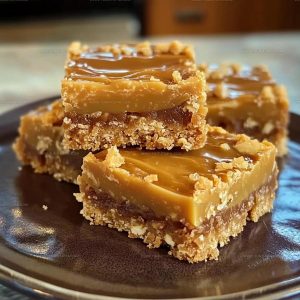
Let the bars cool completely in the pan. Once cool, slice into squares and serve. These are perfect with a cold glass of milk!
What Should Be Kept In Mind While Making Butterscotch Bars
Easy Variations For Butterscotch Bars
Classic Serving Ideas For Butterscotch Bars
Proper Storage Method For Butterscotch Bars
Answers to Popular Butterscotch Bars Questions
Can I use dark brown sugar instead of light brown sugar?
Dark brown sugar will work fine, but it has a stronger molasses flavor that might slightly change the taste of your butterscotch bars.
Are butterscotch chips necessary for this recipe?
Absolutely essential – they provide the signature butterscotch flavor. Without them, you’ll lose the distinctive taste of these bars.
How do I know when the bars are perfectly baked?
Check for golden brown edges and a toothpick with a few moist crumbs. This ensures your bars stay soft and chewy instead of dry and crumbly.
Can I freeze these butterscotch bars?
Definitely! Wrap them tightly in plastic wrap and store in a freezer-safe container for up to 3 months. Thaw at room temperature before serving.
What if I don’t have a 9×13-inch pan?
A similar sized pan works, but adjust baking time accordingly. A smaller pan means thicker bars and potentially longer baking time.
Butterscotch Bars Recipe
- Total Time: 35-40 minutes
- Yield: 12 1x
Description
Butterscotch bars bring sweet comfort straight from childhood memories to your kitchen counter. Warm brown sugar and rich butter create a nostalgic treat that melts perfectly with your afternoon coffee or evening dessert.
Ingredients
Primary Ingredients:
- 1 cup unsalted butter
- 1 cup light brown sugar
- 1 cup granulated sugar
- 2 large eggs
- 2 cups all-purpose flour
- 1 cup butterscotch chips
Supporting Ingredients:
- 2 teaspoons vanilla extract
- 1 teaspoon baking soda
- ½ teaspoon salt
Instructions
- Set your oven to 350°F and coat a 9×13-inch baking pan with butter or cooking spray.
- Combine 1 cup unsalted butter, 1 cup light brown sugar, and 1 cup granulated sugar in a large mixing bowl. Cream them together until the mixture becomes pale and airy.
- Add 2 large eggs into the butter mixture one at a time, thoroughly blending after each addition. Pour in 2 teaspoons vanilla extract and mix well.
- In a separate bowl, sift 2 cups all-purpose flour, 1 teaspoon baking soda, and ½ teaspoon salt until fully integrated.
- Slowly incorporate the dry ingredients into your butter mixture, stirring gently until just combined. Avoid overmixing your batter.
- Fold 1 cup butterscotch chips into the batter, distributing them evenly throughout.
- Transfer the batter into your prepared pan, spreading it smoothly and ensuring an even layer across the surface.
- Bake at 350°F for 20-25 minutes, watching for golden edges and a center that has set but remains slightly soft.
- Remove from the oven and let the bars cool completely in the pan before slicing into square servings.
Notes
- Let the butter soften at room temperature before creaming to ensure a smooth, even mixture that blends perfectly.
- Avoid overmixing the batter after adding dry ingredients, as this can make your bars tough and dense instead of tender.
- For a gluten-free version, swap the all-purpose flour with a cup-for-cup gluten-free flour blend to keep the same delicious texture.
- Line your baking pan with parchment paper for easy removal and clean cutting of the bars, which helps them look neat and professional.
- Prep Time: 15 minutes
- Cook Time: 20-25 minutes
- Category: Dessert Bars
- Method: Baking
- Cuisine: American
Nutrition
- Serving Size: 12
- Calories: 305 kcal
- Sugar: 28 g
- Sodium: 110 mg
- Fat: 16 g
- Saturated Fat: 10 g
- Unsaturated Fat: 6 g
- Trans Fat: 0.5 g
- Carbohydrates: 39 g
- Fiber: 1 g
- Protein: 3 g
- Cholesterol: 40 mg
Madison Wyman
Recipe Developer & Food Storyteller
Expertise
Recipe Research and Adaptation, Food Writing and Cultural Storytelling, Sustainable and Ethical Sourcing, Dietary Adaptations (e.g., gluten-free, plant-based)
Education
Oregon Health & Science University
Portland Community College
Madison’s passion for flavor and culture ignited amidst the rich Southern cooking traditions of her upbringing, where cherished family recipes told delicious tales.
Armed with a Master’s in Food Systems and Society from Oregon Health & Science University and a Culinary Arts Certificate from Portland Community College, Madison truly excels at transforming rich, intricate flavors into dishes that are both approachable and heartfelt.
For her, cooking is a vibrant blend of science, art, and heritage – a powerful way to connect us to our roots and each other. Her recipes invite you to delve deeper, uncovering the fascinating stories woven into every ingredient.