
Crispy Cake Cones Recipe To Make Dessert Fun
A Cake Cones Recipe turns dessert time into something wonderfully fun and memorable for everyone who loves sweet treats.
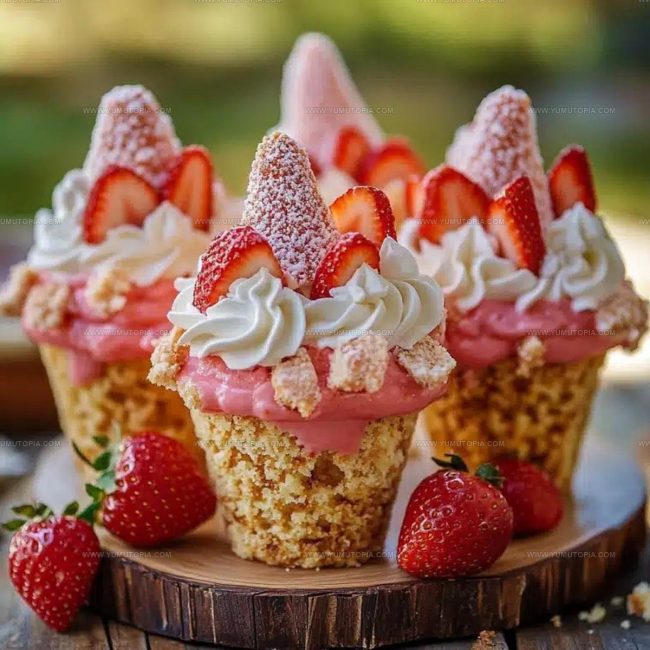
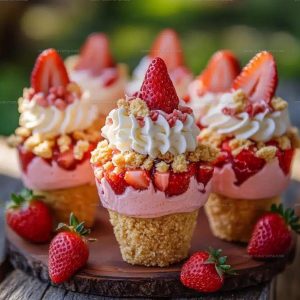
Picture handheld portions of fluffy cake baked right inside crispy ice cream cones – what could be more delightful?
This playful dessert combines two beloved favorites into one charming creation that works beautifully for birthdays, summer gatherings, or simply brightening an ordinary afternoon.
The presentation alone brings smiles before anyone takes a single bite.
You can serve these at parties where guests of all ages will reach for seconds without hesitation.
The portable format means no plates or forks are necessary, which makes cleanup remarkably simple.
The Whimsical, High-Crunch Joy of Every Festive Cake Cone
Crunchy Wafer Bases and Sweet Decorative Dessert Essentials

Tools And Prep Steps For This Cake Cone Recipe
Ways to Pipe and Fill Festive Dessert Cake Cones
Prepare the Oven
Crank your oven to 350°F (175°C). Grab a muffin tin or cone holder and set those 12 flat-bottomed ice cream cones inside so they stand upright and steady.
Create the Cake Batter
Grab a mixing bowl and cream together 1/2 cup (113g) softened unsalted butter with 1 cup (200g) granulated sugar until the mixture looks light and fluffy. Crack in 2 large room-temperature eggs one at a time, mixing after each addition. Stir in 1 1/2 teaspoons pure vanilla extract. In a separate bowl, whisk together your dry ingredients: 1 1/2 cups (190g) all-purpose flour, 1 1/2 teaspoons baking powder, and 1/4 teaspoon salt. Slowly mix the dry ingredients into your butter mixture, alternating with 1/2 cup (120ml) whole milk. Keep stirring until everything blends smoothly.
Fill the Cones
Take your prepared cones and carefully fill each one about two-thirds full with the cake batter. This prevents messy overflow during baking and ensures a perfect cake cone every time.
Bake the Cake Cones
Slide the muffin tin into the preheated oven and bake for 18-22 minutes. Check for doneness by inserting a toothpick into the center of a cake cone – it should come out clean with no wet batter.
Cool and Decorate
Let your cake cones cool completely on a wire rack. Once they’re at room temperature, feel free to frost with buttercream, sprinkle with colorful toppings, or drizzle with melted chocolate for extra flair.
Mold Handling Tricks for a Festive Homemade Cake Cone
Festive Alternatives For This Best Cake Cone Recipe
Fun Festive Dessert Presentations For Cake Cones
Dessert Crispness Maintenance Guides For Cake Cones
Best Cake Cone Q&A for Fun and Festive Desserts
Can I use different types of cones?
Cake cones work best because they’re sturdy and have a flat bottom. Waffle or sugar cones might get too soggy or collapse during baking.
How do I prevent the cones from tipping over?
Secure each cone in a muffin tin or use a specialized cone holder to keep them upright and stable during baking.
What if my batter overflows?
Fill cones only two-thirds full to prevent messy overflow and ensure even baking. Too much batter causes uneven rising and potential mess.
Can I make these cakes ahead of time?
Absolutely! Bake the cone cakes a day in advance and store them in an airtight container at room temperature before decorating.
Do I need special equipment to make these?
A standard muffin tin, mixing bowls, and basic baking tools are all you need. No fancy equipment required.
Cake Cones Recipe
- Total Time: 33-37 minutes
- Yield: 12 1x
Description
Cake Cone blends childhood memories with simple baking joy, bringing classic sweetness right to your kitchen counter. Family gatherings sparkle when this crisp, delightful treat arrives fresh from your oven, ready to make taste buds dance with delight.
Ingredients
Primary Ingredients:
- 1 cup (200g) granulated sugar
- 2 large eggs
- 1 ½ cups (190g) all-purpose flour
- ½ cup (113g) unsalted butter
Liquid Ingredients:
- ½ cup (120ml) whole milk
- 1 ½ teaspoons pure vanilla extract
Binding and Seasoning Ingredients:
- 1 ½ teaspoons baking powder
- ¼ teaspoon salt
- 12 flat-bottomed ice cream cones
Optional Decorations:
- Buttercream or whipped frosting
- Sprinkles
- Mini chocolate chips
- Crushed candies
- Melted chocolate
Instructions
- Crank your oven to precisely 350°F (175°C). Carefully arrange 12 flat-bottomed ice cream cones inside a standard muffin tin, ensuring they stand upright and stable.
- Grab your electric mixer and cream ½ cup (113g) softened unsalted butter with 1 cup (200g) granulated sugar until the mixture transforms into a pale, fluffy cloud. Drop in 2 room-temperature eggs, one at a time, blending thoroughly after each addition.
- In a separate mixing bowl, sift together 1 ½ cups (190g) all-purpose flour, 1 ½ teaspoons baking powder, and ¼ teaspoon salt. These dry ingredients need gentle whisking to combine evenly.
- Pour 1 ½ teaspoons vanilla extract into your butter mixture. Gradually alternate adding your flour mixture and ½ cup (120ml) whole milk, mixing on low speed until just incorporated. Your batter should look smooth and silky.
- Using a small ladle or measuring cup, carefully distribute batter into each cone. Fill each cone approximately two-thirds full, which prevents messy overflow during baking.
- Transfer the muffin tin to the preheated oven. Bake for exactly 18-22 minutes, rotating the tin halfway through. Your test for doneness: insert a toothpick into the center of a cake cone – it should emerge completely clean.
- Remove from oven and let cakes rest in the tin for 5 minutes. Gently transfer cones to a wire rack, allowing them to cool completely for about 30-45 minutes before adding any frosting or decorations.
Notes
- Always use sturdy cake cones that can stand up in a muffin tin without tipping, which prevents batter from spilling.
- When filling the cones, leave enough space for the batter to rise during baking, typically about two-thirds full to prevent overflow.
- For gluten-free bakers, swap regular flour with a cup-for-cup gluten-free blend to make the recipe accessible to more people.
- Experiment with different frosting flavors or decorative toppings to personalize these fun dessert cones for parties or special occasions.
- Prep Time: 15 minutes
- Cook Time: 18-22 minutes
- Category: Cakes
- Method: Baking
- Cuisine: American
Nutrition
- Serving Size: 12
- Calories: 182 kcal
- Sugar: 13 g
- Sodium: 56 mg
- Fat: 9 g
- Saturated Fat: 5 g
- Unsaturated Fat: 4 g
- Trans Fat: 0.3 g
- Carbohydrates: 22 g
- Fiber: 1 g
- Protein: 3 g
- Cholesterol: 50 mg
Logan Lemaster
Founder & Culinary Innovator
Expertise
Recipe Development and Innovation, Menu Design and Optimization, Fine Dining Techniques, Ingredient Pairing and Flavor Science
Education
Metropolitan Culinary Arts Institute
Logan’s culinary journey kicked off in his vibrant Chicago family kitchen, where fresh, seasonal ingredients and bold flavors were always front and center.
After graduating from the Metropolitan Culinary Arts Institute in Arlington, Virginia, and honing his skills in renowned restaurants, Logan mastered the art of blending classic techniques with exciting, modern twists.
His kitchen is a dynamic lab for flavor exploration. Through Yum Utopia, Logan aims to empower you to cook with both confidence and creativity, turning simple ingredients into spectacular meals.