
Crispy Cannoli Cookie Cups Recipe for Dessert Lovers
Cannoli cookie cups offer everything you love about the classic Italian pastry in a fun, handheld form that’s easier to serve at parties and gatherings.
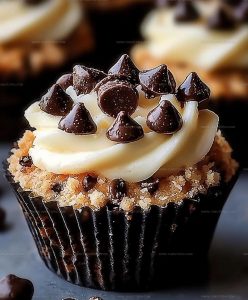
Crispy cookie shells cradle a sweet, creamy filling that delivers rich flavor in every bite.
The combination of textures makes each serving feel special without requiring advanced baking skills or hours in the kitchen.
Whether you need something impressive for a celebration or just want to treat yourself on a weekend afternoon, this dessert fits the occasion perfectly.
The portable size means no messy plates or forks are necessary, so you can enjoy them anywhere.
They look stunning on a dessert table and disappear quickly once guests spot them.
When you want something that feels both traditional and fresh, nothing compares to having a batch of these ready to share.
Why Cannoli Cookie Cups Recipe Is So Fun
Ingredient Overview for Cannoli Cookie Cups
Base Ingredients:Filling Ingredients:Garnish Ingredients:Tools That Mold Cannoli Cookie Cups
Baking Steps for Cannoli Cookie Cups

Mix Dry Ingredients
Grab a medium bowl and whisk together 2 1/4 cups flour, 1 teaspoon baking powder, 1/2 teaspoon baking soda, and 1/4 teaspoon salt until everything looks evenly combined.
Cream Butter and Sugar
Pull out your electric mixer and beat 1 cup softened butter with 3/4 cup granulated sugar and 3/4 cup brown sugar for about 4 minutes. Your mixture should look fluffy and light. Scrape down the bowl’s sides a couple times to make sure everything gets blended perfectly.
Add Eggs
Drop in 2 large eggs one at a time, mixing thoroughly after each. Then stir in 1 teaspoon vanilla extract until smooth.
Combine Dough
Slowly add your dry ingredient mix to the wet ingredients, mixing on low speed. Stop mixing as soon as everything looks combined – don’t overmix the dough.
Chill Dough
Wrap the dough in plastic and park it in the refrigerator for 30 minutes.
Prepare Baking Space
Heat the oven to 350F. Spray a standard 12-cup muffin tin with non-stick cooking spray.
Shape Cookie Bases
Roll the chilled dough into 1-inch balls. Nestle each ball into a muffin cup.
Initial Baking
Bake for 12-15 minutes until the edges turn golden brown.
Create Cookie Cups
Right after pulling the pan from the oven, use a teaspoon to gently press down the center of each cookie, forming little cups.
Cool Cookie Bases
Let the cookie cups cool completely inside the muffin tin.
Prepare Ricotta Filling
In a large bowl, combine ricotta filling ingredients:
Blend with an electric mixer until super smooth.
Add Filling Extras
Gently fold into the ricotta mixture:
Chill Filling
Cover the filling and refrigerate for 30 minutes.
Fill Cookie Cups
Pipe or spoon the ricotta filling into each cookie cup, filling to the top.
Decorate and Serve
Dust with powdered sugar. Sprinkle with extra mini chocolate chips, chopped pistachios, and optional candied orange peel. Serve chilled or at room temperature.
Helpful Tips for Cannoli Cookie Cups
Creamy Cannoli Cookie Cup Variations
Perfect Serving Ideas for Cannoli Cookie Cups
Easy Storage Ideas for Cannoli Cookie Cups
Cannoli Cookie Cups Frequently Asked Questions
Can I use store-bought ricotta?
Fresh ricotta works best, but store-bought works fine. Drain it thoroughly to prevent watery filling.
What if I don’t have a piping bag?
Use a zip-top bag with a corner snipped off or simply spoon the filling into the cookie cups carefully.
How long can these sit out before serving?
Keep them chilled until serving. They’ll stay fresh for about 2-3 hours at room temperature.
Can I make the cookie cups ahead of time?
Absolutely! Bake the cups and make the filling a day before. Assemble just before serving to keep them crisp.
Are these suitable for people who don’t like traditional cannoli?
These cookie cups are lighter and more approachable. The flavors are similar but the texture is softer and easier to eat.
Can I skip the candied orange peel?
Yes! Skip it if you prefer. The filling will still taste delicious without it.
Cannoli Cookie Cups Recipe
- Total Time: 57-60 minutes
- Yield: 12 1x
Description
Cannoli Cookie Cups bring the classic Sicilian treat right to your kitchen, packed with creamy ricotta and a crispy cookie base that crumbles perfectly with each delightful bite. Grab your mixing bowl and prepare to wow friends and family with this simple yet impressive dessert that delivers authentic Italian flavor in one adorable, handheld package.
Ingredients
Base:
- 2 ¼ cups all-purpose flour
- 1 cup unsalted butter
- ¾ cup granulated sugar
- ¾ cup light brown sugar
- 2 large eggs
- 1 teaspoon baking powder
- ½ teaspoon baking soda
- ¼ teaspoon salt
- 1 teaspoon vanilla extract
Filling:
- 15 ounces whole milk ricotta cheese
- 1 cup powdered sugar
- 1 teaspoon vanilla extract
- ½ teaspoon ground cinnamon
Garnish:
- ¼ cup mini chocolate chips
- 2 tablespoons candied orange peel
- Powdered sugar
- Mini chocolate chips
- Chopped pistachios
Instructions
- Whisk flour, baking powder, baking soda, and ¼ teaspoon salt together in a medium bowl until thoroughly combined.
- Cream 1 cup (2 sticks) softened butter with ¾ cup granulated and brown sugars using an electric mixer at medium speed for 3-5 minutes until light and fluffy.
- Add 2 large eggs one at a time to the butter mixture, then mix in 1 teaspoon vanilla extract until fully incorporated.
- Gradually fold dry ingredients into wet ingredients at low speed, mixing just until combined without overmixing.
- Wrap dough in plastic and refrigerate for 30 minutes at 40°F to firm up.
- Preheat oven to 350°F and spray a standard 12-cup muffin tin with non-stick cooking spray.
- Roll chilled dough into 1-inch balls and place one ball into each muffin cup.
- Bake cookie cups for 12-15 minutes until edges turn golden brown.
- Remove tin from oven and immediately press the back of a teaspoon into each cookie’s center to create cup shapes.
- Allow cookie cups to cool completely inside the muffin tin.
- Drain 15 ounces ricotta cheese overnight in a cheesecloth-lined sieve to remove excess liquid.
- Beat drained ricotta with 1 cup powdered sugar, 1 teaspoon vanilla, and ½ teaspoon cinnamon until smooth.
- Gently fold ¼ cup mini chocolate chips and 2 tablespoons chopped candied orange peel into the ricotta mixture.
- Refrigerate filling for 30 minutes to set and chill.
- Pipe or spoon cannoli filling into each cooled cookie cup, filling to the top.
- Dust filled cookie cups with powdered sugar and sprinkle with additional mini chocolate chips, chopped pistachios, and candied orange peel.
- Serve immediately or store chilled until ready to enjoy.
Notes
- Drain ricotta thoroughly to prevent a watery filling, which can make your cookie cups soggy and less enjoyable.
- Chill the dough and filling before shaping and piping to help maintain the perfect texture and make handling easier.
- For a gluten-free version, swap the all-purpose flour with a cup-for-cup gluten-free baking blend that includes xanthan gum.
- If you prefer less sweetness, reduce the powdered sugar in the filling and add a touch of orange zest for brightness instead.
- Prep Time: 45 minutes
- Cook Time: 12-15 minutes
- Category: Cookies
- Method: Baking
- Cuisine: Italian
Nutrition
- Serving Size: 12
- Calories: 272 kcal
- Sugar: 20 g
- Sodium: 75 mg
- Fat: 15 g
- Saturated Fat: 8 g
- Unsaturated Fat: 6 g
- Trans Fat: 0.2 g
- Carbohydrates: 28 g
- Fiber: 1 g
- Protein: 5 g
- Cholesterol: 70 mg
Madison Wyman
Recipe Developer & Food Storyteller
Expertise
Recipe Research and Adaptation, Food Writing and Cultural Storytelling, Sustainable and Ethical Sourcing, Dietary Adaptations (e.g., gluten-free, plant-based)
Education
Oregon Health & Science University
Portland Community College
Madison’s passion for flavor and culture ignited amidst the rich Southern cooking traditions of her upbringing, where cherished family recipes told delicious tales.
Armed with a Master’s in Food Systems and Society from Oregon Health & Science University and a Culinary Arts Certificate from Portland Community College, Madison truly excels at transforming rich, intricate flavors into dishes that are both approachable and heartfelt.
For her, cooking is a vibrant blend of science, art, and heritage – a powerful way to connect us to our roots and each other. Her recipes invite you to delve deeper, uncovering the fascinating stories woven into every ingredient.