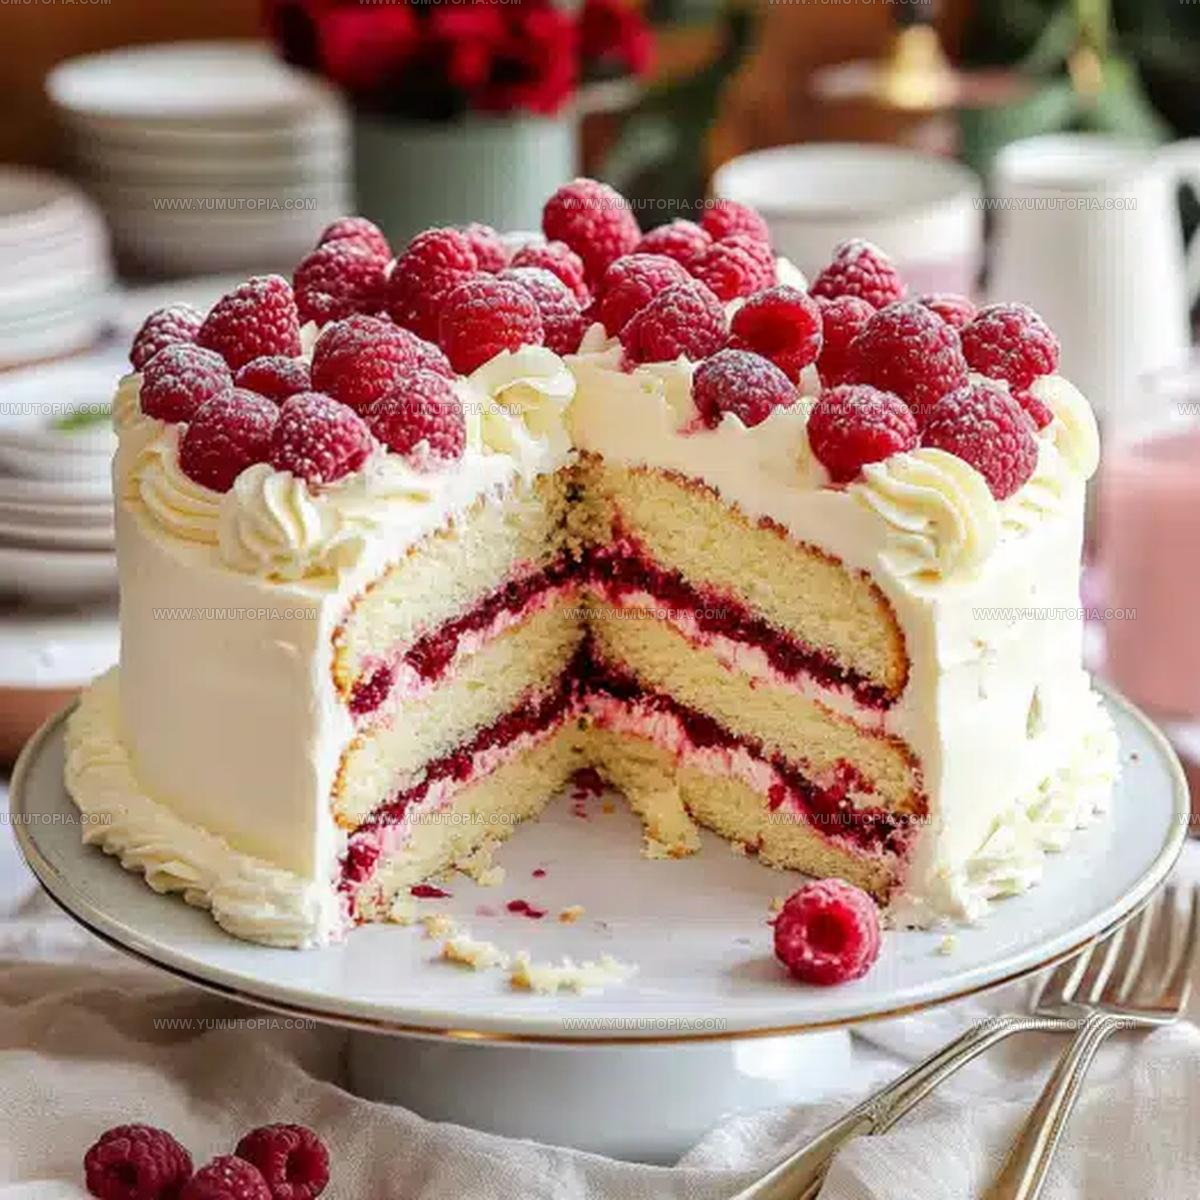
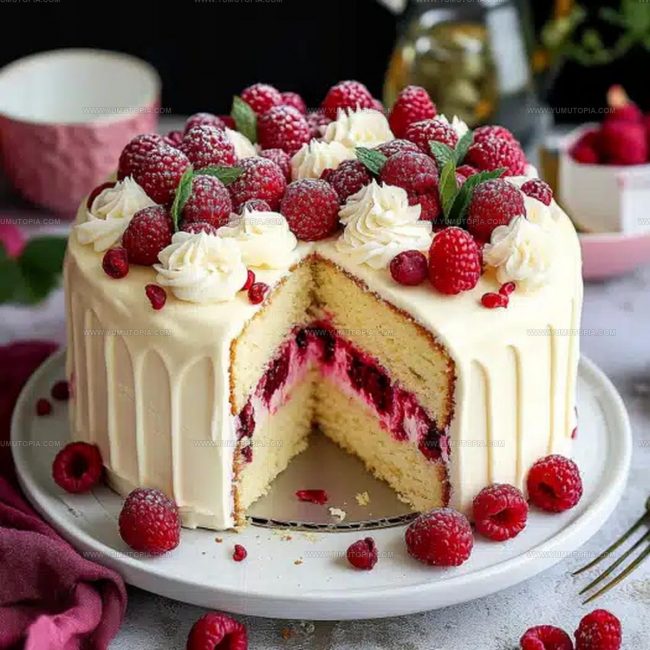
White Chocolate Raspberry Cake Recipe To Slice Pretty
A White Chocolate Raspberry Dream Cake Recipe adds the kind of showstopping dessert that makes any celebration feel extra special.
Layers of tender sweetness meet bright fruit flavors in a combination that feels both elegant and comforting at once.
Perfect for birthdays, dinner parties, or those moments when you want something truly memorable on the table, it strikes a beautiful balance between sophistication and approachability.
The contrast of creamy richness with fruity notes creates an experience that appeals to almost everyone who loves dessert.
Even bakers who feel a bit nervous about fancy cakes will find the process more manageable than expected.
Each slice looks absolutely stunning when plated, making it ideal for impressing guests without spending days in the kitchen.
Don’t wait for a fancy occasion – start baking and treat yourself to something wonderfully indulgent today.
The Stunning, Berry-Laced Sophistication of White Chocolate Dream Cake
White Chocolate and Berry Components in This Cake
Cake Dry Ingredients:Cake Wet Ingredients:Filling and Decoration Ingredients:Precision Cake Hardware And Aerating Tools For Raspberry Dream Cake
Steps to Achieving a Smooth White Chocolate Cake Batter
Prepare Baking Pans
Heat your oven to 350F (175C). Grab three 8-inch round cake pans and coat them thoroughly with butter or cooking spray. Line the bottom of each pan with parchment paper to make sure the cake layers release perfectly.
Mix Dry Ingredients
Grab a medium bowl and whisk together 212 cups (312g) all-purpose flour, 212 teaspoons baking powder, and 12 teaspoon salt until they’re evenly combined. Set this mixture aside for now.
Cream Butter and Sugar
In a large mixing bowl, beat 34 cup (170g) softened unsalted butter with 134 cups (350g) granulated sugar until the mixture looks light and fluffy. This takes about 3-4 minutes with an electric mixer.
Add Egg Whites
Crack 5 large egg whites into the butter mixture. Add them one at a time, beating well after each addition. Pour in 2 teaspoons vanilla extract and mix until smooth.
Combine Wet Ingredients
In a separate small bowl, blend 1 cup (240ml) whole milk with 23 cup (160ml) sour cream. Gradually add your dry ingredients to the butter mixture, alternating with the milk mixture. Mix just until everything comes together – don’t overwork the batter.
Bake Cake Layers
Divide the batter evenly between the three prepared pans. Bake at 350F (175C) for 25-28 minutes. Check doneness by inserting a toothpick – it should come out clean when the cakes are ready. Let the cakes rest in the pans for 10 minutes, then transfer to wire racks to cool completely.
Prepare White Chocolate Frosting
Beat 112 cups (340g) softened unsalted butter until creamy. Gradually add 4 cups (480g) powdered sugar, mixing until the frosting looks fluffy. Stir in 6 oz (170g) melted and cooled white chocolate and 1 teaspoon vanilla extract. Add 12 tablespoons (15-30ml) heavy cream as needed to reach your desired frosting consistency.
Assemble the Cake
Level your cake layers if needed. Place the first layer on your serving plate. Spread a generous layer of 1 cup (240ml) raspberry preserves, then add a layer of white chocolate frosting. Repeat with the second layer.
Final Frosting and Decoration
Top with the third cake layer. Frost the entire cake with the remaining white chocolate frosting. Decorate the top with fresh raspberries and white chocolate curls. Chill the cake for about 15 minutes before slicing to help the frosting set.
Cooling Essentials To Perfect White Chocolate Raspberry Dream Cake
Decadent Raspberry Redesigns For Dream Cakes
Heavenly Celebration Slicing Maneuvers For Dream Cake
Elegant Cake Maturation & Storage For Dream Cake
White Chocolate Raspberry Dream Cake Q&A for Perfect Baking
Can I use frozen raspberries instead of preserves?
Fresh or frozen raspberries work well. Thaw and drain them first, then mash slightly before spreading between cake layers to prevent excess moisture.
How do I make white chocolate curls?
Warm a white chocolate bar slightly, then use a vegetable peeler to scrape along the edge, creating delicate curls for decorating your cake.
What if my frosting is too thick?
Add cream one teaspoon at a time, mixing thoroughly. This helps you control the consistency and avoid making it too runny.
Can I make this cake ahead of time?
Absolutely. Bake the layers, cool completely, and wrap tightly. Refrigerate up to two days before assembling and frosting.
Is there a substitute for sour cream?
Greek yogurt works perfectly as a replacement. Use the same measurement and it will provide similar moisture and texture.
How do I prevent my cake layers from sticking?
Always grease the pan and line with parchment paper. Once cooled, run a knife around the edges before removing from the pan.

Celebration White Chocolate Raspberry Dream Cake Recipe
- Total Time: Approximately 45-50 minutes
- Yield: 12 1x
Description
Creamy white chocolate raspberry dream cake brings pure elegance to your dessert table with its delicate balance of sweet and tangy flavors. Rich layers of smooth white chocolate cake nestled with fresh raspberry filling create a delightful treat perfect for special celebrations.
Ingredients
Cake Ingredients:
- 2.5 cups (312g) all-purpose flour
- 2.5 teaspoons baking powder
- 0.5 teaspoon salt
- 5 large egg whites
- 1.75 cups (350g) granulated sugar
- 0.75 cup (170g) unsalted butter, softened
- 2 teaspoons vanilla extract
- 1 cup (240ml) whole milk
- 0.67 cup (160ml) sour cream
Support Ingredients:
- 1 cup (240ml) raspberry preserves or seedless raspberry jam
- 1 cup (125g) fresh raspberries (optional)
Frosting Ingredients:
- 1.5 cups (340g) unsalted butter, softened
- 4 cups (480g) powdered sugar
- 6 ounces (170g) white chocolate, melted and cooled
- 1 teaspoon vanilla extract
- 0.5 tablespoons (15-30ml) heavy cream, as needed
Garnish:
- Fresh raspberries
- White chocolate curls
Instructions
- Heat the oven to 350°F (175°C). Coat three 8-inch round cake pans with butter and line with parchment paper.
- Combine 2½ cups (312g) flour, 2½ teaspoons baking powder, and ½ teaspoon salt in a mixing bowl.
- Cream ¾ cup (170g) softened butter with 1¾ cups (350g) sugar until the mixture becomes pale and airy.
- Incorporate 5 egg whites one at a time, blending thoroughly after each addition. Stir in 2 teaspoons vanilla extract.
- Whisk 1 cup (240ml) whole milk with ⅔ cup (160ml) sour cream in a separate container.
- Gradually fold dry ingredients into butter mixture, alternating with milk mixture. Mix gently until just combined.
- Distribute batter evenly across prepared pans. Bake for 25-28 minutes until a toothpick inserted comes out clean.
- Remove cakes from oven and allow to rest 10 minutes in pans. Transfer to wire cooling racks.
- Beat 1½ cups (340g) softened butter until smooth and creamy.
- Gradually add 4 cups (480g) powdered sugar, mixing until fluffy and light.
- Incorporate 6 oz (170g) melted and cooled white chocolate and 1 teaspoon vanilla extract.
- Adjust frosting consistency with 1-2 tablespoons (15-30ml) heavy cream as needed.
- Trim cake layers to create flat surfaces for even stacking.
- Place first cake layer on serving plate. Spread ⅓ cup raspberry preserves and frosting evenly.
- Position second cake layer and repeat preserves and frosting application.
- Add final cake layer and cover entire cake with remaining frosting.
- Garnish with fresh raspberries and white chocolate curls.
- Refrigerate briefly before serving to set frosting.
Notes
- Let the cake layers cool completely before frosting to prevent melting and sliding.
- Whip butter and sugar until super pale and fluffy for the lightest, most tender cake texture.
- When adding liquid ingredients, mix gently to avoid tough, dense cake – just combine until smooth.
- Fresh raspberries make a gorgeous garnish, but frozen work perfectly for preserves if fresh aren’t available.
- Prep Time: Approximately 20 minutes
- Cook Time: 25-28 minutes
- Category: Cakes
- Method: Baking
- Cuisine: American
Nutrition
- Serving Size: 12
- Calories: 519 kcal
- Sugar: 55 g
- Sodium: 177 mg
- Fat: 29 g
- Saturated Fat: 18 g
- Unsaturated Fat: 10 g
- Trans Fat: 0.5 g
- Carbohydrates: 63 g
- Fiber: 1.5 g
- Protein: 4.8 g
- Cholesterol: 75 mg
Madison Wyman
Recipe Developer & Food Storyteller
Expertise
Recipe Research and Adaptation, Food Writing and Cultural Storytelling, Sustainable and Ethical Sourcing, Dietary Adaptations (e.g., gluten-free, plant-based)
Education
Oregon Health & Science University
Portland Community College
Madison’s passion for flavor and culture ignited amidst the rich Southern cooking traditions of her upbringing, where cherished family recipes told delicious tales.
Armed with a Master’s in Food Systems and Society from Oregon Health & Science University and a Culinary Arts Certificate from Portland Community College, Madison truly excels at transforming rich, intricate flavors into dishes that are both approachable and heartfelt.
For her, cooking is a vibrant blend of science, art, and heritage – a powerful way to connect us to our roots and each other. Her recipes invite you to delve deeper, uncovering the fascinating stories woven into every ingredient.