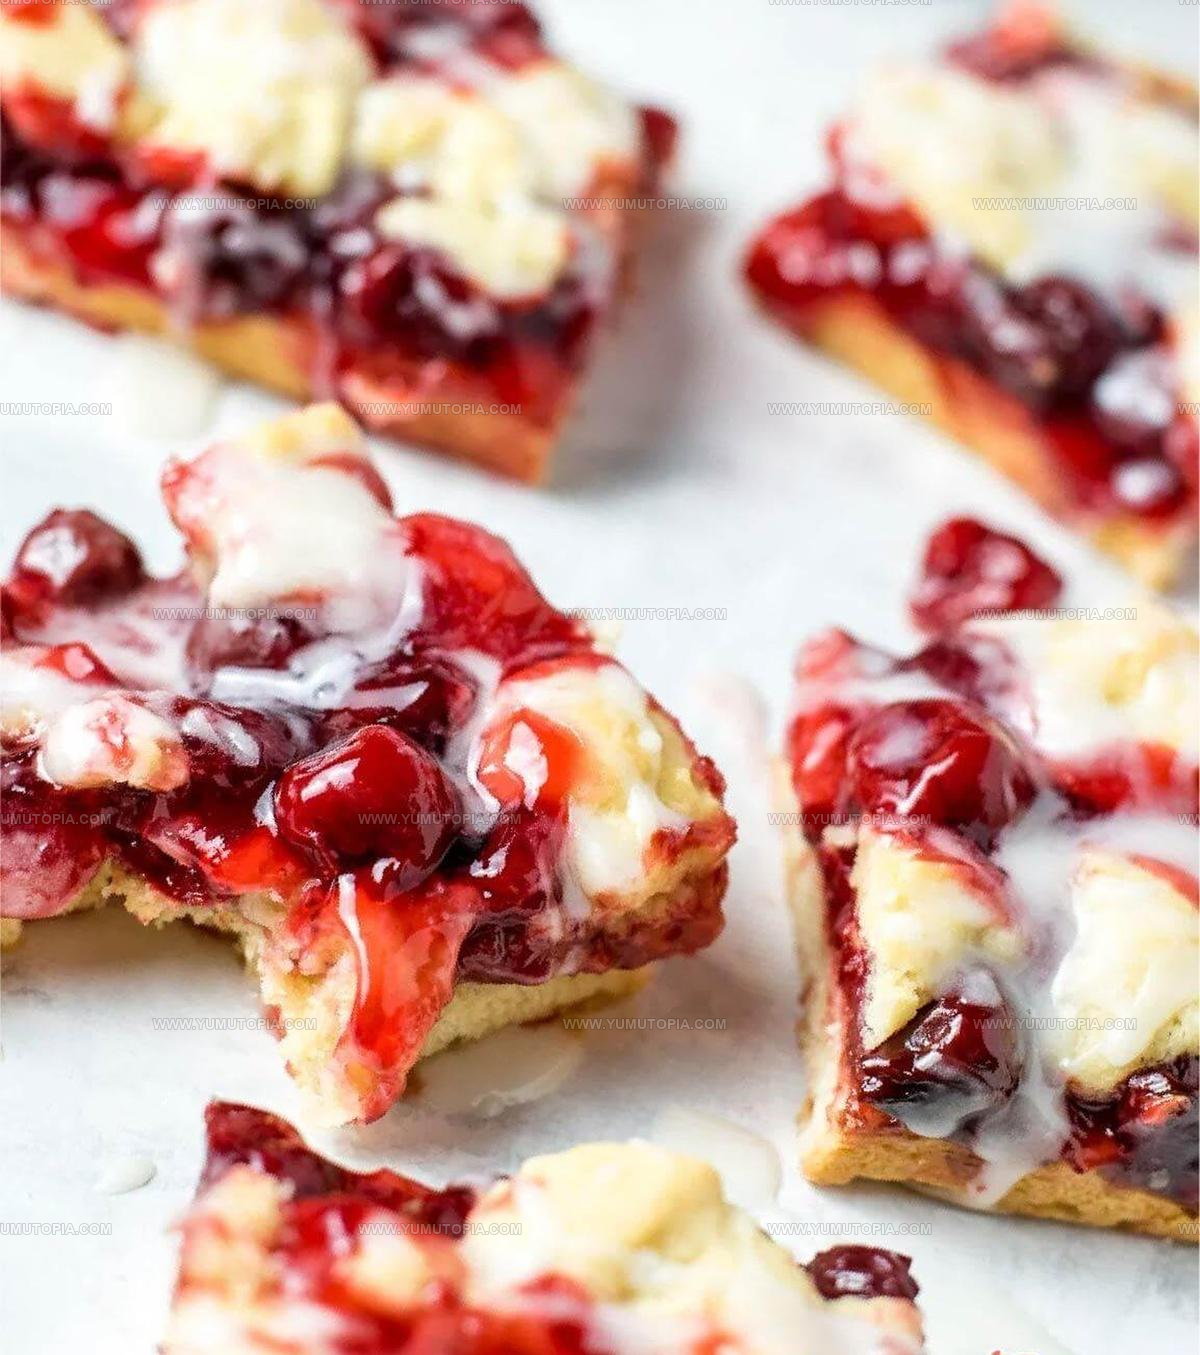
Cherry Bars Recipe That Delivers Bakery-Style Treats at Home
Cherry bars combine the comfort of homemade baking with fruit-filled sweetness in every bite.
They work beautifully for potlucks, bake sales, or casual weeknight desserts when something simple yet satisfying sounds just right.
The soft, tender crumb pairs perfectly with bright fruit flavor that never feels too heavy or overly complicated.
They’re easy to slice into neat squares, pack for lunches, or serve alongside coffee for an afternoon pick-me-up.
Kids enjoy the approachable sweetness while adults appreciate the balanced flavor that doesn’t overwhelm.
When you need a dessert that feels both classic and crowd-pleasing, few options deliver quite as much charm with so little fuss.
Why Cherry Bars Always Delivers
Ingredient List for Cherry Bars
Butter Base:Binding Ingredient:Flour Blend:Texture and Topping Elements:Simple Kitchen Equipment for Cherry Bars
Preparing Cherry Bars Step by Step
Prepare Butter and Sugar
Grab your electric mixer and cream 3/4 cup softened butter with 1 cup packed brown sugar until the mixture looks light and fluffy. Crack in 1 egg and splash 1 teaspoon vanilla, then mix everything together smoothly.
Mix Dry Ingredients
In a separate bowl, combine your dry ingredients carefully:
Gradually add these dry ingredients to your butter mixture, mixing on low speed. Switch to a wooden spoon to fold in 2 cups oat flakes when the batter gets thick.
Create Base Layer
Pull out your 13 x 9 inch baking pan and lightly butter the surface. Scoop out and press most of the oatmeal mixture into the pan, creating an even bottom layer.
Add Cherry Layer
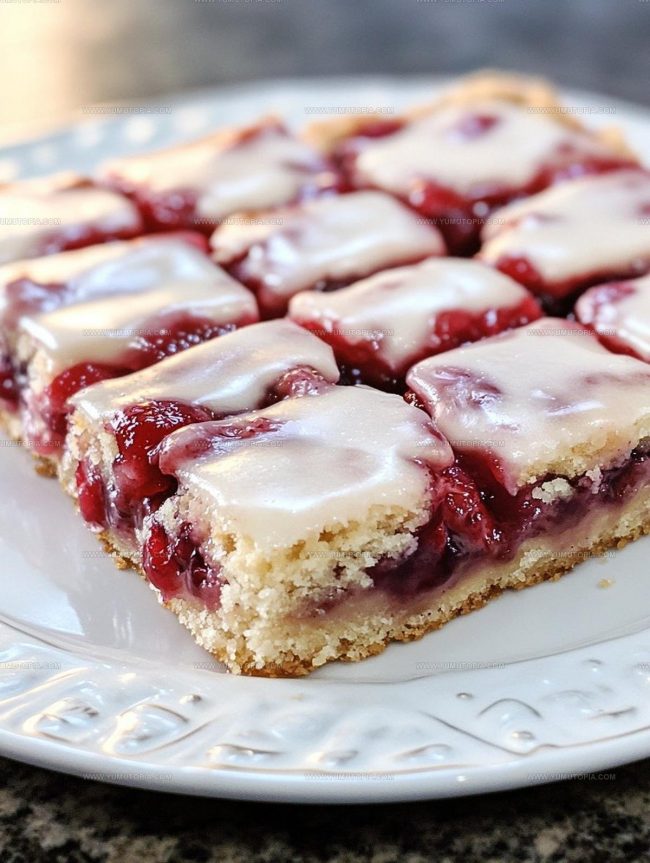
Spread 1 cup of cherry spread evenly across the oatmeal base. Take the remaining 1/2 cup of oatmeal mixture and sprinkle it over the cherry layer.
Bake and Cool
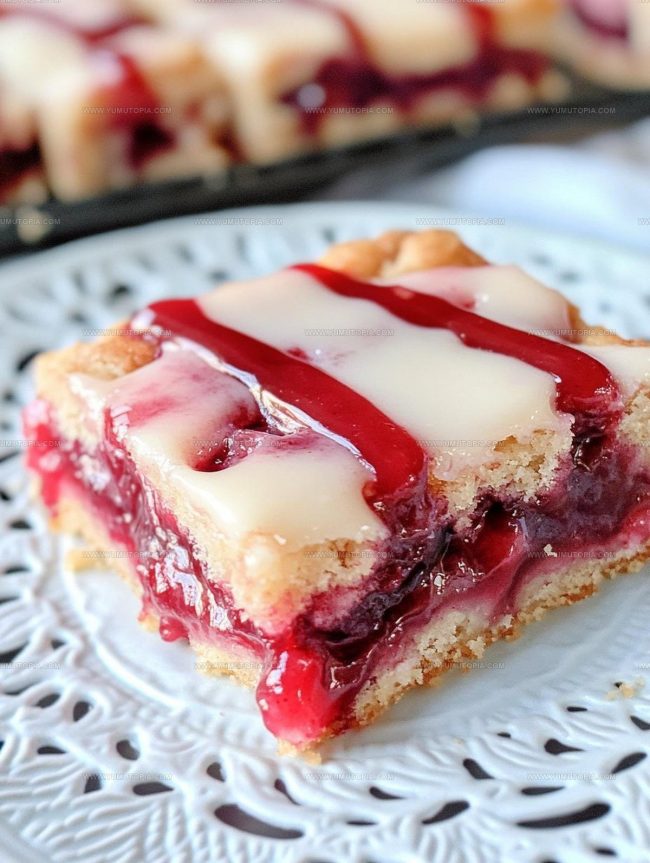
Slide the pan into a preheated 350°F oven and bake for exactly 35 minutes. The top should look golden brown when done. Remove and let the pan cool completely on a wire rack before slicing into bars.
Helpful Cooking Notes For Cherry Bars Recipe
Flavor Options for Cherry Bars
Serving Notes For Cherry Bars
Best Storage Practices For Cherry Bars
Cherry Bars Common Questions Answered
Can I use fresh cherries instead of cherry spread?
No, the recipe requires cherry spread for the correct moisture and texture. Fresh cherries would make the bars too wet and change the consistency.
Why does the recipe use both whole wheat and white flour?
Combining flours creates a more complex flavor and better texture. The whole wheat adds nutty depth while white flour keeps the bars light.
Do I need an electric mixer for this recipe?
Yes, an electric mixer helps cream the butter and sugar properly. Hand mixing won’t incorporate enough air to get the right fluffy texture.
Can I substitute the brown sugar?
Brown sugar provides moisture and caramel notes. White sugar won’t give the same rich flavor, so stick with brown sugar for best results.
What if I don’t have a 13×9 inch pan?
The pan size matters for proper baking. If your pan is smaller, you’ll need to adjust baking time and might need to make two batches.
How do I know when the bars are done baking?
Look for a lightly browned top. The bars should look set and not wiggle when you move the pan. A golden color means they’re ready.

Cherry Bars Recipe
- Total Time: 50 minutes
- Yield: 8 1x
Description
Delicious cherry bars bring pure summer joy straight from Grandma’s kitchen, packed with sweet-tart flavor that makes your taste buds dance. Crumbly golden crust and juicy cherry filling create the perfect dessert for sharing with family and friends.
Ingredients
Main Ingredients:
- 2 cups oat flakes
- 1 cup whole wheat flour
- 1 cup unbleached white flour
- 1 cup cherry spread
Supporting Ingredients:
- ¾ cups butter
- 1 cup brown sugar
Flavor Enhancers:
- 1 egg
- 1 teaspoon vanilla
- 2 teaspoons baking powder
Instructions
- Cream ¾ cup softened butter and 1 cup brown sugar with an electric mixer until the mixture looks pale and airy. Incorporate 1 egg and 1 teaspoon vanilla, mixing thoroughly.
- Whisk 1 cup whole wheat flour, 1 cup white flour, and 2 teaspoons baking powder in a separate bowl. Gradually blend dry ingredients into butter mixture on low speed.
- Fold in 2 cups oat flakes using a wooden spoon until a consistent dough forms. Set aside ½ cup of the mixture for topping.
- Grease a 13″ x 9″ baking pan. Press the primary dough evenly across the bottom, creating a smooth base layer.
- Spread 1 cup cherry spread carefully over the dough, ensuring complete and even coverage.
- Sprinkle the reserved ½ cup dough mixture across the top of the cherry layer, creating a crumbly topping.
- Bake at 350°F for 35 minutes, watching for a light golden-brown surface. The edges should look slightly crisp.
- Remove from oven and cool completely on a wire rack before slicing into rectangular bars.
Notes
- Use softened butter at room temperature for easier mixing and a smoother batter consistency.
- Spread the cherry filling evenly to ensure each bar has a balanced fruit flavor.
- For a gluten-free version, swap whole wheat and white flour with a gluten-free flour blend.
- Experiment with different fruit spreads like raspberry or apricot for variety in your bars.
- Prep Time: 15 minutes
- Cook Time: 35 minutes
- Category: Dessert Bars
- Method: Baking
- Cuisine: American
Nutrition
- Serving Size: 8
- Calories: 252 kcal
- Sugar: 15 g
- Sodium: 110 mg
- Fat: 10 g
- Saturated Fat: 6 g
- Unsaturated Fat: 3 g
- Trans Fat: 0.2 g
- Carbohydrates: 38 g
- Fiber: 3 g
- Protein: 4 g
- Cholesterol: 35 mg
Madison Wyman
Recipe Developer & Food Storyteller
Expertise
Recipe Research and Adaptation, Food Writing and Cultural Storytelling, Sustainable and Ethical Sourcing, Dietary Adaptations (e.g., gluten-free, plant-based)
Education
Oregon Health & Science University
Portland Community College
Madison’s passion for flavor and culture ignited amidst the rich Southern cooking traditions of her upbringing, where cherished family recipes told delicious tales.
Armed with a Master’s in Food Systems and Society from Oregon Health & Science University and a Culinary Arts Certificate from Portland Community College, Madison truly excels at transforming rich, intricate flavors into dishes that are both approachable and heartfelt.
For her, cooking is a vibrant blend of science, art, and heritage – a powerful way to connect us to our roots and each other. Her recipes invite you to delve deeper, uncovering the fascinating stories woven into every ingredient.