
Chewy Brownie Ice Cream Sandwiches Recipe to Enjoy
Chewy brownie ice cream sandwiches bring together two beloved desserts in one handheld treat that feels both indulgent and fun.
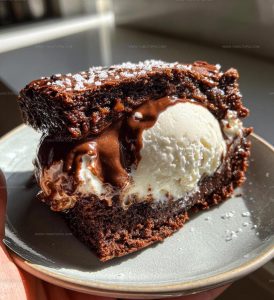
The combination of rich, fudgy layers with creamy frozen filling creates a contrast in textures that makes every bite satisfying.
This dessert works beautifully for summer gatherings, birthday celebrations, or any moment when you want something special without too much fuss.
The portability factor means they’re as practical as they are delicious, and everyone seems to love having a personal-sized treat.
They look impressive but come together more easily than you might expect, making them a smart choice when you need to feed a crowd.
The freezer does most of the work while you move on to other tasks.
When you need a dessert that offers wow factor with minimal stress, this recipe will become a favorite.
Why Chewy Brownie Ice Cream Sandwiches Feel So Indulgent
What Goes Into Chewy Brownie Ice Cream Sandwiches
Base Ingredients:Dry Ingredients:Ice Cream Layer:What Tools Help Assemble Brownie Ice Cream Sandwiches?
Step-by-Step Directions for Chewy Brownie Ice Cream Sandwiches
Prepare Oven and Pan
Heat the oven to exactly 350°F. Grab a 9×13 inch baking pan and coat it with cooking spray or butter so nothing sticks.
Create Butter and Sugar Base
Melt 1 cup of unsalted butter and combine with 2 cups granulated sugar in a large mixing bowl. Stir until the mixture looks smooth and glossy.
Add Wet Ingredients
Crack 4 large eggs into the bowl and pour in 1 teaspoon vanilla extract. Whisk everything together until fully blended.
Combine Dry Ingredients
In a separate bowl, measure out the dry ingredients carefully:
Stir these dry ingredients until they’re well mixed.
Mix Batter
Slowly add the dry ingredient mixture into the wet ingredients. Stir gently until everything just comes together – don’t overmix.
Bake Brownies
Pour the batter into your prepared pan. Spread it evenly with a spatula. Slide the pan into the preheated oven and bake for exactly 25-30 minutes.
Check Doneness
After 25 minutes, insert a toothpick into the center. A few moist crumbs are perfect – that means your brownies will be deliciously chewy.
Cool Completely
Remove the pan from the oven and let the brownies cool right in the pan. This takes about 1 hour at room temperature.
Cut Brownie Squares
Once completely cool, slice the brownies into even squares using a sharp knife.
Assemble Ice Cream Sandwiches
Grab 2 pints of your favorite ice cream. Place a scoop of ice cream between two brownie squares. Gently press to create a sandwich.
Freeze and Serve
Wrap each ice cream sandwich in plastic wrap. Freeze for at least 1 hour before enjoying your delicious treat.
How to Enhance Brownie Ice Cream Sandwiches
Chewy Brownie Ice Cream Sandwiches Flavor Changes
How To Serve Chewy Brownie Ice Cream Sandwiches
Brownie Ice Cream Sandwiches Storage Tips
Chewy Brownie Ice Cream Sandwiches Helpful Q&A
Can I use a different type of cocoa powder?
Natural and Dutch-processed cocoa powder work differently, so stick with unsweetened cocoa powder for the best results.
How do I prevent my brownies from sticking to the pan?
Always line your baking pan with parchment paper, leaving some overhang for easy removal.
What if my brownies are too soft to make sandwiches?
Freeze the cut brownie squares for about 15 minutes before assembling to help them firm up and handle more easily.
Can I make these ahead of time?
Absolutely! These sandwiches can be wrapped individually and stored in the freezer for up to two weeks.
Does the ice cream need to be a specific flavor?
No, any ice cream flavor works great. Get creative and choose your favorite!
How can I make the edges neat when cutting brownies?
Use a sharp knife and wipe the blade clean between cuts for crisp, clean edges.
Chewy Brownie Ice Cream Sandwiches Recipe
- Total Time: 1 hour 45 minutes
- Yield: 8 1x
Description
Nothing beats homemade Chewy Brownie Ice Cream Sandwiches when you want a cool, sweet treat that brings pure summer happiness. Grab your favorite ice cream, sandwich it between two rich, gooey brownies, and watch smiles spread faster than the melting goodness.
Ingredients
Base Ingredients:
- 2 cups granulated sugar
- 1 cup all-purpose flour
- 1 cup unsweetened cocoa powder
- 4 large eggs
Wet Ingredients:
- 1 cup unsalted butter, melted
- 1 teaspoon vanilla extract
Leavening and Seasoning:
- ½ teaspoon salt
- ½ teaspoon baking powder
- 2 pints ice cream
Instructions
- Heat your oven to 350F and coat a 9×13 inch pan with cooking spray.
- Whisk 1 cup melted butter with 2 cups sugar until completely smooth.
- Crack 4 large eggs into the butter mixture and add 1 teaspoon vanilla extract, stirring thoroughly.
- Sift together 1 cup flour, 1 cup cocoa powder, ½ teaspoon salt, and ½ teaspoon baking powder in a separate bowl.
- Fold dry ingredients into wet ingredients, mixing just until combined without overmixing.
- Spread batter evenly into prepared pan, ensuring smooth surface.
- Bake for 25-30 minutes until a toothpick inserted near center shows a few moist crumbs.
- Allow brownies to cool completely inside the pan, which takes approximately 1-2 hours.
- Cut cooled brownies into 12 equal squares using a sharp knife.
- Remove 2 pints of ice cream from freezer to soften slightly.
- Place one brownie square on a plate and top with ¼ cup softened ice cream.
- Gently press a second brownie square on top, creating a sandwich.
- Wrap each sandwich individually in plastic wrap.
- Freeze sandwiches for at least 1 hour before serving to help them set firmly.
Notes
- Allow brownies to cool completely before assembling sandwiches to prevent melting ice cream.
- Experiment with different ice cream flavors like mint chocolate chip, salted caramel, or classic vanilla for variety.
- Use parchment paper in the baking pan for easier brownie removal and cleaner edges.
- Wrap each sandwich individually in plastic wrap to keep them fresh and prevent freezer burn.
- Prep Time: 15 minutes
- Cook Time: 25-30 minutes
- Category: Brownies
- Method: Baking
- Cuisine: American
Nutrition
- Serving Size: 8
- Calories: 517
- Sugar: 47 g
- Sodium: 120 mg
- Fat: 30 g
- Saturated Fat: 18 g
- Unsaturated Fat: 12 g
- Trans Fat: 0.5 g
- Carbohydrates: 56 g
- Fiber: 4 g
- Protein: 7 g
- Cholesterol: 95 mg
Logan Lemaster
Founder & Culinary Innovator
Expertise
Recipe Development and Innovation, Menu Design and Optimization, Fine Dining Techniques, Ingredient Pairing and Flavor Science
Education
Metropolitan Culinary Arts Institute
Logan’s culinary journey kicked off in his vibrant Chicago family kitchen, where fresh, seasonal ingredients and bold flavors were always front and center.
After graduating from the Metropolitan Culinary Arts Institute in Arlington, Virginia, and honing his skills in renowned restaurants, Logan mastered the art of blending classic techniques with exciting, modern twists.
His kitchen is a dynamic lab for flavor exploration. Through Yum Utopia, Logan aims to empower you to cook with both confidence and creativity, turning simple ingredients into spectacular meals.