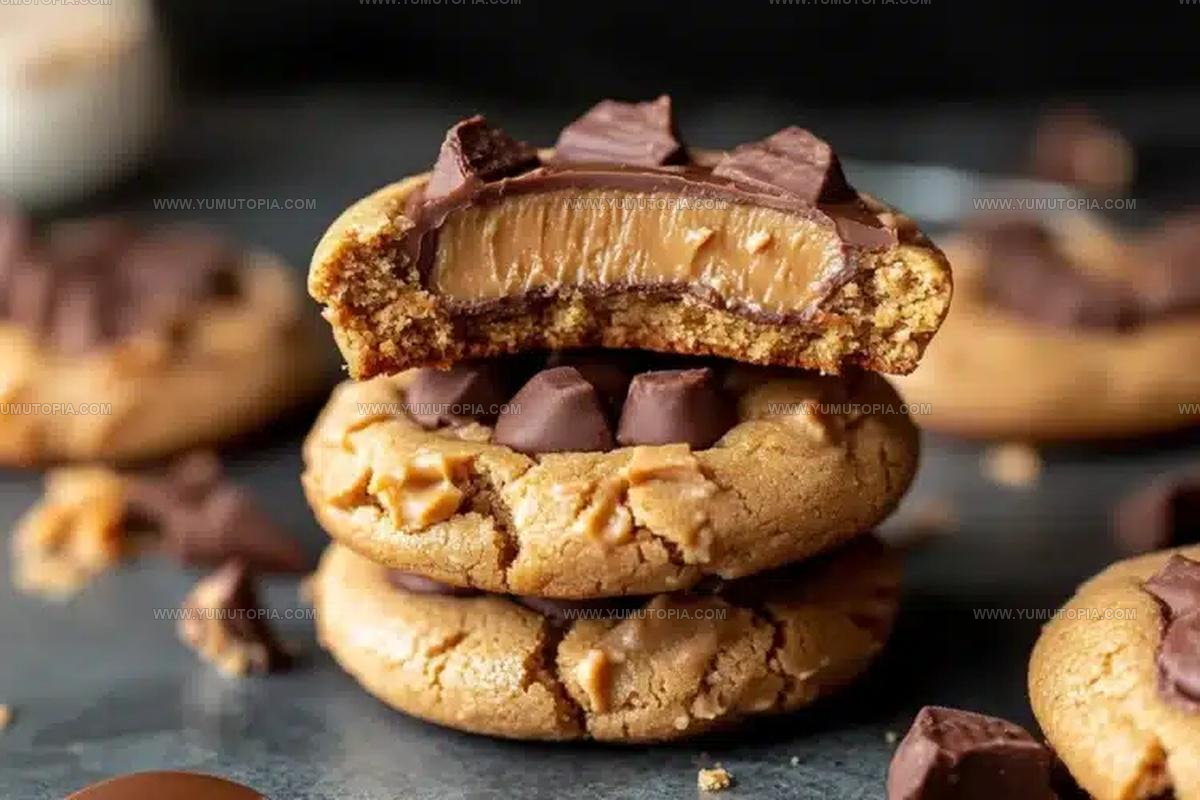
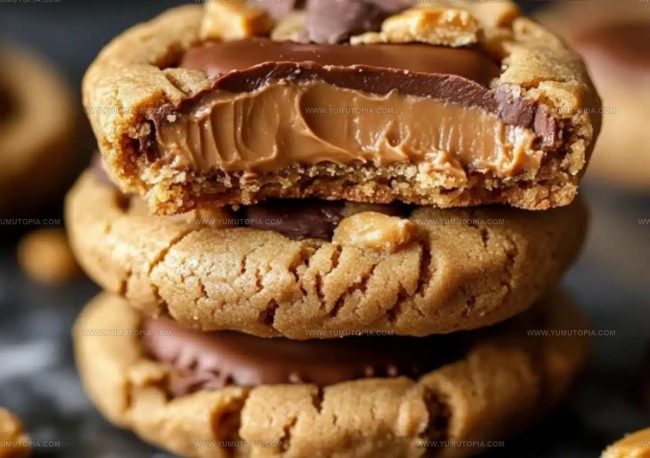
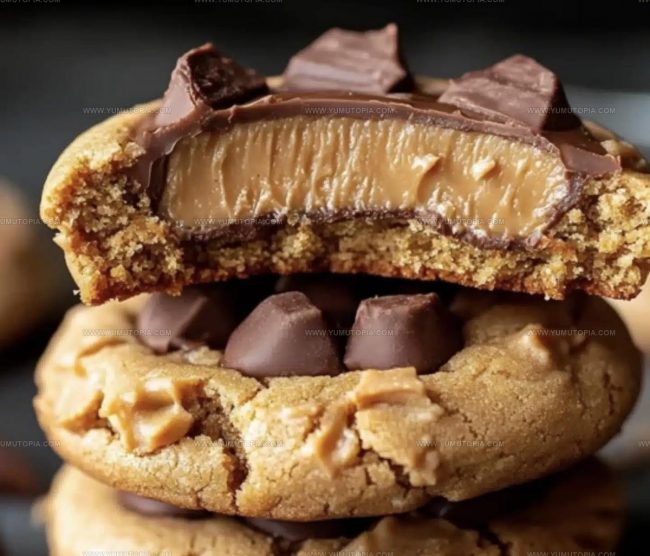
Gooey Peanut Butter Cup Cookies Recipe for Chocolate Lovers
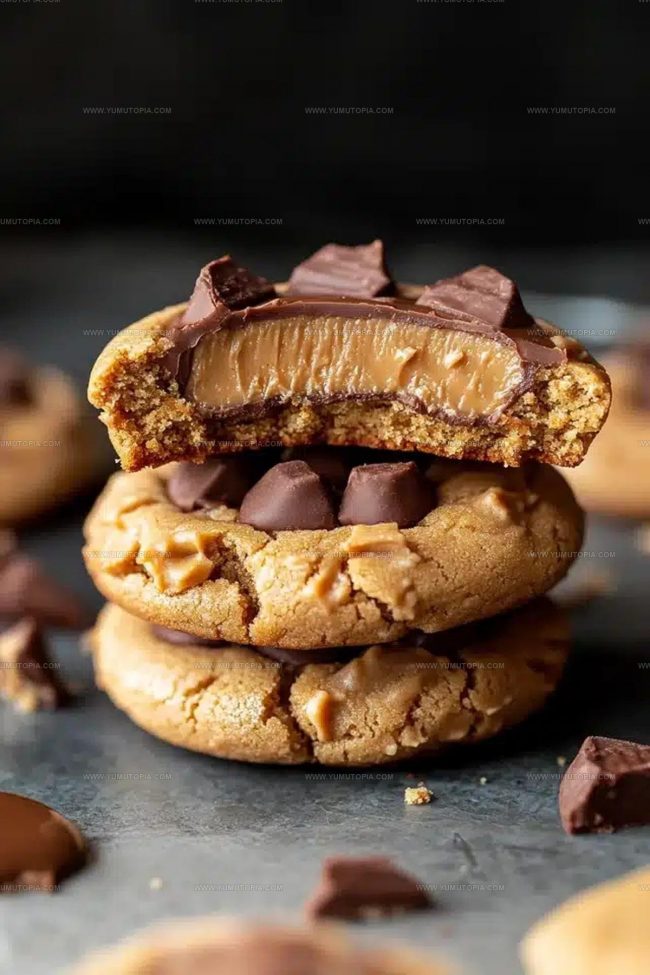
Chewy peanut butter cup cookies deliver pure joy in every bite with their soft texture and rich candy surprise tucked inside.
The combination creates an indulgent treat that satisfies both cookie lovers and chocolate enthusiasts equally well.
Perfect for baking sessions when you crave something sweet and comforting, these cookies offer crowd-pleasing appeal at parties, potlucks, or casual afternoons at home.
Each cookie provides that satisfying chew that makes it hard to stop at just one.
The flavors work together beautifully to create a dessert that feels both familiar and special.
Whether you need a quick dessert solution or want to bake something fun on a lazy weekend, this recipe fits the bill perfectly.
Start baking today and watch how quickly these disappear from the plate!
Secrets Behind The Addictive Charm Of Peanut Butter Cup Cookies
Key Ingredients For These Peanut Butter Cup Cookies

Necessary Bakeware For Peanut Butter Cup Cookies
Steps Creating Peanut Butter Cup Cookies
Prep the Oven
Warm up your oven to 375°F (190°C). Grab a mini muffin tin and either spray it with cooking spray or line it with paper liners. Your cookie adventure is about to begin!
Mix Dry Ingredients
Grab a medium bowl and whisk together:
Make sure these ingredients are well combined so your cookies turn out perfectly.
Cream the Fats and Sugars
In a large mixing bowl, grab your electric mixer and blend:
Whip these together for 2-3 minutes until the mixture looks light and fluffy. Don’t forget to scrape down the sides of the bowl to catch everything.
Add Wet Ingredients
Drop in:
Beat these into your creamy mixture until everything is well combined.
Combine Wet and Dry
Slowly add your flour mixture into the wet ingredients. Stir just until the dough comes together. Be gentle – you want tender cookies, not tough ones!
Form Cookie Balls
Scoop out about 1 tablespoon of dough and roll it into a neat ball. Tuck each ball into a spot in your prepared muffin tin. These little nests will cradle your peanut butter cups perfectly.
Bake to Golden
Slide the tin into the 375°F oven and bake for 8-10 minutes. Look for tops that are set and just turning golden at the edges.
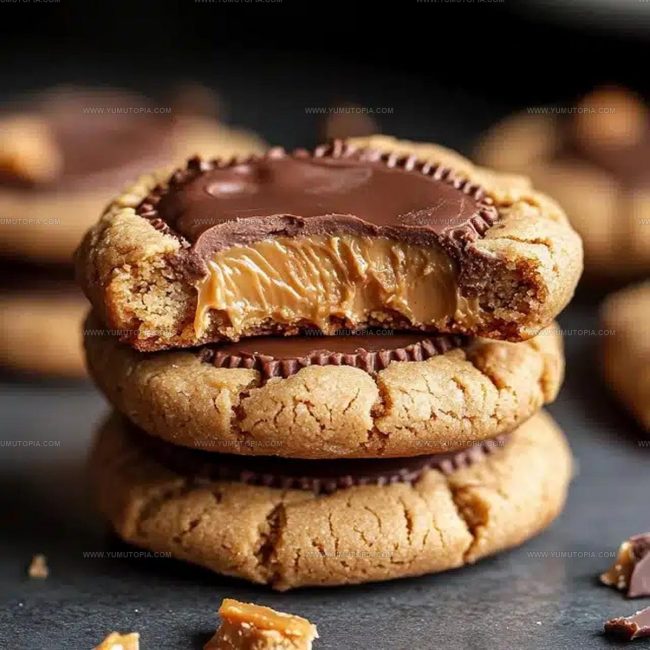
Add Peanut Butter Cups
The moment the cookies come out of the oven, press an unwrapped mini peanut butter cup into the center of each warm cookie. The heat will help the chocolate get deliciously soft and settle right in.
Cool and Enjoy
Let the cookies hang out in the tin for about 5 minutes, then transfer them to a wire rack to cool completely. Your kitchen will smell amazing, and these cookies are ready to be devoured!
Enhancers Deepening Peanut Butter Cookie Flavor
Stuffed and Swirled Twists for Peanut Butter Cup Cookies
Serving Peanut Butter Cookies with Simple Pairings
Ways To Keep Peanut Butter Cup Cookies Soft
Peanut Butter Cookie Questions Many Bakers Ask
Can I use chunky peanut butter instead of creamy?
Creamy peanut butter works best for a smooth cookie texture. Chunky peanut butter might create uneven mixing and change your cookie’s consistency.
What if I don’t have mini muffin tins?
A regular baking sheet works, but mini muffin tins help create the perfect cup shape for the peanut butter cups to nestle into.
Can these cookies be frozen?
Absolutely! Freeze the baked cookies in an airtight container for up to 3 months. Just thaw at room temperature before serving.
Do I need room temperature ingredients?
Yes, softened butter and room temperature egg blend more smoothly and create a better cookie texture.
Are these cookies good for kids?
Peanut butter cups contain nuts, so check for allergies before serving to children or guests.

Chewy Peanut Butter Cup Cookies Recipe
- Total Time: 18-20 minutes
- Yield: 24 1x
Description
Peanut Butter Cup Cookies bring pure chocolate and peanut butter bliss right to your kitchen counter. Chocolate lovers rejoice as these simple treats combine creamy peanut butter with rich chocolate in one delightful cookie that disappears faster than you can bake them.
Ingredients
Main Ingredients:
- 1.75 cups all-purpose flour
- 0.5 cup peanut butter
- 0.5 cup unsalted butter, softened
- 40 mini peanut butter cups
Sweeteners:
- 0.5 cup granulated sugar
- 0.5 cup brown sugar, packed
Binding and Flavor Agents:
- 1 large egg
- 1 teaspoon vanilla extract
- 2 tablespoons milk
- 1 teaspoon baking soda
- 0.5 teaspoon salt
Instructions
- Preheat the oven to 375°F (190°C). Coat a mini muffin tin with nonstick spray or line with paper cups to prevent sticking.
- Whisk 1 ¾ cups flour, 1 teaspoon baking soda, and ½ teaspoon salt together in a medium bowl until thoroughly combined.
- Cream ½ cup softened butter, ½ cup granulated sugar, ½ cup brown sugar, and ½ cup peanut butter in a large bowl for 2-3 minutes until light and fluffy.
- Mix 1 large egg, 1 teaspoon vanilla extract, and 2 tablespoons milk into the butter mixture until smooth.
- Fold the dry ingredients into the wet ingredients, stirring gently until a soft dough forms. Avoid overmixing to keep the cookies tender.
- Roll the dough into 1-tablespoon balls and place each one into a mini muffin tin cavity.
- Bake for 8-10 minutes at 375°F (190°C) until the cookie tops look set and have a light golden color.
- Remove from the oven and immediately press 1 unwrapped mini peanut butter cup into the center of each warm cookie.
- Let the cookies rest in the pan for 5 minutes, then transfer to a wire rack to cool completely.
Notes
- Refrigerate dough for 30 minutes to prevent spreading during baking and ensure a more compact cookie shape.
- Press chocolate cups gently into warm cookies right after removing from oven to help them melt slightly and adhere perfectly.
- Room temperature ingredients like eggs and butter blend more smoothly and create a more consistent cookie texture.
- For gluten-free version, substitute all-purpose flour with a cup-for-cup gluten-free baking blend and check that chocolate cups are also gluten-free.
- Prep Time: 10 minutes
- Cook Time: 8-10 minutes
- Category: Cookies
- Method: Baking
- Cuisine: American
Nutrition
- Serving Size: 24
- Calories: 159 kcal
- Sugar: 11 g
- Sodium: 113 mg
- Fat: 9 g
- Saturated Fat: 3 g
- Unsaturated Fat: 5 g
- Trans Fat: 0 g
- Carbohydrates: 17 g
- Fiber: 1 g
- Protein: 4 g
- Cholesterol: 23 mg
Logan Lemaster
Founder & Culinary Innovator
Expertise
Recipe Development and Innovation, Menu Design and Optimization, Fine Dining Techniques, Ingredient Pairing and Flavor Science
Education
Metropolitan Culinary Arts Institute
Logan’s culinary journey kicked off in his vibrant Chicago family kitchen, where fresh, seasonal ingredients and bold flavors were always front and center.
After graduating from the Metropolitan Culinary Arts Institute in Arlington, Virginia, and honing his skills in renowned restaurants, Logan mastered the art of blending classic techniques with exciting, modern twists.
His kitchen is a dynamic lab for flavor exploration. Through Yum Utopia, Logan aims to empower you to cook with both confidence and creativity, turning simple ingredients into spectacular meals.