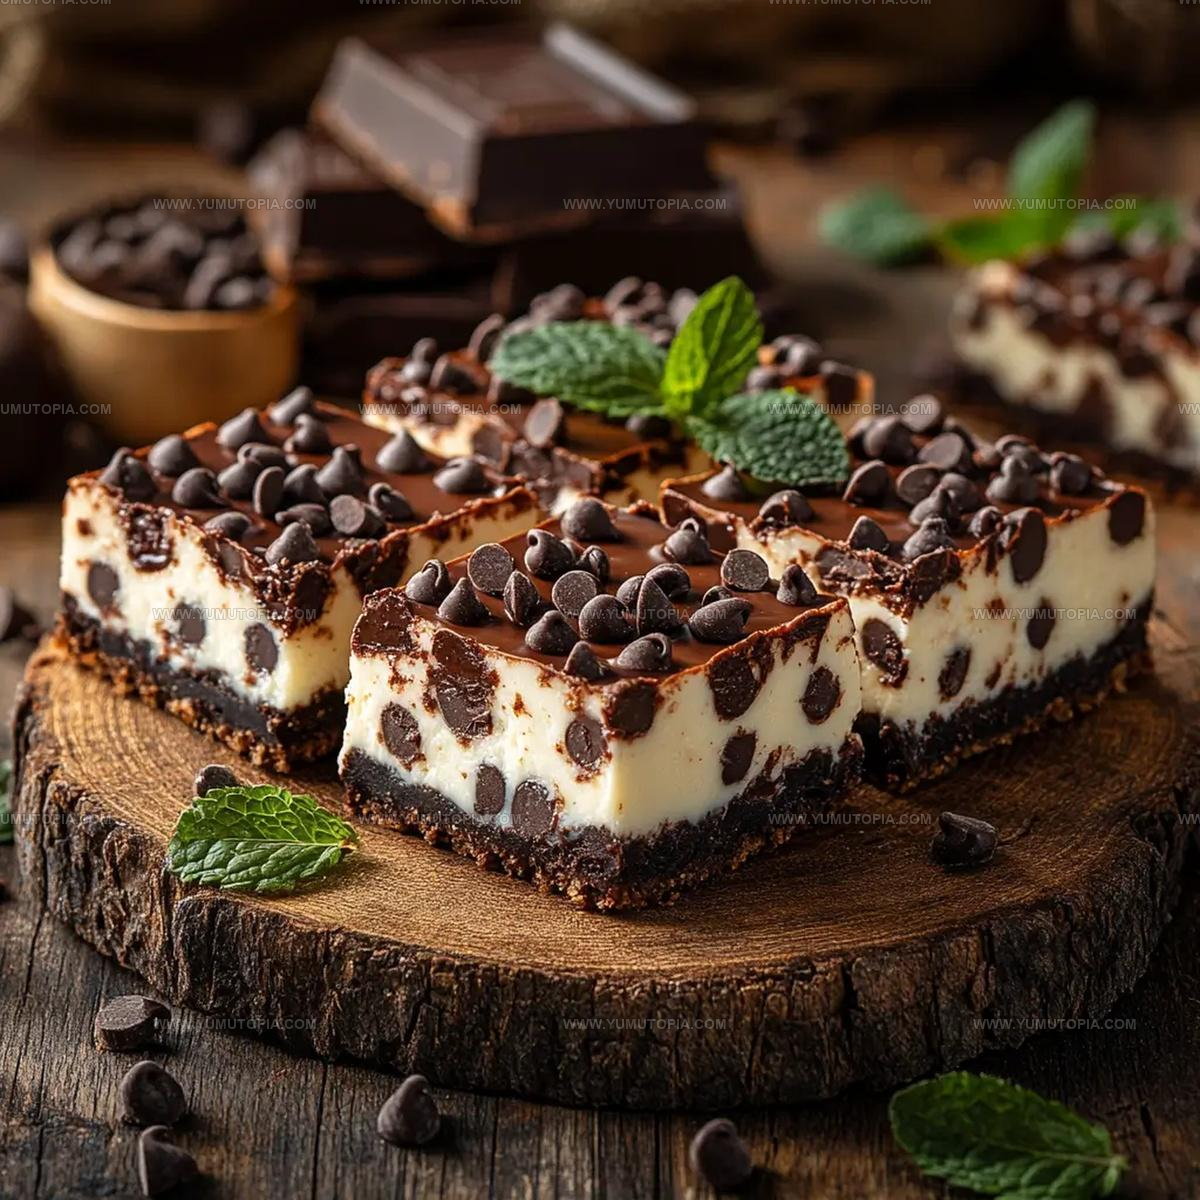
Chocolate Chip Cheesecake Bars Recipe That Combines Two Beloved Desserts
Decadent chocolate chip cheesecake bars promise pure dessert magic that melts hearts and sparks joy.
Sweet sensations emerge when creamy textures blend with classic cookie crumbles and rich chocolate moments.
Smooth cream cheese layers create an incredible dessert experience promising pure indulgence for anyone craving something extraordinary.
Comfort meets luxury in every delightful bite, offering a sophisticated twist on traditional treats.
Perfect for gatherings, afternoon snacking, or midnight cravings, these bars guarantee instant happiness without complicated preparation.
Dessert lovers will appreciate the seamless combination of classic flavors transformed into an irresistible square of deliciousness.
What Makes Chocolate Chip Cheesecake Bars A Favorite
Essential Ingredients For Chocolate Chip Cheesecake Bars
Graham Cracker Crust:Cheesecake Filling:Chocolate and Finishing Touches:Handy Kitchen Tools for Chocolate Chip Cheesecake Bars
Preparing Chocolate Chip Cheesecake Bars Step by Step
Prepare Baking Pan
Heat the oven to 325°F and grab a 9×9-inch baking pan. Spray every inch of the pan’s interior with cooking spray so nothing sticks later.
Make Graham Cracker Crust
Melt the butter and combine it with the graham cracker crust ingredients:
Mix everything until it feels like slightly damp sand that can hold together.
Create Crust Base
Press the crumb mixture firmly across the bottom of the pan. Use the back of a measuring cup to pack it down super tight and create a solid foundation.
Cream the Cream Cheese
Grab your electric mixer and beat the cream cheese until it becomes super smooth, which takes about 2 minutes. Make sure the cream cheese is completely softened before starting.
Add Sugar to Cream Cheese
Slowly add the sugar to the cream cheese mixture:
Keep mixing until the texture becomes light and fluffy.
Incorporate Eggs
Add the eggs one at a time, mixing thoroughly after each addition:
Blend until everything is completely combined.
Mix in Flavor
Stir in the vanilla extract and fold in the chocolate chips:
Distribute the chocolate chips evenly throughout the mixture.
Pour Filling
Carefully spread the cheesecake filling over the graham cracker crust, making sure it covers the entire surface evenly.
Bake the Bars
Slide the pan into the oven and bake at 325°F for exactly 30 minutes. Look for edges that are set but a slightly jiggly center.
Initial Cooling
Remove the pan from the oven and let the bars sit at room temperature for 30 minutes to start cooling down.
Chill in Refrigerator
Transfer the pan to the refrigerator and let it chill for at least 2 hours. This helps the bars set completely.
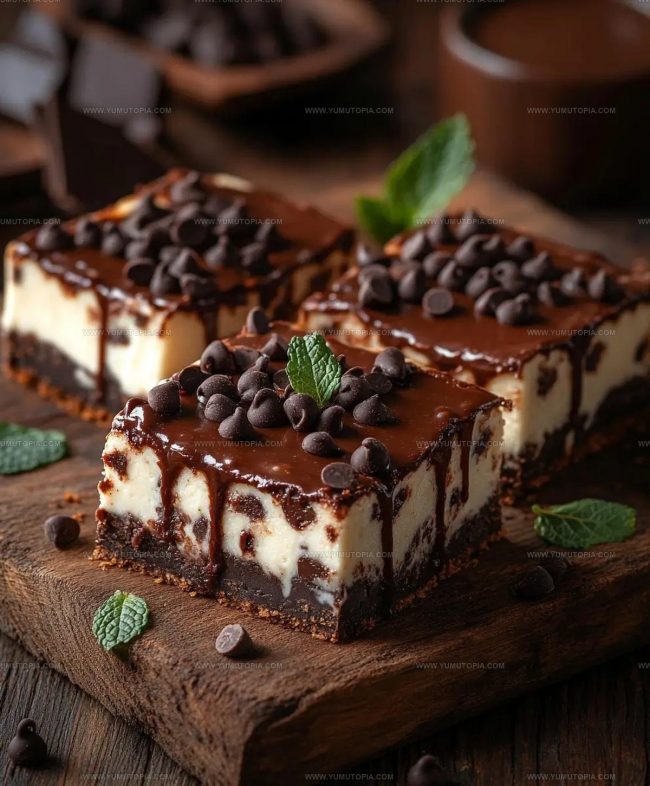
Slice and Serve
Cut the chilled bars into 9 equal squares. Serve cold and add a dollop of whipped cream or some fresh berries if you’re feeling fancy.
Cooking Know-How For Chocolate Chip Cheesecake Bars
Which Creative Spins Elevate Chocolate Chip Cheesecake Bars
Best Ways To Slice Chocolate Chip Cheesecake Bars
What’s The Proper Storage For Chocolate Chip Cheesecake Bars
Chocolate Chip Cheesecake Bars Questions
Can I freeze these cheesecake bars?
Absolutely! Wrap each bar individually in plastic wrap, then place in a freezer-safe container. They’ll stay delicious for up to 3 months.
How do I prevent cracking in the cheesecake?
Avoid overmixing the batter and don’t overbake. Remove the bars from the oven when the center still has a slight jiggle.
What if my cream cheese isn’t softened?
Let it sit at room temperature for about 30 minutes before starting. Cold cream cheese won’t blend smoothly and can create lumps in your filling.
Can I use a different type of chocolate?
Definitely! Feel free to swap semi-sweet chips with milk, dark, or even white chocolate chips to match your chocolate preference.
Do I need a stand mixer for this recipe?
No worries! A handheld electric mixer works perfectly for creating that smooth, creamy cheesecake filling.
How do I know when the bars are fully baked?
Look for set edges and a center that still has a slight wobble when you gently shake the pan. This ensures a creamy, not dry, texture.

Chocolate Chip Cheesecake Bars Recipe
- Total Time: 50 minutes
- Yield: 9 1x
Description
Whipping up chocolate chip cheesecake bars brings pure joy right to your kitchen counter. Creamy cheesecake meets classic chocolate chips in a delightful dessert that disappears faster than you can slice them.
Ingredients
Main Ingredients:
- 16 oz cream cheese
- 1 cup semi-sweet chocolate chips
- 2 large eggs
- 1 ¾ cups graham cracker crumbs
Supporting Ingredients:
- 1 cup granulated sugar
- ½ cup unsalted butter
Finishing Ingredients:
- 1 teaspoon vanilla extract
- ¼ cup granulated sugar
Instructions
- Preheat your oven to 325°F and grab a 9×9-inch baking pan. Coat the pan’s interior completely with cooking spray to prevent sticking.
- Melt ½ cup unsalted butter and mix it thoroughly with 1 ¾ cups graham cracker crumbs and ¼ cup granulated sugar in a medium bowl until the texture resembles damp sand.
- Press the crumb mixture firmly and evenly across the bottom of the prepared pan, using the back of a measuring cup to create a compact base.
- In a separate large bowl, beat 16 oz softened cream cheese using an electric mixer until smooth and creamy, approximately 2 minutes.
- Gradually add ½ cup granulated sugar to the cream cheese, blending until the mixture becomes light and fluffy.
- Incorporate 2 large eggs into the cream cheese mixture, adding one egg at a time and mixing thoroughly after each addition.
- Stir 1 tsp vanilla extract into the filling and gently fold in 1 cup semi-sweet chocolate chips, ensuring even distribution.
- Pour the cheesecake filling over the prepared graham cracker crust, spreading it carefully to create an even layer.
- Bake at 325°F for exactly 30 minutes, watching for slightly jiggly center and set edges as your doneness indicators.
- Remove the pan from the oven and let the bars rest at room temperature for 30 minutes to begin cooling.
- Transfer the pan to the refrigerator and chill for at least 2 hours before slicing into squares.
- Cut into 9 equal bars and serve cold, garnishing with optional whipped cream or fresh berries if desired.
Notes
- Let the bars sit at room temperature for 15-20 minutes before cutting to ensure clean, neat slices that don’t crumble.
- For a gluten-free version, swap graham cracker crumbs with almond flour or gluten-free cookie crumbs to make the crust compatible with dietary restrictions.
- Beat cream cheese at room temperature to prevent lumps and create a smoother, more consistent filling that blends perfectly with chocolate chips.
- Avoid overbaking by checking the cheesecake bars at 25 minutes, looking for slightly jiggly centers that will set during cooling and chilling.
- Prep Time: 20 minutes
- Cook Time: 30 minutes
- Category: Dessert Bars
- Method: Baking
- Cuisine: American
Nutrition
- Serving Size: 9
- Calories: 433
- Sugar: 28 g
- Sodium: 160 mg
- Fat: 33 g
- Saturated Fat: 19 g
- Unsaturated Fat: 12 g
- Trans Fat: 0.5 g
- Carbohydrates: 29 g
- Fiber: 1 g
- Protein: 6 g
- Cholesterol: 110 mg
Logan Lemaster
Founder & Culinary Innovator
Expertise
Recipe Development and Innovation, Menu Design and Optimization, Fine Dining Techniques, Ingredient Pairing and Flavor Science
Education
Metropolitan Culinary Arts Institute
Logan’s culinary journey kicked off in his vibrant Chicago family kitchen, where fresh, seasonal ingredients and bold flavors were always front and center.
After graduating from the Metropolitan Culinary Arts Institute in Arlington, Virginia, and honing his skills in renowned restaurants, Logan mastered the art of blending classic techniques with exciting, modern twists.
His kitchen is a dynamic lab for flavor exploration. Through Yum Utopia, Logan aims to empower you to cook with both confidence and creativity, turning simple ingredients into spectacular meals.