Chocolate Chip Cookie Ice Cream Sandwiches Recipe for Summer Treats
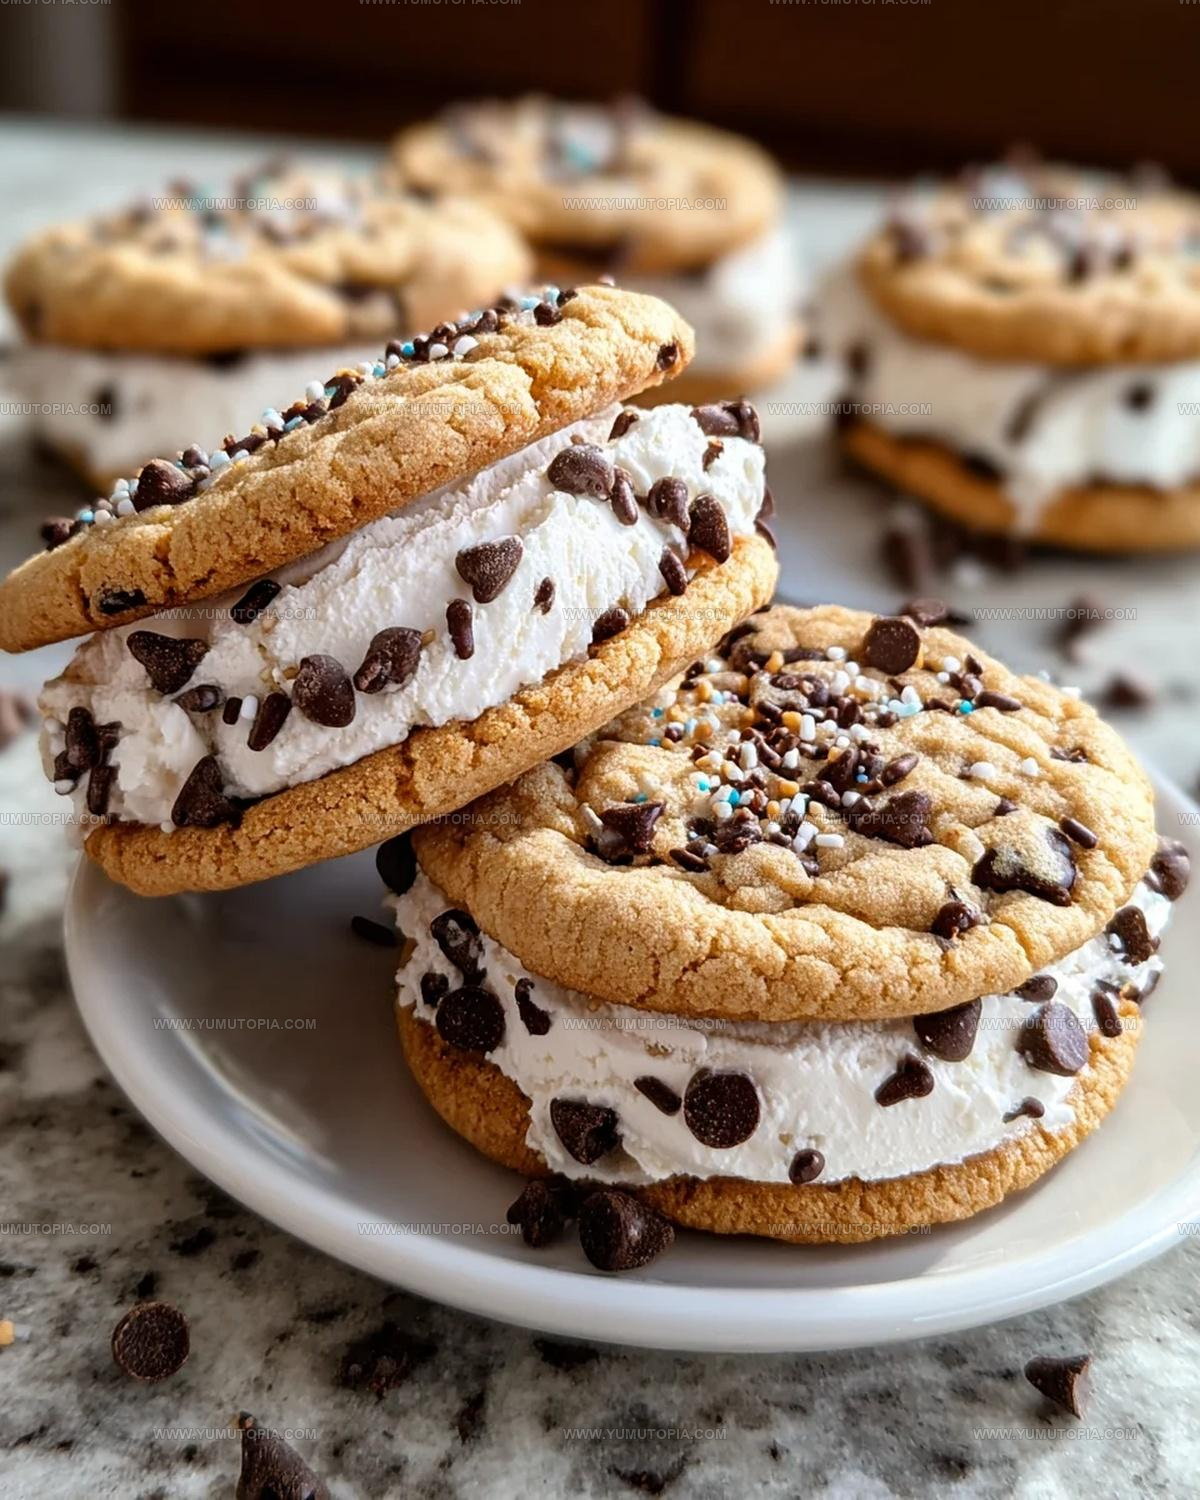
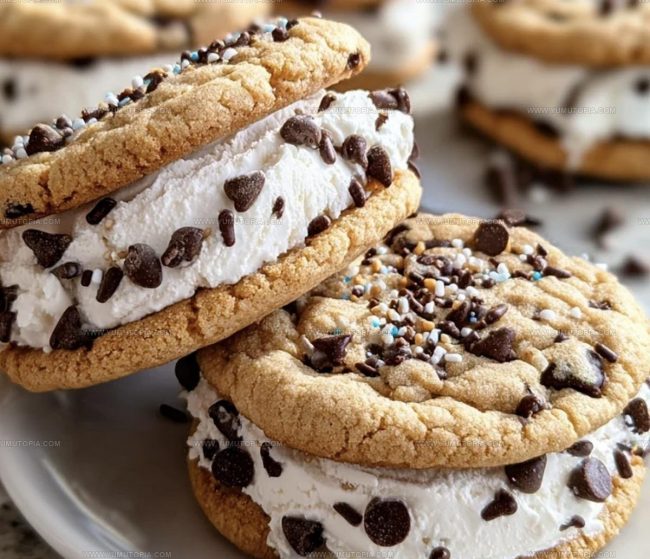
Chocolate chip cookie ice cream sandwiches bring pure joy to any occasion with their playful combination of soft, chewy cookies and cold, creamy filling.
There’s something magical about biting through that perfect cookie exterior into the smooth ice cream center that makes every mouthful feel like a celebration.
Kids love them for summer afternoons by the pool, while grown-ups appreciate them as a fun dessert after backyard barbecues or casual dinner parties.
The beauty of ice cream sandwiches lies in their casual charm—no plates or forks needed, just pure handheld happiness.
They’re surprisingly simple to put together at home, giving you control over size, sweetness, and overall quality compared to store-bought options.
Serve them at birthday parties, pack them in coolers for picnics, or keep a stash in the freezer for spontaneous sweet cravings.
Anyone can master making ice cream sandwiches with just a bit of patience and freezer space.
Why Chocolate Chip Cookie Ice Cream Sandwiches Always Deliver

Chocolate Chip Cookie Ice Cream Sandwich Ingredients
Ice Cream Base:Cookie Base:Optional Garnish:Equipment You’ll Use for Chocolate Chip Cookie Ice Cream Sandwiches
How Do You Prepare Chocolate Chip Cookie Ice Cream Sandwiches
Warm Up the Oven
Crank your oven to 350°F. Grab your favorite chocolate chip cookie recipe or mix and get ready to bake some delicious cookies.
Bake Perfect Cookies
Prepare your cookie dough and spread it out on a baking sheet. Bake the cookies for 10-12 minutes until they’re golden around the edges. Pull them out and let them cool completely on a wire rack.
Gather Ice Cream and Cookies
After the cookies have cooled down, grab your 1 pint of ice cream from the freezer. Make sure it’s soft enough to scoop but not melting.
Create Ice Cream Sandwiches
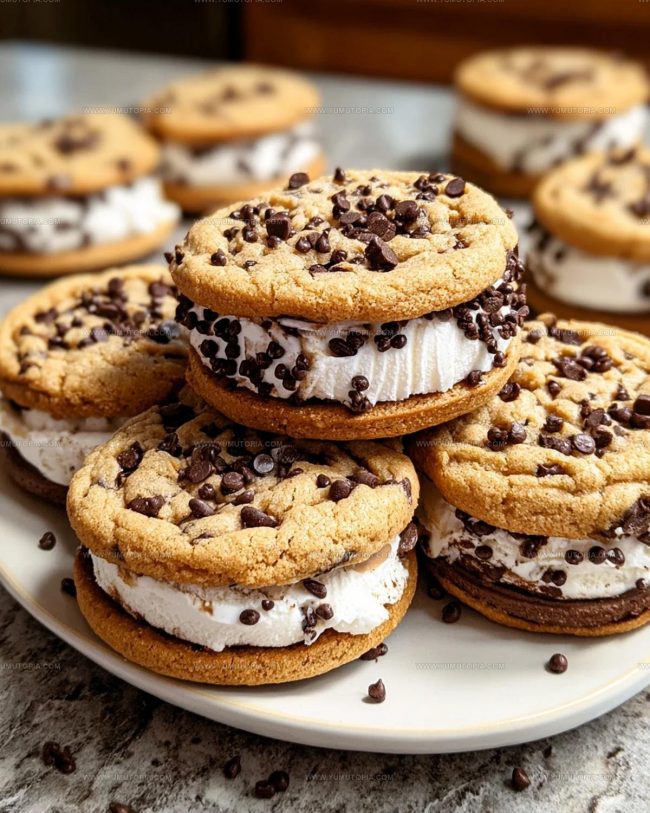
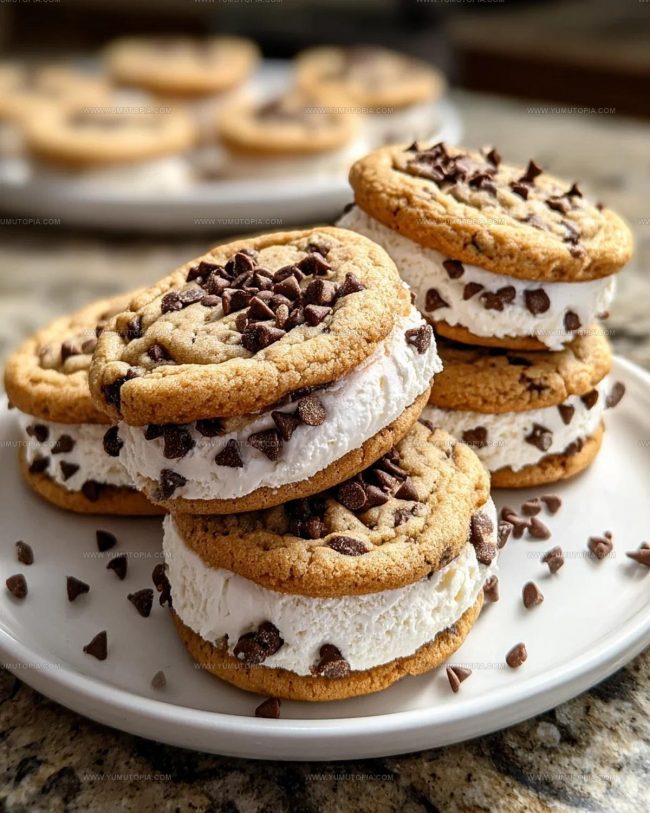
Pick two cookies of similar size. Scoop about 1/4 cup of ice cream onto the flat side of one cookie. Gently press a second cookie on top, squishing the ice cream just a bit.
Add Optional Crunch
If you’re feeling fancy, roll the edges of your ice cream sandwich in:
Freeze and Set
Wrap each sandwich in plastic wrap. Tuck them into the freezer for at least 1 hour so they firm up nicely. When you’re ready for a cool treat, pull them out and enjoy!
Kitchen Know-How for Cookie Ice Cream Sandwiches
Flavor Options for Cookie Ice Cream Sandwiches
Ways To Serve Chocolate Chip Cookie Ice Cream Sandwiches
Proper Storage for Cookie Ice Cream Sandwiches
Chocolate Chip Cookie Ice Cream Sandwiches Frequently Asked Questions
Can I use store-bought cookies instead of homemade?
Absolutely! Grab your favorite chocolate chip cookies from the store. Just make sure they’re completely cooled before assembling the ice cream sandwiches.
What type of ice cream works best?
Any flavor you love will be delicious. Vanilla is classic, but chocolate, mint chip, or caramel are awesome choices that complement chocolate chip cookies perfectly.
How long can these be stored in the freezer?
These treats stay fresh for about a week when wrapped tightly in plastic wrap. Just keep them in an airtight container to prevent freezer burn.
Can I make these ahead of time?
Definitely! Prepare the ice cream sandwiches and freeze them up to three days before serving. They’re great for summer parties or unexpected dessert cravings.
Do I need any special equipment?
Nope! Just a baking sheet, some cookies, ice cream, and plastic wrap are all you need to create these delightful frozen treats.
Are these messy to eat?
They can get a bit drippy on hot days, so have napkins ready. Pro tip: Let them sit at room temperature for 2-3 minutes before eating to soften slightly.

Chocolate Chip Cookie Ice Cream Sandwiches Recipe
- Total Time: 1 hour 22 minutes
- Yield: 8 1x
Description
Chocolate Chip Cookie Ice Cream Sandwiches bring pure summer happiness right to your plate. Creamy vanilla ice cream nestled between two homemade chocolate chip cookies creates the ultimate cool treat your friends will absolutely adore.
Ingredients
Main Ingredients:
- 1 pint ice cream
- 1 batch chocolate chip cookie dough
Optional Garnish:
- Chocolate chips or sprinkles (as needed)
Instructions
- Preheat your oven to 350°F and prepare a baking sheet with parchment paper.
- Mix the chocolate chip cookie dough according to your preferred recipe, ensuring all ingredients are well combined.
- Scoop 2-tablespoon portions of cookie dough onto the prepared baking sheet, spacing them 2 inches apart.
- Bake the cookies for 10-12 minutes until golden brown around the edges and slightly soft in the center.
- Remove cookies from the oven and let them cool completely on a wire rack for 30 minutes.
- Select your favorite ice cream flavor and remove it from the freezer to soften slightly for 3-5 minutes.
- Place a ¼ cup scoop of softened ice cream onto the flat side of one cooled cookie.
- Gently press a second cookie on top of the ice cream, applying light pressure to create a sandwich.
- Roll the exposed ice cream edges in mini chocolate chips or colorful sprinkles for extra crunch.
- Wrap each ice cream sandwich individually in plastic wrap.
- Freeze the wrapped sandwiches for at least 1 hour to allow them to firm up completely.
- Remove from the freezer 2-3 minutes before serving to slightly soften for easier eating.
Notes
- Bake cookies slightly underdone to ensure they stay soft when frozen and won’t become rock-hard after chilling.
- Select premium quality ice cream that freezes firmly but remains creamy, like vanilla bean or chocolate.
- Use room temperature cookies when assembling sandwiches so the ice cream doesn’t melt too quickly during assembly.
- Wrap each sandwich individually in plastic wrap to prevent freezer burn and keep the cookies from absorbing other flavors.
- Prep Time: 10 minutes
- Cook Time: 12 minutes
- Category: Cookies
- Method: Baking
- Cuisine: American
Nutrition
- Serving Size: 8
- Calories: 300 kcal
- Sugar: 24 g
- Sodium: 150 mg
- Fat: 15 g
- Saturated Fat: 8 g
- Unsaturated Fat: 5 g
- Trans Fat: 0.5 g
- Carbohydrates: 35 g
- Fiber: 2 g
- Protein: 4 g
- Cholesterol: 40 mg
Logan Lemaster
Founder & Culinary Innovator
Expertise
Recipe Development and Innovation, Menu Design and Optimization, Fine Dining Techniques, Ingredient Pairing and Flavor Science
Education
Metropolitan Culinary Arts Institute
Logan’s culinary journey kicked off in his vibrant Chicago family kitchen, where fresh, seasonal ingredients and bold flavors were always front and center.
After graduating from the Metropolitan Culinary Arts Institute in Arlington, Virginia, and honing his skills in renowned restaurants, Logan mastered the art of blending classic techniques with exciting, modern twists.
His kitchen is a dynamic lab for flavor exploration. Through Yum Utopia, Logan aims to empower you to cook with both confidence and creativity, turning simple ingredients into spectacular meals.