Chocolate Chip Mummy Cake Recipe That Turns Spooky Into Sweet
Chocolate Chip Mummy Cake provides Halloween fun straight to any celebration table with its playful presentation and crowd-pleasing flavors.
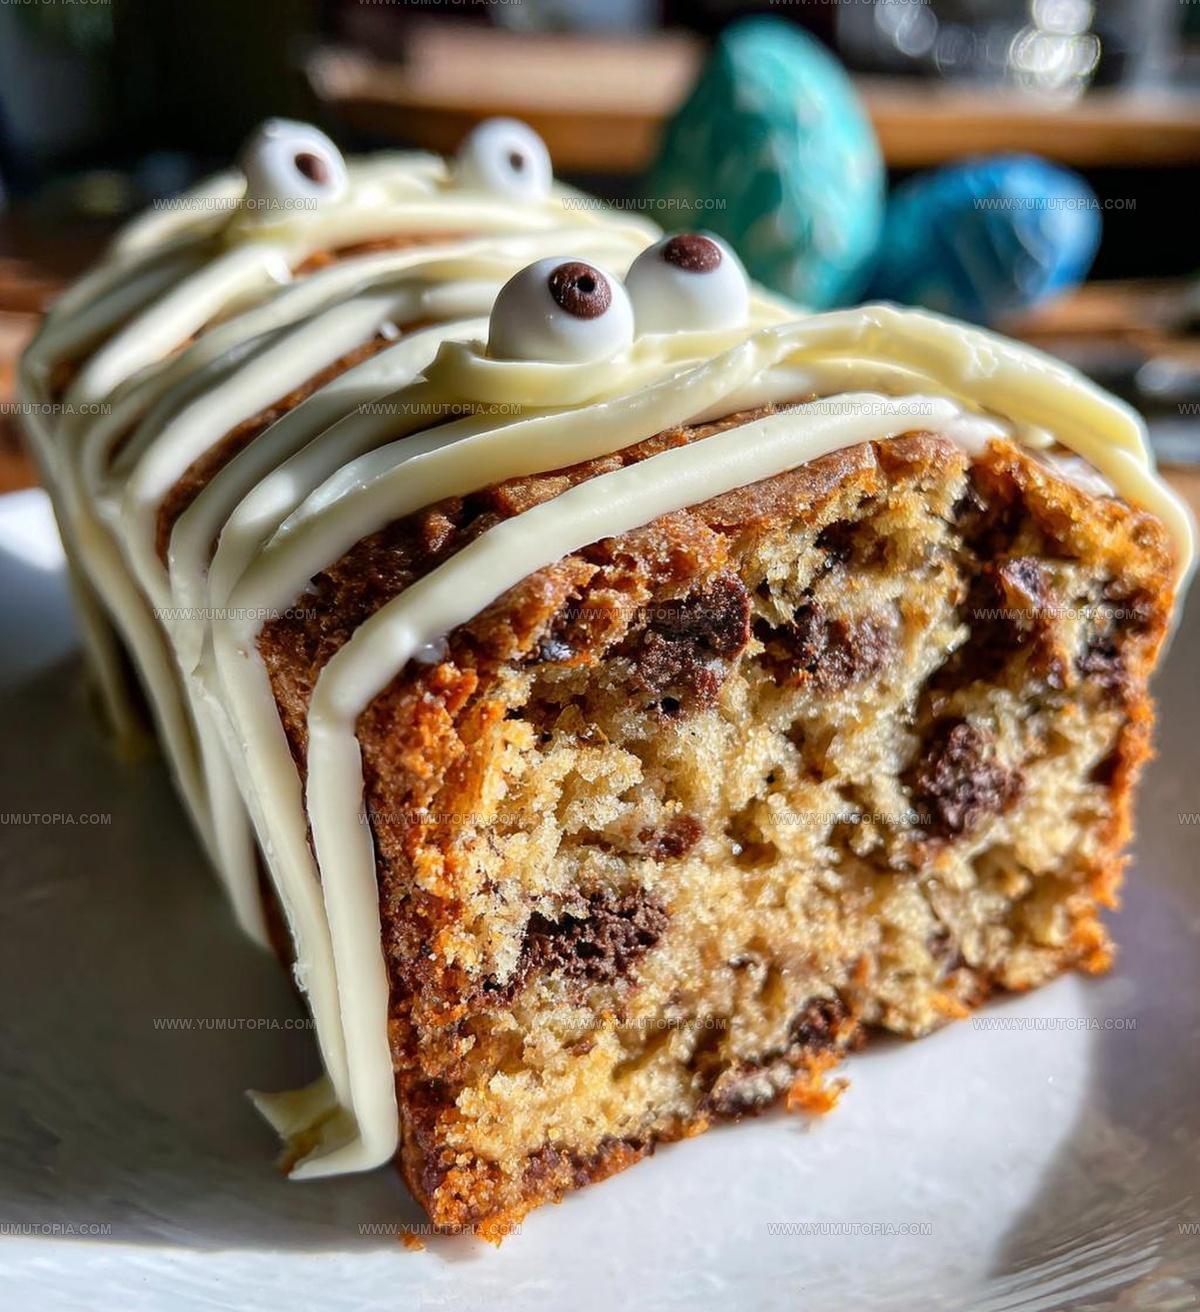
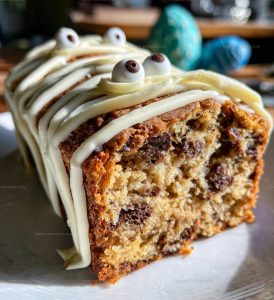
Sweet, moist layers wrapped in white frosting bandages make for an adorable centerpiece that looks impressive without requiring advanced baking skills.
Perfect for classroom parties, family gatherings, or seasonal get-togethers, it offers just the right balance of festive charm and delicious taste.
The combination of classic chocolate and vanilla flavors means everyone at the party will find something to love.
Simple decorating techniques help you achieve that wrapped mummy look in less time than expected.
When you need a showstopping dessert that sparks conversation and smiles, nothing quite matches the spooky-cute appeal of a dessert dressed up for the season.
Check out the full recipe below and watch how quickly it becomes a new October tradition.
Why You’ll Love Chocolate Chip Mummy Cake Fun
Chocolate Chip Mummy Cake Ingredient Overview
Dry Ingredients:Wet Ingredients:Mix-In Ingredients:Which Tools Are Essential for Chocolate Chip Mummy Cake?
Preparation Guide for Chocolate Chip Mummy Cake
Prep the Oven
Heat your oven to 350°F and grab a 9-inch cake pan. Quickly grease the inside with a thin layer of butter so your cake doesn’t stick.
Mix the Base
Grab a large mixing bowl and cream 1/2 cup softened unsalted butter with 1 cup granulated sugar until the mixture looks smooth and fluffy.
Add Moisture
Crack 2 large eggs into the butter-sugar mixture and pour in 1 teaspoon vanilla extract. Whisk everything together until completely combined.
Combine Dry Ingredients
In a separate bowl, measure out your dry ingredients:
Stir these together until they’re well blended.
Create the Batter
Slowly add the dry ingredient mixture to your wet ingredients. Pour in 1 cup of milk and mix until the batter looks silky and smooth.
Add Chocolate
Sprinkle 1 cup of chocolate chips into the batter. Gently fold them in so they’re evenly distributed throughout.
Bake the Cake
Pour the batter into your prepared pan. Slide the pan into the preheated oven and bake for 32-35 minutes. Check with a toothpick – it should come out clean when the cake is done.
Create Mummy Design
Let the cake cool completely. Use white icing to draw zigzag lines across the top, making it look like wrapped mummy bandages.
Easy Tips for Chocolate Chip Mummy Cake
Chocolate Chip Mummy Cake Flavor Changes
How to Present Chocolate Chip Mummy Cake
Chocolate Chip Mummy Cake Storage Notes
Chocolate Chip Mummy Cake Q&A
Can I use different types of chocolate chips?
Absolutely! Swap milk, dark, or white chocolate chips based on your chocolate preference. Each type creates a unique flavor profile.
How do I prevent chocolate chips from sinking?
Toss the chips in a bit of flour before adding them to the batter. This light coating helps them stay suspended while baking.
What if I don’t have vanilla extract?
No worries. Substitute with almond extract or maple syrup for a slightly different but delicious flavor twist.
Can I make this cake gluten-free?
Replace the all-purpose flour with a gluten-free flour blend. Just ensure your blend includes xanthan gum for better texture.
Do I need special tools to create the mummy design?
Not at all. A simple piping bag or even a zip-top bag with the corner snipped works perfectly for creating those spooky mummy bandage lines.
How can I make the cake extra moist?
Add an extra egg or substitute some butter with sour cream or Greek yogurt to boost moisture and richness.
Chocolate Chip Mummy Cake Recipe
- Total Time: 45-50 minutes
- Yield: 8 1x
Description
Chocolate Chip Mummy Cake brings Halloween magic right to your kitchen, wrapping sweet terror into a deliciously creepy dessert that sparks festive joy. Bandaged with white frosting and playful chocolate chip eyes, this spooky treat turns baking into a ghoulishly fun adventure.
Ingredients
Main Ingredients:
- 2 cups all-purpose flour
- 1 cup granulated sugar
- 1 cup chocolate chips
- 1 cup milk
- ½ cup unsalted butter, softened
- 2 large eggs
Supporting Ingredients:
- 1 teaspoon baking powder
- 1 teaspoon vanilla extract
- ½ teaspoon salt
Decorative Ingredient:
- White icing
Instructions
- Set your oven to precisely 350F and grease a 9-inch cake pan with butter.
- Cream ½ cup softened butter with 1 cup sugar until the mixture becomes light and fluffy.
- Crack 2 large eggs into the butter mixture and blend in 1 teaspoon vanilla extract until completely incorporated.
- Sift 2 cups flour with 1 teaspoon baking powder and ½ teaspoon salt in a separate container.
- Slowly integrate the dry ingredients into the wet mixture, stirring gently to prevent overmixing.
- Pour 1 cup milk into the batter, stirring until the consistency becomes smooth and even.
- Sprinkle 1 cup chocolate chips through the batter, distributing them evenly with a gentle folding motion.
- Transfer the batter into the prepared cake pan, spreading it uniformly with a spatula.
- Slide the pan into the preheated oven and bake for precisely 32 minutes.
- Test the cake’s doneness by inserting a toothpick into the center – it should emerge completely clean.
- Allow the cake to cool for 15 minutes at room temperature.
- Decorate the cooled cake surface with white icing, creating bandage-like strips to resemble a mummy’s wrappings.
Notes
- Check the chocolate chip distribution so each slice gets an even amount of chocolate.
- Carefully fold chocolate chips to prevent them from sinking to the bottom of the cake during baking.
- Ensure your cake pan is well-greased and lined with parchment paper for easy removal.
- When decorating with white icing to create mummy bandages, use a piping bag for clean, crisp lines that look like authentic wrapped bandages.
- Prep Time: 15 minutes
- Cook Time: 30-35 minutes
- Category: Cakes
- Method: Baking
- Cuisine: American
Nutrition
- Serving Size: 8
- Calories: 325 kcal
- Sugar: 24 g
- Sodium: 180 mg
- Fat: 15 g
- Saturated Fat: 9 g
- Unsaturated Fat: 5 g
- Trans Fat: 0.2 g
- Carbohydrates: 43 g
- Fiber: 2 g
- Protein: 5 g
- Cholesterol: 55 mg
Logan Lemaster
Founder & Culinary Innovator
Expertise
Recipe Development and Innovation, Menu Design and Optimization, Fine Dining Techniques, Ingredient Pairing and Flavor Science
Education
Metropolitan Culinary Arts Institute
Logan’s culinary journey kicked off in his vibrant Chicago family kitchen, where fresh, seasonal ingredients and bold flavors were always front and center.
After graduating from the Metropolitan Culinary Arts Institute in Arlington, Virginia, and honing his skills in renowned restaurants, Logan mastered the art of blending classic techniques with exciting, modern twists.
His kitchen is a dynamic lab for flavor exploration. Through Yum Utopia, Logan aims to empower you to cook with both confidence and creativity, turning simple ingredients into spectacular meals.