Chocolate Peanut Butter Cake Recipe That Combines Two Beloved Flavors
Chocolate peanut butter cake hits the perfect balance between rich cocoa and nutty sweetness that makes every celebration feel extra special.
Two beloved flavors come side by side in a dessert that feels both comforting and impressively decadent at the same time.
Birthdays, potlucks, and casual weekend gatherings all become more memorable when something so satisfying appears on the table.
The combination appeals to nearly everyone, from young dessert enthusiasts to adults who appreciate classic flavor pairings done right.
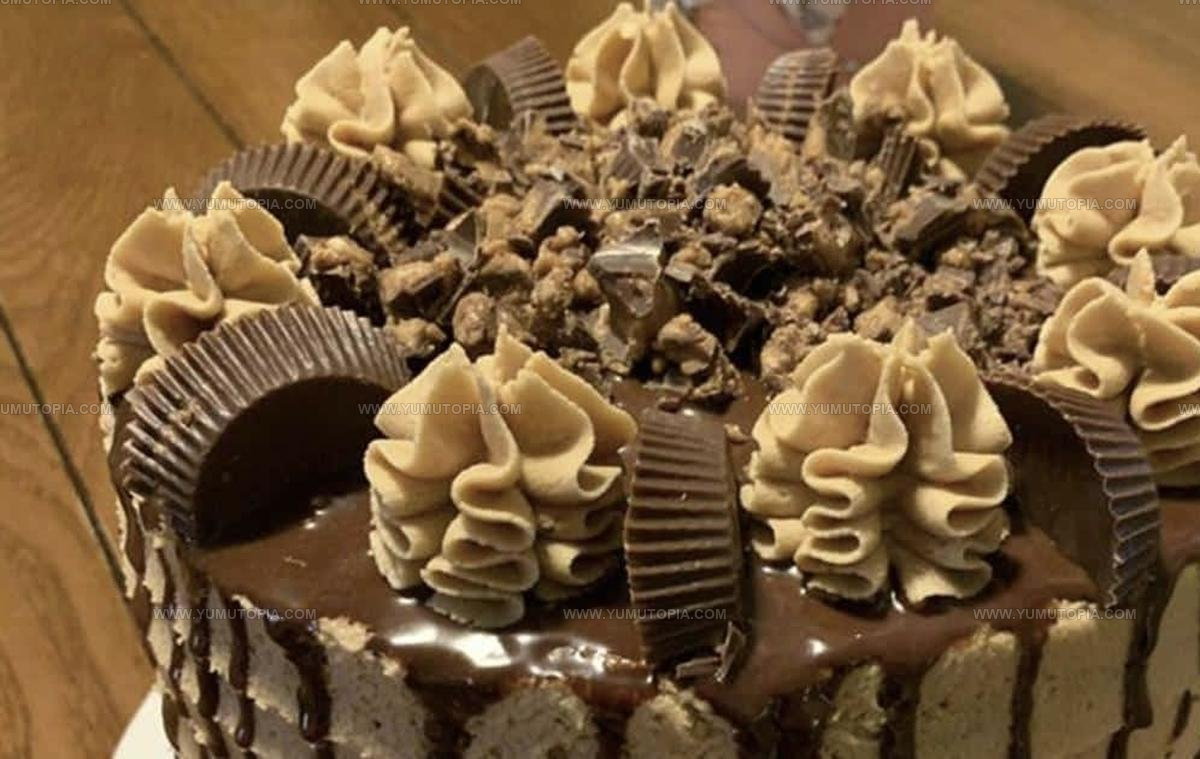
Moist layers and creamy elements work in harmony to create a treat that looks as stunning as it tastes.
Simple preparation techniques mean you can focus on enjoying time with loved ones instead of stressing in the kitchen.
That first bite reveals why some flavor combinations never go out of style and always earn requests for seconds.
Go make one today and watch it disappear faster than you ever expected.
Why Chocolate Peanut Butter Cake Always Delivers
Chocolate Peanut Butter Cake Ingredient Essentials
Chocolate Cake Dry Ingredients:Chocolate Cake Wet Ingredients:Peanut Butter Icing Ingredients:Simple Kitchen Equipment for Chocolate Peanut Butter Cake
How to Layer Chocolate Peanut Butter Cake
Prepare Peanut Butter Icing
Start this delicious adventure by making the icing a day ahead if possible. Grab your mixer and these ingredients:
Cream everything together until smooth and fluffy.
Complete Icing Mixture
Add these ingredients to your creamed mixture:
Mix on medium speed for 3 to 5 minutes until everything blends perfectly. Let the icing sit at room temperature, covered with plastic wrap.
Mix Dry Cake Ingredients
Grab a large mixing bowl and combine these dry ingredients:
Combine Wet Cake Ingredients
In a separate bowl, whisk together these wet ingredients:
Create Cake Batter
Slowly add the dry ingredients to the wet ingredients. If using a mixer, blend on low speed until everything combines smoothly.
Prepare Baking Pans
Grease two 9-inch cake pans with non-stick spray and dust with flour. Divide the batter evenly between the pans.
Bake the Cake
Preheat the oven to 350°F. Bake the cake for 22-25 minutes until a toothpick comes out clean.
Cool and Layer Cake
Let the cakes cool completely. Carefully slice each cake layer in half horizontally.
First Icing Layer
Spread a thin layer of peanut butter icing between each cake layer. Refrigerate for 20 minutes to set the crumbs.
Final Icing
Cover the entire cake with a final smooth layer of peanut butter icing. Optional: Decorate with chopped peanut butter cups on top.
Practical Cooking Insight for Chocolate Peanut Butter Cake
Flavor Options for Chocolate Peanut Butter Cake
How To Serve Chocolate Peanut Butter Cake
What’s The Proper Storage For Chocolate Peanut Butter Cake
Chocolate Peanut Butter Cake Helpful FAQs
Can I use butter instead of margarine?
Butter works perfectly fine and will give the frosting a rich, creamy texture. Just make sure it’s softened to room temperature before mixing.
How do I know if my cake layers are done baking?
Test the cake by inserting a toothpick into the center. If it comes out clean with no wet batter, your cake is ready.
What’s the best way to keep my cake layers even when cutting?
Use a long serrated knife and rotate the cake slowly as you cut. Work gently and keep the knife level to create smooth, consistent layers.
Can I make this cake gluten-free?
Swap the all-purpose flour for a gluten-free flour blend. Check that all your ingredients are certified gluten-free to ensure safe preparation.
How do I prevent air bubbles in the frosting?
Beat the frosting on medium speed and scrape down the sides of the bowl regularly. This helps create a smooth, consistent texture without unwanted air pockets.
Why should I do a crumb coat before final frosting?
The crumb coat seals in loose cake crumbs, creating a clean, professional-looking final layer of frosting that looks smooth and polished.

Chocolate Peanut Butter Cake Recipe
- Total Time: 45-50 minutes
- Yield: 12 1x
Description
Chocolate peanut butter cake brings pure comfort right to your kitchen table, blending rich chocolate with creamy peanut butter for a seriously delicious dessert. Grab your mixing bowl and get ready to create a classic treat that’ll make your taste buds dance with joy.
Ingredients
Main Ingredients:
- 2 Cups Sugar
- 3 Cups Flour
- 1 Cup Vegetable Oil
- 2 Eggs
- 1 to 2 Cups Peanut Butter
- 14 Ounces Butter
- 4 Ounces Margarine
- 4 Ounces Shortening
- 4 Cups Powdered Sugar
Supporting Ingredients:
- ½ Cup Cocoa
- 2 Teaspoons Baking Soda
- 1 Teaspoon Salt
Flavor Enhancers:
- 2 Teaspoons Vanilla
- 1 Cup Water
Instructions
- Whip 14 oz softened butter, 4 oz margarine, 4 oz shortening, and 2 tsp vanilla together in a large mixing bowl for 3 minutes until smooth and creamy.
- Gradually incorporate 4 cups powdered sugar and 1-2 cups peanut butter into the butter mixture. Beat on medium speed for 3-5 minutes until fully blended.
- Cover icing with plastic wrap and let sit at room temperature for 24 hours to develop flavor.
- Preheat oven to 350°F and prepare two 9-inch cake pans by spraying with non-stick spray and dusting with flour.
- Combine 3 cups flour, ½ cup cocoa, 2 cups sugar, 1 tsp salt, and 2 tsp baking soda in one mixing bowl.
- Whisk 2 eggs, 1 cup vegetable oil, 2 tsp vanilla, and 1 cup water in a separate bowl until well mixed.
- Slowly fold dry ingredients into wet ingredients, mixing on low speed until just combined.
- Divide cake batter evenly between prepared pans and spread smoothly.
- Bake at 350°F for 22-25 minutes until a toothpick inserted in center comes out clean.
- Allow cakes to cool completely on wire rack for 1 hour.
- Slice each cake horizontally to create four layers using a serrated knife.
- Apply thin layer of peanut butter icing between each cake layer, stacking carefully.
- Coat entire cake with thin crumb layer of icing and refrigerate for 20 minutes.
- Apply final thick layer of icing, covering cake completely.
- Optionally decorate top with chopped peanut butter cups for extra flair.
Notes
- Prepare the icing a day ahead to let flavors develop and make spreading easier.
- Cream ingredients thoroughly to ensure a smooth, lump-free frosting that spreads beautifully.
- Room temperature ingredients blend more evenly, so take butter and margarine out of the fridge 30 minutes before mixing.
- For a gluten-free version, swap regular flour with a cup-for-cup gluten-free baking blend and check that all other ingredients are gluten-free.
- Prep Time: 20-25 minutes
- Cook Time: 22-25 minutes
- Category: Cakes
- Method: Baking
- Cuisine: American
Nutrition
- Serving Size: 12
- Calories: 633
- Sugar: 70 g
- Sodium: 351 mg
- Fat: 44 g
- Saturated Fat: 16 g
- Unsaturated Fat: 27 g
- Trans Fat: 1.5 g
- Carbohydrates: 67 g
- Fiber: 3.2 g
- Protein: 8.4 g
- Cholesterol: 45 mg
Madison Wyman
Recipe Developer & Food Storyteller
Expertise
Recipe Research and Adaptation, Food Writing and Cultural Storytelling, Sustainable and Ethical Sourcing, Dietary Adaptations (e.g., gluten-free, plant-based)
Education
Oregon Health & Science University
Portland Community College
Madison’s passion for flavor and culture ignited amidst the rich Southern cooking traditions of her upbringing, where cherished family recipes told delicious tales.
Armed with a Master’s in Food Systems and Society from Oregon Health & Science University and a Culinary Arts Certificate from Portland Community College, Madison truly excels at transforming rich, intricate flavors into dishes that are both approachable and heartfelt.
For her, cooking is a vibrant blend of science, art, and heritage – a powerful way to connect us to our roots and each other. Her recipes invite you to delve deeper, uncovering the fascinating stories woven into every ingredient.