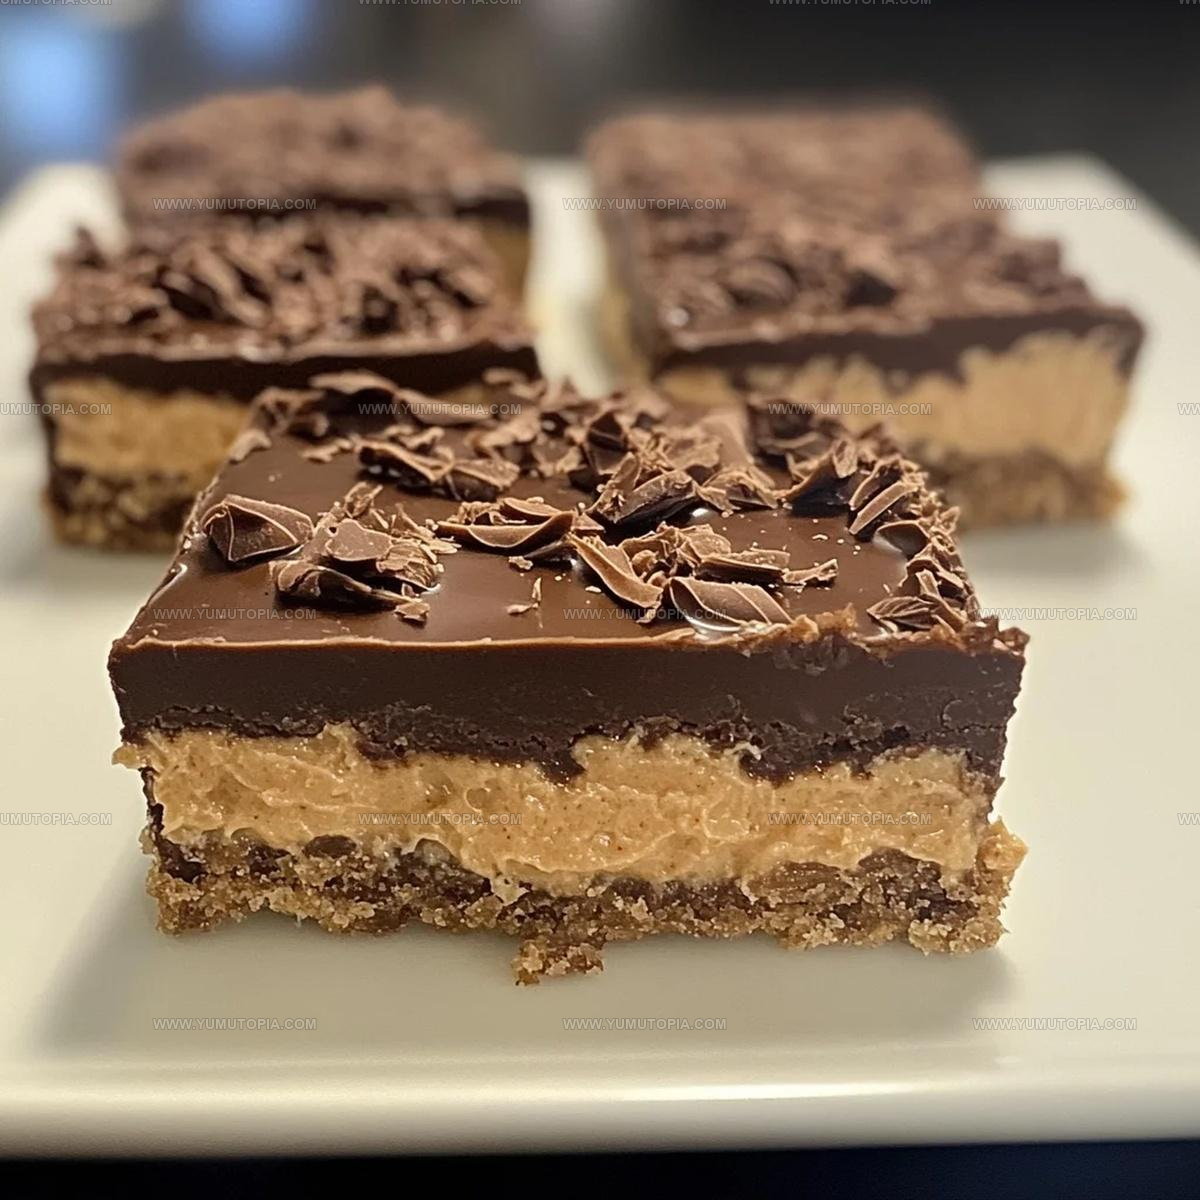
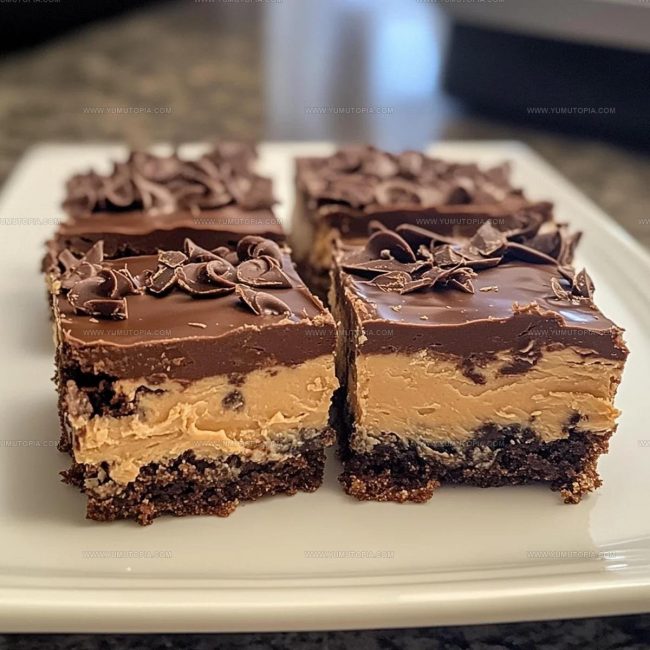
Chocolate Peanut Butter Dream Bars Recipe That Melts in Your Mouth
Decadent chocolate peanut butter dream bars promise pure dessert magic that satisfies deep chocolate cravings.
Sweet and rich flavor combinations never fail to spark joy among dessert enthusiasts.
Creamy chocolate layers complemented by nutty undertones create an irresistible treat perfect for special moments.
Dessert lovers understand the powerful connection between chocolate and peanut butter, a classic pairing that feels simultaneously familiar and extraordinary.
Smooth textures and intense flavors merge into one seriously stunning confection that demands attention.
Minimal effort yields maximum deliciousness, making these bars an ideal solution for impromptu celebrations or sudden sweet tooth emergencies.
Your taste buds are about to experience pure bliss with every single bite.
What Makes Chocolate Peanut Butter Dream Bars So Rich
Chocolate Peanut Butter Dream Bars Ingredient List
Crust Base:Cream Layer:Chocolate Pudding Layer:Topping Layer:Optional Garnish:What Tools Do You Need for Chocolate Peanut Butter Dream Bars
Simple Way to Make Chocolate Peanut Butter Dream Bars
Crush the Cookies
Grab your food processor and toss in 26 Oreo sandwich cookies. Pulse until the cookies turn into fine crumbs. Melt 6 tablespoons of unsalted butter and pour it over the cookie crumbs. Mix until the crumbs are completely coated and look like wet sand.
Create the Crust
Press the buttery cookie mixture into the bottom of a greased 9×13-inch baking dish. Use the back of a spoon or your fingers to pack it down firmly and create an even layer that covers the entire bottom of the pan.
Whip the Cream Cheese Layer
In a mixing bowl, beat 8 ounces of cream cheese until it becomes smooth and creamy. Add these ingredients:
Blend everything until the mixture is completely smooth and free of lumps. Carefully spread this cream cheese mixture over the Oreo crust, making sure to cover it evenly.
Prepare the Chocolate Pudding
Open the 3.9-ounce box of instant chocolate pudding mix. Whisk the powder with 1 cup of cold whole milk for exactly 2 minutes. The mixture will start to thicken and become pudding-like. Spread this chocolate layer over the cream cheese layer, creating a neat and even surface.
Craft the Peanut Butter Whipped Cream
In a large bowl, pour 1 1/2 cups cold heavy cream. Add these ingredients:
Whip the cream until stiff peaks form. Gently fold in 1/2 cup creamy peanut butter, making sure not to deflate the whipped cream.
Top and Decorate
Spread the peanut butter whipped cream over the chocolate pudding layer. If you want extra richness, grate 1/2 of a chocolate bar on top.
Chill and Set
Place the baking dish in the refrigerator for at least 4 hours, or preferably overnight. This allows all the layers to set and the flavors to meld together perfectly.
Slice and Serve
Remove the dish from the refrigerator. Cut into neat squares and serve chilled. Each bite will be a delicious combination of chocolate, peanut butter, and creamy goodness.
Helpful Cooking Notes For Chocolate Peanut Butter Dream Bars
Flavorful Options For Chocolate Peanut Butter Dream Bars
Classic Serving Ideas For Chocolate Peanut Butter Dream Bars
Proper Storage Guide For Chocolate Peanut Butter Dream Bars
Chocolate Peanut Butter Dream Bars Popular Questions
Can I use reduced-fat cream cheese?
Absolutely! Reduced-fat cream cheese works perfectly and helps keep the dessert lighter without sacrificing flavor.
How do I know when the whipped cream is ready?
When your whipped cream forms stiff peaks that stand straight up without falling over, it’s ready to fold in the peanut butter.
What if my pudding doesn’t thicken quickly?
Whisk the pudding mix and milk thoroughly, and let it sit for exactly 2 minutes. If it seems runny, continue whisking for another 30 seconds.
Should the ingredients be at room temperature?
Keep the cream cheese slightly cool and the heavy cream very cold for the best texture and stability.
Can I substitute a different cookie for the Oreo crust?
Chocolate graham crackers or chocolate sandwich cookies work great as alternatives to Oreos.
How do I get clean, neat slices?
Run your knife under hot water and wipe it dry between each cut to create smooth, precise squares.

Chocolate Peanut Butter Dream Bars Recipe
- Total Time: 20 minutes
- Yield: 9 1x
Description
Chocolate peanut butter dream bars deliver a perfect combo of creamy peanut butter and rich chocolate that’ll make your taste buds dance. These no-bake treats come together quickly and taste like pure bliss with their smooth layers and irresistible crunch.
Ingredients
Chocolate Base:
- 26 Oreo sandwich cookies
- 6 tablespoons unsalted butter
- ¼ teaspoon kosher salt
Filling:
- 8 ounces cream cheese
- 1 (3.9-ounce) box instant chocolate pudding mix
- 1 ½ cups cold whole or 2% milk
- ½ cup creamy peanut butter
- ¾ cup powdered sugar
Topping:
- 1 ½ cups cold heavy cream
- 2 tablespoons powdered sugar
- ¼ teaspoon kosher salt
- ½ cup plus 1 tablespoon creamy peanut butter
- ½ (about 2-ounce) bar dark or milk chocolate
Instructions
- Pulverize 26 Oreo cookies (10 ½ ounces) in a food processor until they become fine crumbs. Melt 6 tablespoons of unsalted butter and combine thoroughly with the cookie crumbs.
- Transfer the buttery cookie mixture into a 9×13-inch baking dish. Press firmly to create an even, compact crust across the bottom of the pan.
- Beat 8 ounces of cream cheese until completely smooth. Add ½ cup cold milk and ½ cup powdered sugar, mixing until the texture becomes creamy and uniform.
- Spread the cream cheese mixture carefully and evenly across the Oreo cookie crust, ensuring complete coverage.
- Whisk the 3.9-ounce chocolate pudding mix with 1 cup cold milk for approximately 2 minutes until the mixture thickens significantly.
- Distribute the chocolate pudding layer smoothly over the cream cheese layer, creating an even surface.
- Pour 1 ½ cups cold heavy cream into a large mixing bowl. Whip with 2 tablespoons powdered sugar and ½ teaspoon kosher salt until stiff peaks develop.
- Gently incorporate ½ cup creamy peanut butter into the whipped cream, maintaining the light and airy texture.
- Carefully spread the peanut butter whipped cream across the chocolate pudding layer, creating a smooth final layer.
- Optionally, grate ½ bar of dark or milk chocolate on top for additional richness.
- Refrigerate the bars for a minimum of 4 hours, preferably overnight, to ensure complete setting.
- Slice into square portions and serve chilled directly from the refrigerator.
Notes
- Always crush Oreos super fine for a smooth, compact crust that holds together perfectly when cutting the bars.
- Make sure cream cheese is completely room temperature to prevent lumps and create a silky, spreadable layer.
- Whip the heavy cream until stiff peaks form, but don’t overbeat, or the texture will become grainy and less creamy.
- Refrigerating overnight lets the layers set and allows flavors to meld, creating a more intense and harmonious dessert.
- Prep Time: 20 minutes
- Cook Time: 0 minutes
- Category: Dessert Bars
- Method: Blending
- Cuisine: American
Nutrition
- Serving Size: 9
- Calories: 321 kcal
- Sugar: 24 g
- Sodium: 210 mg
- Fat: 23 g
- Saturated Fat: 10 g
- Unsaturated Fat: 11 g
- Trans Fat: 0.3 g
- Carbohydrates: 26 g
- Fiber: 1 g
- Protein: 5 g
- Cholesterol: 50 mg
Madison Wyman
Recipe Developer & Food Storyteller
Expertise
Recipe Research and Adaptation, Food Writing and Cultural Storytelling, Sustainable and Ethical Sourcing, Dietary Adaptations (e.g., gluten-free, plant-based)
Education
Oregon Health & Science University
Portland Community College
Madison’s passion for flavor and culture ignited amidst the rich Southern cooking traditions of her upbringing, where cherished family recipes told delicious tales.
Armed with a Master’s in Food Systems and Society from Oregon Health & Science University and a Culinary Arts Certificate from Portland Community College, Madison truly excels at transforming rich, intricate flavors into dishes that are both approachable and heartfelt.
For her, cooking is a vibrant blend of science, art, and heritage – a powerful way to connect us to our roots and each other. Her recipes invite you to delve deeper, uncovering the fascinating stories woven into every ingredient.