
Chocolate Snowball Cookies Recipe for Cozy Baking Days
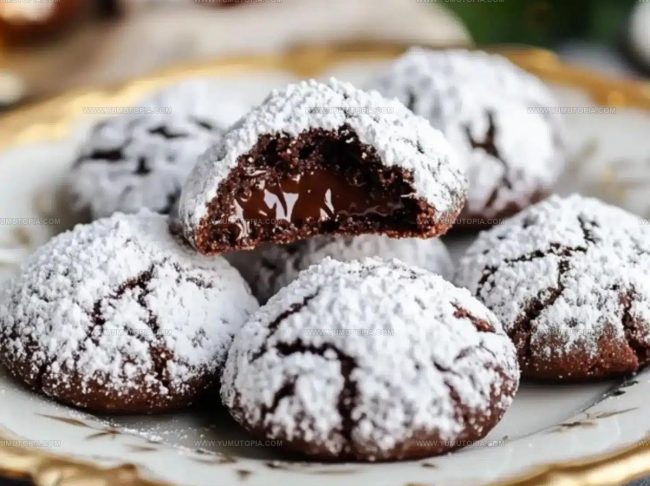
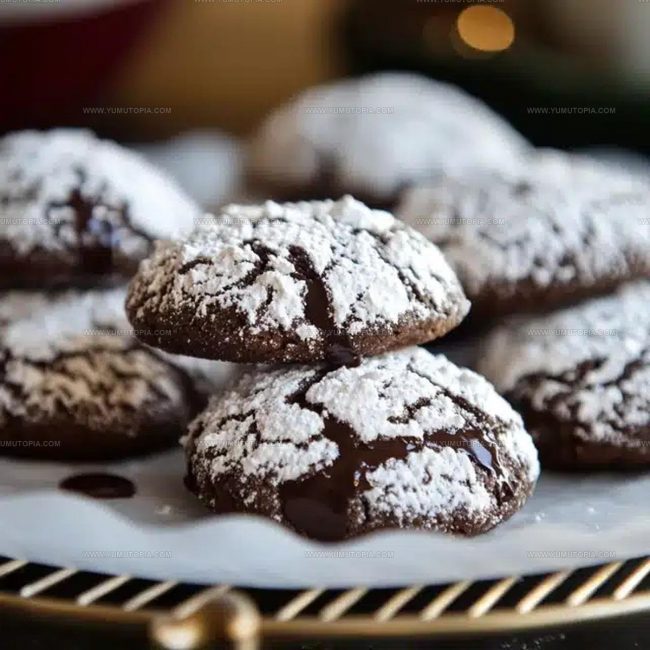
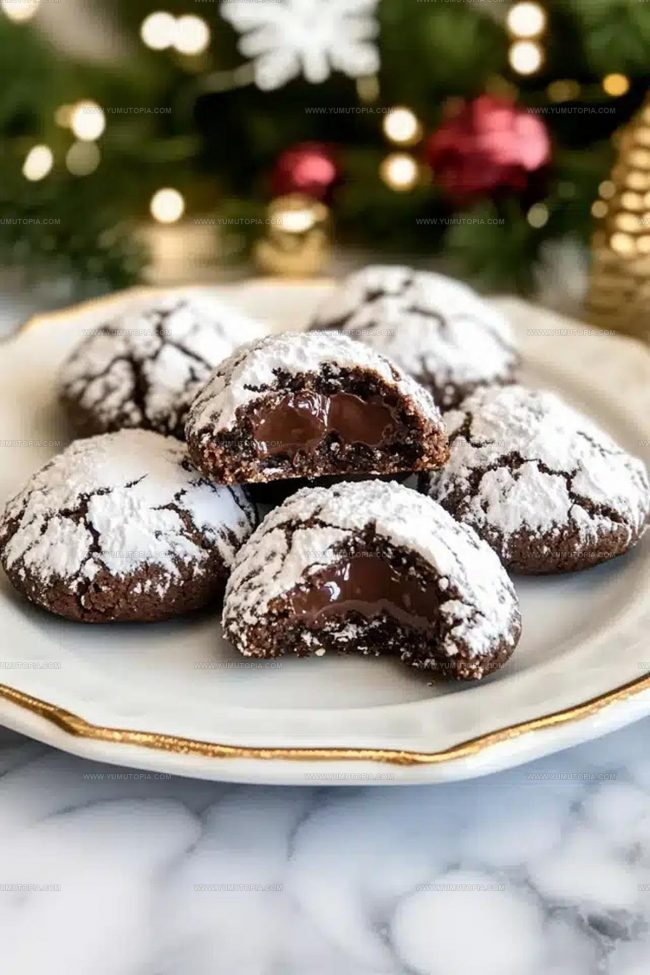
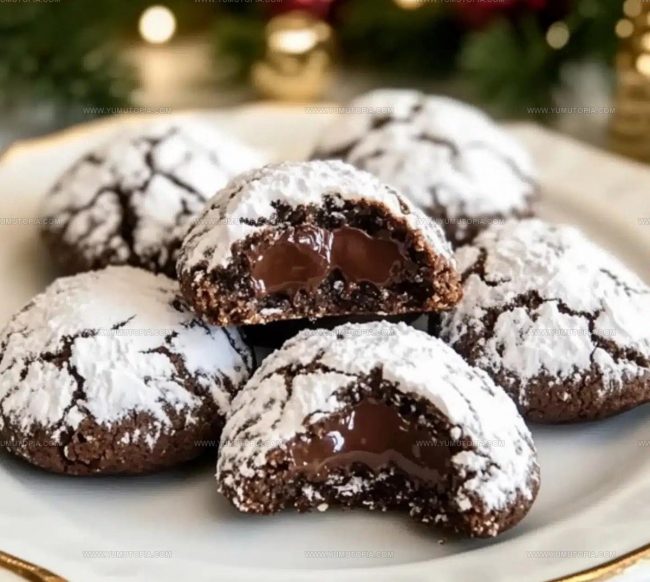
Chocolate snowball cookies deliver pure joy in every bite with their melt-in-your-mouth texture and festive appearance.
These delightful treats have earned a special place at holiday gatherings and winter celebrations for generations.
The contrast between their rich, dark interior and snowy white coating makes them as beautiful as they are delicious.
Bakers of all skill levels find success with this recipe, making it perfect for both seasoned cookie enthusiasts and kitchen newcomers.
Each cookie offers a moment of comfort during cold weather or adds sweetness to any special occasion.
The appeal extends far beyond the holiday season since people crave them year-round.
Treat yourself to homemade goodness that’s easier than you might expect!
What Gives These Chocolate Snowball Cookies Their Melt-In-Your-Mouth Appeal
Why Everyone Loves The Delicate Texture Of Chocolate Snowball Cookies
Tools Supporting Round, Powdery Cookie Shapes
Steps Crafting Tender Chocolate Snowballs
Prepare Baking Station
Grab your baking sheets and line them with parchment paper. Preheat the oven to 175°C (350°F). Having your workspace ready makes the whole cookie-making process smoother.
Cream Butter and Sugar
Take 1 cup (226 g) of softened unsalted butter and ½ cup (60 g) powdered sugar. Beat them together in a large bowl until the mixture becomes light and fluffy. This should take about 2-3 minutes with a hand mixer. Your arm will thank you for using an electric mixer!
Add Flavor Boost
Pour in 1 teaspoon of vanilla extract. Stir it into the butter mixture until it’s completely combined. The vanilla adds a wonderful depth that makes these cookies extra special.
Mix Dry Ingredients
In a separate bowl, combine your dry ingredients:
Whisk these together until they’re well blended and no cocoa clumps remain.
Combine Dough
Slowly add the dry ingredient mixture to the butter mixture. Mix until just combined. The dough should feel soft but not sticky.
Chocolate Chip Magic
Fold in ¾ cup (135 g) of mini chocolate chips. Distribute them evenly throughout the dough so every bite gets some chocolate goodness.
Shape the Cookies
Roll the dough into small balls, about a tablespoon in size. Place them on your prepared baking sheets, leaving about 2 inches between each cookie.
Bake to Perfection
Slide the baking sheets into the preheated oven. Bake for 10-12 minutes at 175°C (350°F). The cookies won’t spread much and should look slightly set but not too firm.
Powdered Sugar Coating
Let the cookies cool for 5 minutes. While they’re still slightly warm, roll them in powdered sugar. Once completely cooled, give them another generous coating of powdered sugar. This creates that classic snowball look that makes these cookies so charming.
Flavor Add-Ons Creating Deeper Cocoa Notes
Snowball Variations for Seasonal Spins
Ways to Serve Festive Chocolate Snowball Cookies
Storage Notes for Soft, Powdered Bites
Snowball Cookie Questions People Ask
Why do the cookies need two dustings of powdered sugar?
The first coating helps the sugar stick to the warm cookie, while the second coating after cooling creates that classic snow-white look that makes these treats so festive.
Can I use regular chocolate chips instead of mini ones?
Mini chocolate chips distribute more evenly and melt better in the dough, but standard chocolate chips will work if that’s what’s in your pantry.
How do I know when the dough is the right consistency?
The dough should hold together when you roll it into a ball without cracking. If it feels too dry, add a tiny splash of milk to help bind it.
Are these cookies crispy or soft?
These cookies have a tender, soft texture that practically melts in your mouth, with a slight crumbly quality from the powdered sugar coating.
Can children help make these cookies?
Absolutely! Rolling the dough into balls and coating them in powdered sugar are perfect tasks for little hands to help with.
What makes these different from traditional snowball cookies?
The cocoa powder gives these a rich chocolate twist on the classic recipe, making them extra special and decadent.

Chocolate Snowball Cookies Recipe
- Total Time: 25-30 minutes
- Yield: 24 1x
Description
Chocolate Snowball Cookies deliver a delightful winter treat straight from grandma’s kitchen. Dusted with powdered sugar and packed with rich cocoa flavor, these tender morsels melt in your mouth and bring pure comfort to your holiday table.
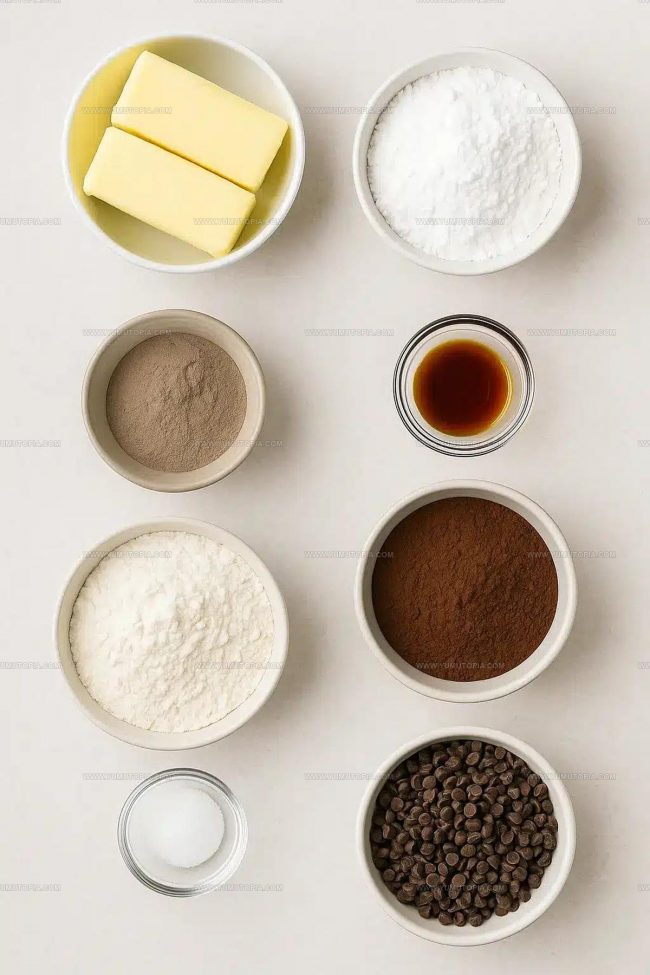
Ingredients
Primary Ingredients:
- 1 cup (226 g) unsalted butter, softened
- 2 cups (240 g) all-purpose flour
- ½ cup (50 g) unsweetened cocoa powder
- ¾ cup (135 g) mini chocolate chips
Supporting Ingredients:
- ½ cup (60 g) powdered sugar, plus extra for coating
- 1 teaspoon vanilla extract
Finishing Ingredients:
- ¼ teaspoon salt
Instructions
- Preheat the oven to 175°C (350°F) and line two baking sheets with parchment paper for even baking and easy cleanup.
- In a large mixing bowl, cream 226 grams (1 cup) of softened unsalted butter with 60 grams (½ cup) powdered sugar for 2-3 minutes until light and fluffy.
- Add 1 teaspoon vanilla extract and blend thoroughly to enhance the chocolate flavor.
- Separately whisk 240 grams (2 cups) all-purpose flour, 50 grams (½ cup) unsweetened cocoa powder, and ¼ teaspoon salt until no clumps remain.
- Gradually incorporate dry ingredients into butter mixture, stirring until just combined. The dough should feel soft but not sticky.
- Fold 135 grams (¾ cup) mini chocolate chips evenly throughout the dough.
- Roll tablespoon-sized portions into small balls and place them 5 centimeters (2 inches) apart on prepared baking sheets.
- Bake for 10-12 minutes at 175°C (350°F). The cookies should look slightly set but not completely firm.
- Allow cookies to cool for 5 minutes, then roll them while warm in powdered sugar.
- Once completely cooled, dust the cookies again with powdered sugar for that classic snowball appearance.
Notes
- Toast the pecans before chopping to enhance their nutty flavor and add depth to the cookie’s taste.
- Chill the dough for 30 minutes before rolling to prevent sticky hands and help cookies maintain their shape.
- Roll cookies in powdered sugar while still warm for a more even, delicate coating that melts slightly into the surface.
- Use room temperature butter to ensure smooth mixing and a consistent cookie texture that’s neither too crumbly nor too dense.
- Prep Time: 15-18 minutes
- Cook Time: 10-12 minutes
- Category: Cookies
- Method: Baking
- Cuisine: American
Nutrition
- Serving Size: 24
- Calories: 153
- Sugar: 4 g
- Sodium: 12 mg
- Fat: 9 g
- Saturated Fat: 5 g
- Unsaturated Fat: 4 g
- Trans Fat: 0.1 g
- Carbohydrates: 17 g
- Fiber: 2 g
- Protein: 2 g
- Cholesterol: 23 mg
Logan Lemaster
Founder & Culinary Innovator
Expertise
Recipe Development and Innovation, Menu Design and Optimization, Fine Dining Techniques, Ingredient Pairing and Flavor Science
Education
Metropolitan Culinary Arts Institute
Logan’s culinary journey kicked off in his vibrant Chicago family kitchen, where fresh, seasonal ingredients and bold flavors were always front and center.
After graduating from the Metropolitan Culinary Arts Institute in Arlington, Virginia, and honing his skills in renowned restaurants, Logan mastered the art of blending classic techniques with exciting, modern twists.
His kitchen is a dynamic lab for flavor exploration. Through Yum Utopia, Logan aims to empower you to cook with both confidence and creativity, turning simple ingredients into spectacular meals.