Chocolate Spider Cookies Recipe for a Fun Halloween Treat
Chocolate Spider Cookies turn any gathering into a memorable celebration with their playful charm and delicious flavor.
Perfect for Halloween parties or anytime you want to add a touch of whimsy to dessert, they bring smiles to faces of all ages.
Sweet, rich, and undeniably fun, they strike the perfect balance between festive and satisfying.
They’re surprisingly simple to prepare, making them ideal when you need an impressive treat without spending hours in the kitchen.
Whether you’re planning a spooky party or just want something different for afternoon snacks, they deliver exactly what you need.
The combination of chocolate and creative presentation makes them a standout choice that never fails to impress.
Go bake a batch that will have everyone asking for seconds and requesting the recipe.
Why You’ll Love Playful Chocolate Spider Cookies
Chocolate Spider Cookie Ingredient List
Base Ingredients:Dry Ingredients:Decorative and Flavor Ingredients:What Baking Tools Are Needed for Chocolate Spider Cookies?
Easy Decorating Steps for Chocolate Spider Cookies
Warm Up the Oven
Heat the oven to precisely 350°F (175°C). This temperature ensures perfect cookie texture.
Blend Butter and Sugars
Grab a large mixing bowl and cream together 1 cup softened unsalted butter, 1 cup granulated sugar, and 1 cup packed brown sugar until the mixture looks smooth and fluffy.
Add Moisture and Flavor
Crack 2 large eggs into the sugar mixture and pour in 2 teaspoons vanilla extract. Mix everything until completely combined.
Prepare Dry Ingredients
In a separate bowl, whisk together:
Blend these dry ingredients thoroughly.
Combine Wet and Dry Mixtures
Slowly add the dry ingredient mixture to your wet ingredients. Stir gently until just combined.
Add Chocolate Chunks
Fold 2 cups chocolate chips into the cookie dough. Make sure they’re evenly distributed.
Shape the Cookies
Drop spoonfuls of dough onto an ungreased baking sheet, leaving space between each cookie.
Bake to Golden Perfection
Slide the baking sheet into the preheated oven. Bake for exactly 10-12 minutes until the cookie edges turn golden brown.
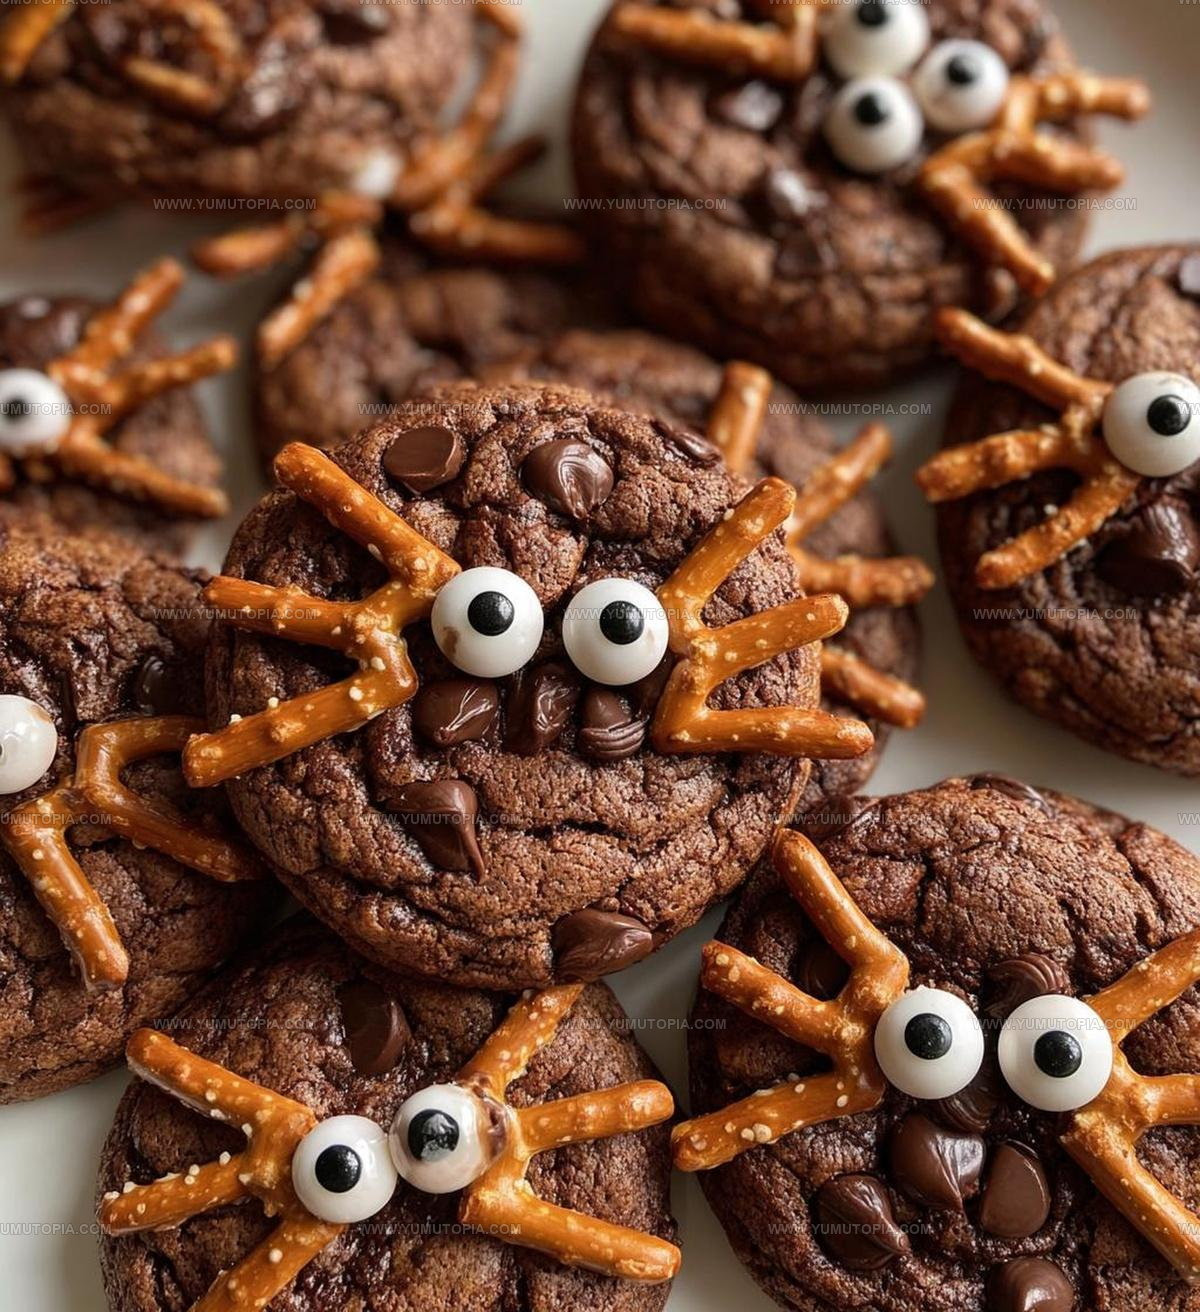
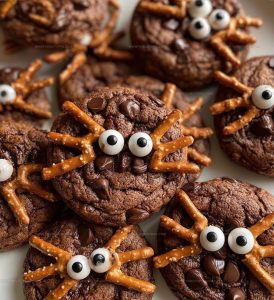
Create Spooky Spider Design
After cookies cool completely, transform them into spooky spiders:
Serve and watch everyone smile!
Helpful Tricks for Fun Chocolate Spider Cookies
How Can Chocolate Spider Cookie Variations Look Spooky
How to Serve Chocolate Spider Cookies
Storage Notes for Chocolate Spider Cookies
Chocolate Spider Cookies Frequently Asked Questions
Can I make these cookies ahead of time?
You can prepare the dough up to 3 days in advance and refrigerate it. Just wrap the dough tightly in plastic wrap and store in the refrigerator until ready to bake.
Are chocolate chips necessary for this recipe?
While chocolate chips add extra flavor, you could substitute with chopped chocolate or leave them out completely if desired.
What type of pretzels work best for spider legs?
Thin pretzel sticks are perfect. They create the most realistic spider leg effect and provide a nice salty crunch against the sweet cookie.
Do I need special candy eyes or can I make them?
Candy eyes are easiest, but you can also use white and black icing to create spider eyes if needed.
Can kids help make these spider cookies?
Absolutely! Decorating the cookies with legs and eyes is a fun activity that children will enjoy. Just supervise them near the hot oven.
How long do these cookies stay fresh?
Store in an airtight container at room temperature for 4-5 days. The pretzels might lose some crispness after a couple days.
Chocolate Spider Cookies Recipe
- Total Time: 25-27 minutes
- Yield: 24 1x
Description
Halloween baking gets seriously fun with chocolate spider cookies that will make your friends do a delightful double-take. Creepy-crawly treats come together with simple ingredients and a playful decorating twist that turns an ordinary cookie into a spooky sensation.
Ingredients
Cookies:
- 1 cup unsalted butter
- 1 cup granulated sugar
- 1 cup brown sugar
- 2 large eggs
- 3 cups all-purpose flour
- 2 cups chocolate chips
Flavor Enhancers:
- 2 teaspoons vanilla extract
- 1 teaspoon baking soda
- ½ teaspoon salt
Decorations:
- 1 cup pretzel sticks
- 1 cup candy eyes
Instructions
- Activate your oven to precisely 350F and prepare two baking sheets with parchment paper.
- Combine 1 cup softened butter with 1 cup granulated sugar and 1 cup brown sugar in a mixing bowl, blending until creamy and smooth.
- Crack 2 large eggs and add 2 teaspoons vanilla extract, stirring until fully incorporated.
- Sift 3 cups all-purpose flour with 1 teaspoon baking soda and ½ teaspoon salt in a separate bowl.
- Slowly integrate dry ingredients into butter mixture, stirring until a consistent dough forms.
- Gently fold 2 cups chocolate chips throughout the dough, distributing evenly.
- Scoop rounded tablespoon-sized portions of dough onto prepared baking sheets, spacing 2 inches apart.
- Bake at 350F for exactly 11 minutes, watching for golden brown edges.
- Remove cookies and let cool completely on wire rack for 15 minutes.
- Insert 4 pretzel sticks around each cookie’s edge to create spider legs.
- Attach 2 candy eyes on top center of each cookie using a dab of melted chocolate.
Notes
- Swap out regular chocolate chips for dark or white chocolate to change up the flavor profile.
- Chill the dough for 30 minutes before baking to prevent spreading and create thicker cookies.
- Use room temperature butter and eggs for smoother, more evenly mixed cookie dough.
- Avoid overmixing the dough, which can make the cookies tough and dense instead of soft and chewy.
- Prep Time: 15 minutes
- Cook Time: 10-12 minutes
- Category: Cookies
- Method: Baking
- Cuisine: American
Nutrition
- Serving Size: 24
- Calories: 251
- Sugar: 16 g
- Sodium: 114 mg
- Fat: 13 g
- Saturated Fat: 7 g
- Unsaturated Fat: 6 g
- Trans Fat: 0.2 g
- Carbohydrates: 33 g
- Fiber: 1 g
- Protein: 3 g
- Cholesterol: 30 mg
Madison Wyman
Recipe Developer & Food Storyteller
Expertise
Recipe Research and Adaptation, Food Writing and Cultural Storytelling, Sustainable and Ethical Sourcing, Dietary Adaptations (e.g., gluten-free, plant-based)
Education
Oregon Health & Science University
Portland Community College
Madison’s passion for flavor and culture ignited amidst the rich Southern cooking traditions of her upbringing, where cherished family recipes told delicious tales.
Armed with a Master’s in Food Systems and Society from Oregon Health & Science University and a Culinary Arts Certificate from Portland Community College, Madison truly excels at transforming rich, intricate flavors into dishes that are both approachable and heartfelt.
For her, cooking is a vibrant blend of science, art, and heritage – a powerful way to connect us to our roots and each other. Her recipes invite you to delve deeper, uncovering the fascinating stories woven into every ingredient.