Sweet and Tangy Lemon Pixie Cookies Recipe
Lemon Pixie Cookies are light, sweet treats that practically melt in the mouth with every bite.
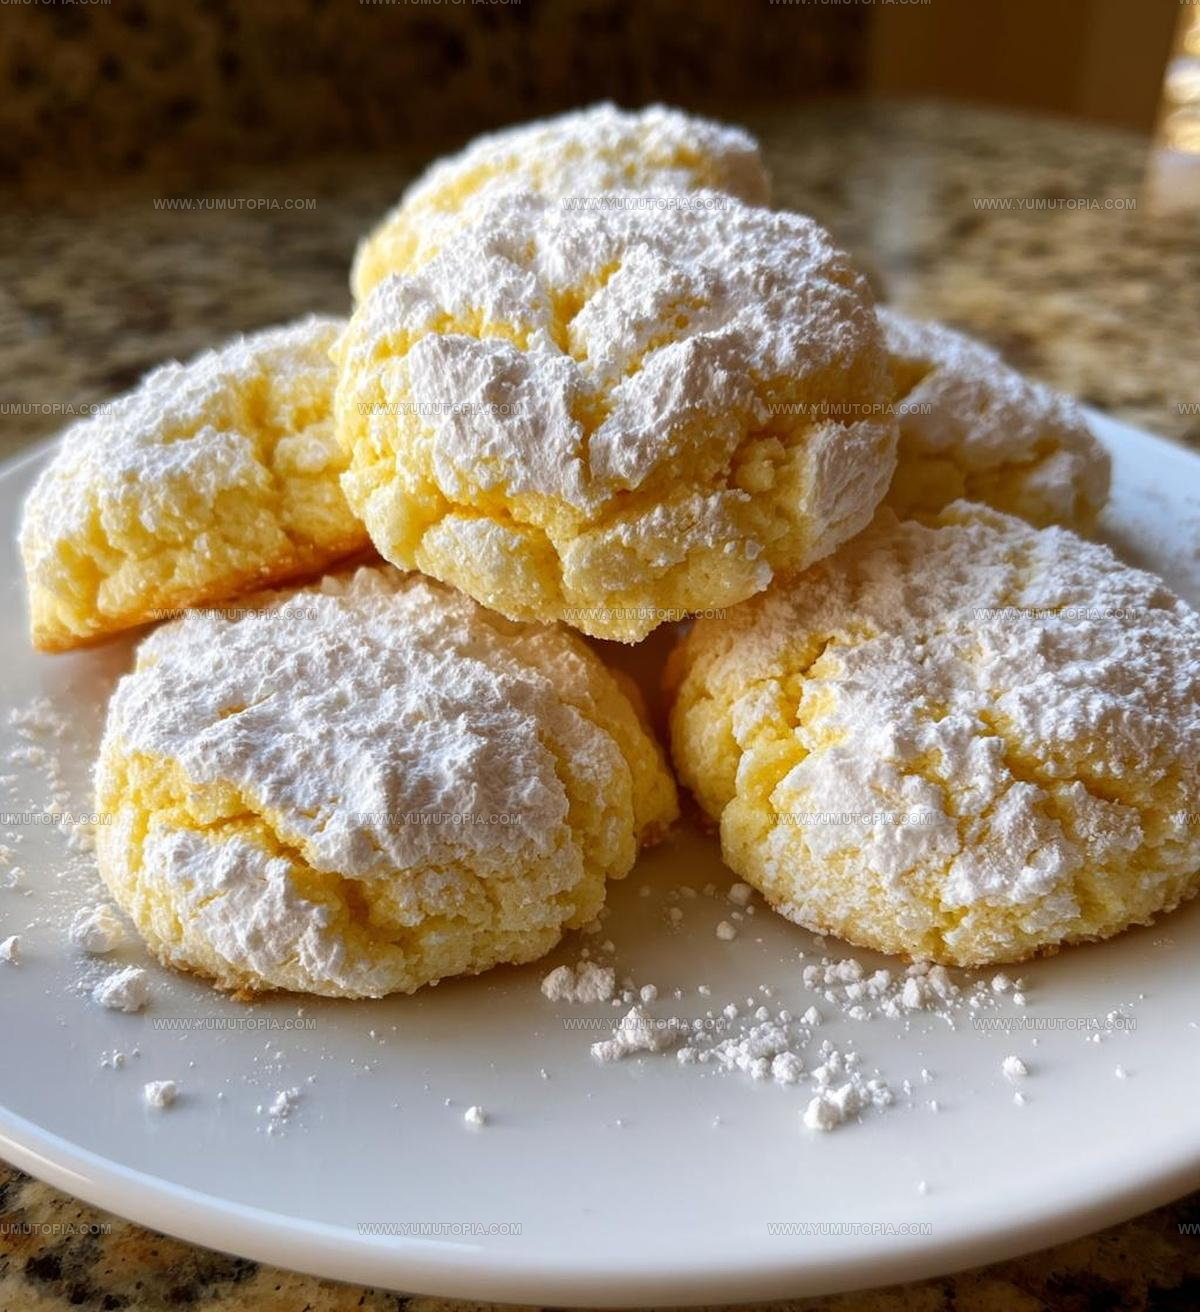
Soft and cloud-like in texture, they offer a delightful contrast to denser desserts while maintaining just enough substance to feel satisfying.
The bright, cheerful appearance makes them perfect for spring gatherings, baby showers, or any occasion that calls for something playful yet elegant.
They come together quickly and require minimal effort, making them ideal when you need impressive results without spending hours in the kitchen.
The powdery coating gives them a whimsical, snow-dusted look that never fails to catch attention on dessert tables.
Kids adore the fun shape and sweet flavor, while grown-ups appreciate the balanced sweetness that doesn’t overwhelm.
If you love cookies that feel special but remain wonderfully simple to prepare, scroll down for the full recipe that’ll have everyone asking for seconds.
Why You’ll Love Lemon Pixie Cookies
Full Ingredient Breakdown for Lemon Pixie Cookies
Dry Ingredients:Sugars:Wet Ingredients:Citrus Elements:Kitchen Tools for Lemon Pixie Cookies
Step By Step Directions For Lemon Pixie Cookies
Warm Up the Oven
Crank your oven to exactly 350F and grab a baking sheet. This temperature ensures perfect cookie texture every single time.
Cream the Butter and Sugars
Grab your mixer and whip those sweet ingredients until they’re super smooth.
Beat until the mixture looks light and fluffy like a cloud.
Add Zesty Moisture
Crack in that egg and sprinkle in the lemony goodness.
Mix everything until it’s perfectly combined.
Prepare Dry Ingredients
In a separate bowl, blend your dry components carefully.
Whisk these together until they’re well integrated.
Combine Wet and Dry Mixtures
Slowly fold your dry ingredients into the wet mixture. Stir gently until everything looks smooth and consistent.
Shape the Cookies
Use a spoon to drop small mounds of dough onto your prepared baking sheet. Space them about 2 inches apart so they have room to spread.
Bake to Golden Perfection
Slide the baking sheet into the preheated oven. Bake for exactly 10-12 minutes until the edges turn a delicate golden color.
Cool and Dust
Let the cookies rest on the baking sheet for a few minutes. Then transfer to a wire rack. Once completely cool, dust with a light sprinkle of powdered sugar for that final touch of sweetness.
Helpful Tips For Lemon Pixie Cookies
Lemon Pixie Cookies With Citrus Variations
Sweet And Simple Ways To Serve Lemon Pixie Cookies
Lemon Pixie Cookies Storage Tips
Lemon Pixie Cookies Common Queries
Can I use bottled lemon juice instead of fresh?
Bottled lemon juice works, but fresh provides a brighter, more vibrant flavor. Your cookies will taste best with freshly squeezed juice and zest.
How finely should I zest the lemon?
Grate the lemon zest using a microplane or fine grater, avoiding the bitter white pith. You want only the bright yellow outer layer for maximum citrus punch.
What if my butter isn’t at room temperature?
Soften butter quickly by cutting it into small pieces and letting it sit for 15-20 minutes. Cold butter won’t cream properly and can make your cookies dense.
Can I freeze the cookie dough?
Absolutely! Shape the dough into balls and freeze on a baking sheet. Once frozen, transfer to a freezer bag. Bake directly from frozen, adding 1-2 extra minutes to the baking time.
Why do these cookies get dusted with powdered sugar?
The powdered sugar adds a delicate sweetness and creates a beautiful, snow-like appearance. It also helps balance the tangy lemon flavor.
Are these cookies crispy or soft?
These pixie cookies are soft and tender with slightly crisp edges – perfect for dunking in tea or enjoying with a glass of milk.

Citrus Dusted Lemon Pixie Cookies Recipe
- Total Time: 20-22 minutes
- Yield: 12 1x
Description
Lemon Pixie Cookies bring sunshine to your kitchen with zesty, melt-in-your-mouth charm. Dusted with powdered sugar and packed with tangy citrus flavor, these little treats are pure delight for afternoon tea or sweet snacking moments.
Ingredients
Primary Ingredients:
- 1 cup all-purpose flour
- ½ cup unsalted butter, softened
- 1 large egg
Supporting Ingredients:
- ½ cup powdered sugar
- ¼ cup granulated sugar
- 1 tablespoon lemon zest
- 2 tablespoons lemon juice
Finishing Ingredients:
- ½ teaspoon baking powder
- ¼ teaspoon salt
Instructions
- Warm your oven to 350°F and line a baking sheet with parchment paper.
- Beat ½ cup softened butter with ½ cup powdered sugar and ¼ cup granulated sugar until the mixture becomes pale and fluffy.
- Crack 1 large egg into the butter mixture and stir in 1 tablespoon lemon zest and 2 tablespoons lemon juice until thoroughly incorporated.
- Sift together 1 cup flour, ½ teaspoon baking powder, and ¼ teaspoon salt in a separate bowl.
- Fold the dry ingredients into the wet mixture, stirring gently until a soft dough forms.
- Using a spoon, drop rounded tablespoon-sized portions of dough onto the prepared baking sheet, spacing them 2 inches apart.
- Slide the sheet into the preheated oven and bake for exactly 11 minutes, watching for golden edges.
- Remove the cookies and let them rest on the baking sheet for 3 minutes to firm up.
- Transfer cookies to a wire rack and dust generously with additional powdered sugar while still warm.
Notes
- Check butter temperature for perfect creaming, keeping it cool but softened helps create fluffy cookies.
- Zest lemons carefully to avoid bitter white pith, using only the bright yellow outer layer for maximum flavor.
- For extra tangy cookies, add an extra teaspoon of lemon juice or swap some granulated sugar with powdered sugar in the coating.
- Store cookies in an airtight container at room temperature for up to 5 days, separating layers with parchment paper to prevent sticking.
- Prep Time: 10 minutes
- Cook Time: 10-12 minutes
- Category: Cookies
- Method: Baking
- Cuisine: American
Nutrition
- Serving Size: 12
- Calories: 110 kcal
- Sugar: 7 g
- Sodium: 70 mg
- Fat: 7 g
- Saturated Fat: 4 g
- Unsaturated Fat: 3 g
- Trans Fat: 0 g
- Carbohydrates: 13 g
- Fiber: 0.3 g
- Protein: 1.5 g
- Cholesterol: 25 mg
Logan Lemaster
Founder & Culinary Innovator
Expertise
Recipe Development and Innovation, Menu Design and Optimization, Fine Dining Techniques, Ingredient Pairing and Flavor Science
Education
Metropolitan Culinary Arts Institute
Logan’s culinary journey kicked off in his vibrant Chicago family kitchen, where fresh, seasonal ingredients and bold flavors were always front and center.
After graduating from the Metropolitan Culinary Arts Institute in Arlington, Virginia, and honing his skills in renowned restaurants, Logan mastered the art of blending classic techniques with exciting, modern twists.
His kitchen is a dynamic lab for flavor exploration. Through Yum Utopia, Logan aims to empower you to cook with both confidence and creativity, turning simple ingredients into spectacular meals.