Brooklyn Blackout Cake Recipe For Chocolate Lovers
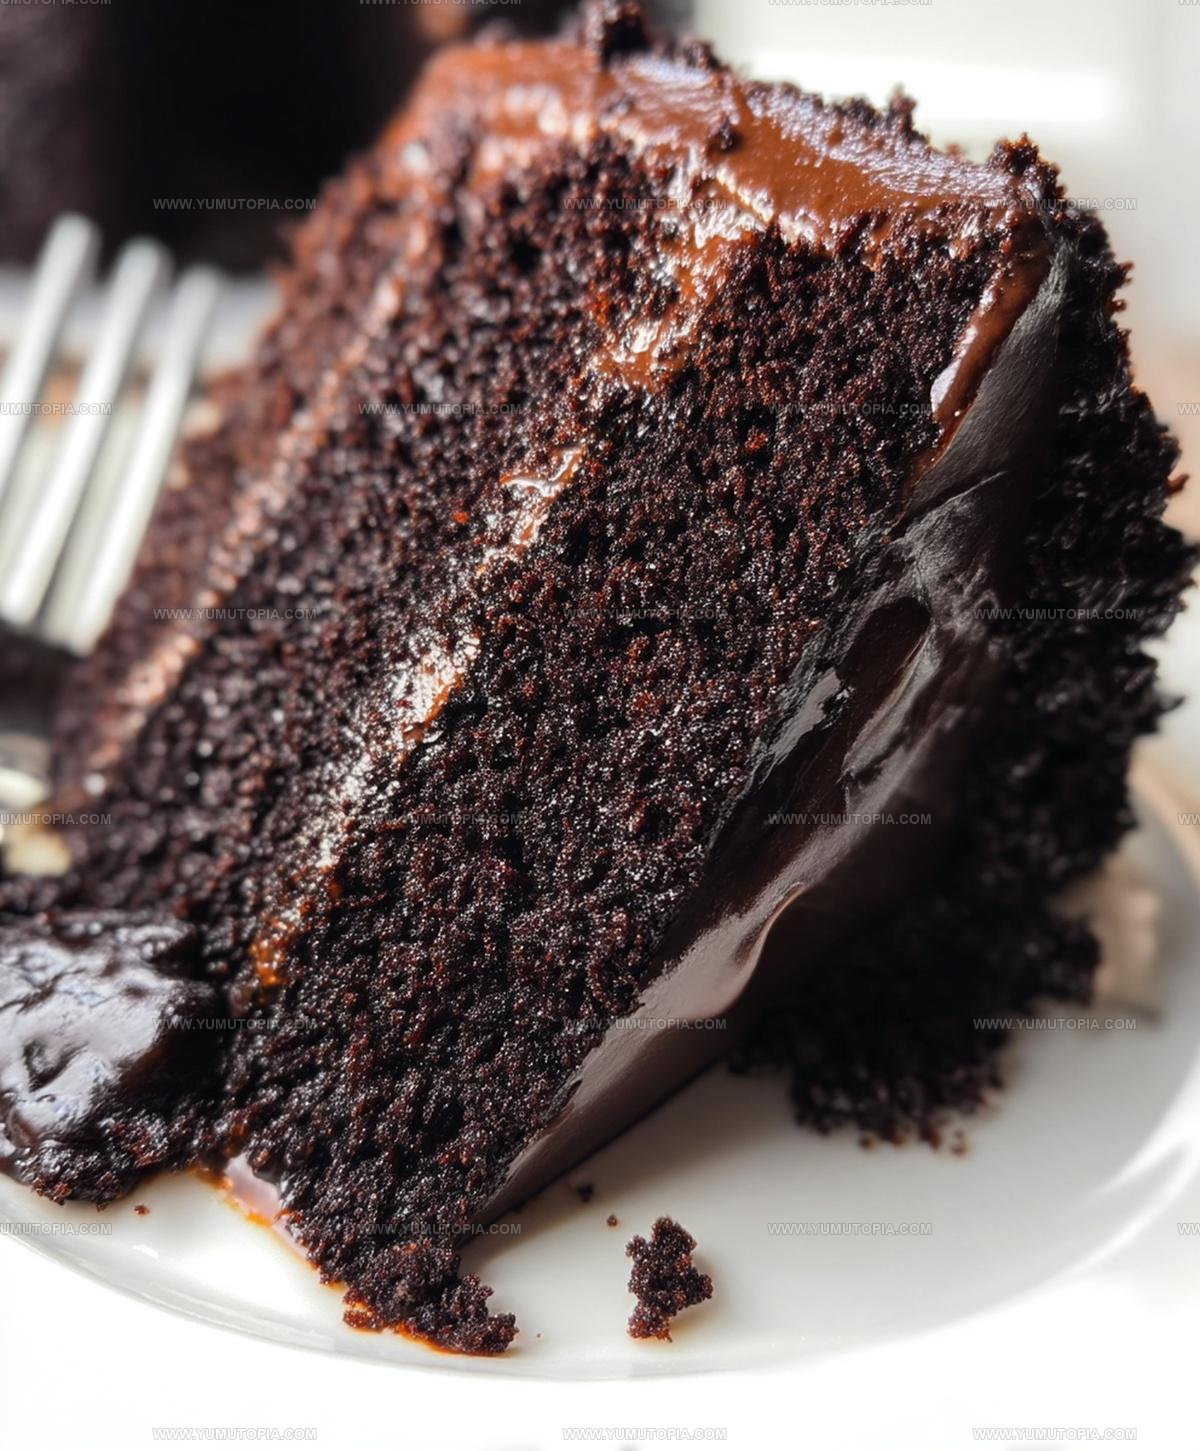
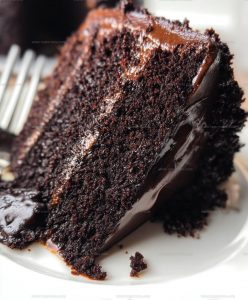
Brooklyn blackout cake stands as one of the most celebrated chocolate desserts to come out of New York City bakeries, beloved for its rich flavor and dramatic presentation.
Chocolate lovers know that few treats can match the deep, intense satisfaction of a dessert built on layers of pure cocoa goodness.
Born in the mid-20th century during wartime blackouts, the name pays homage to a unique moment in history while delivering pure decadence on every plate.
The dark, almost mysterious appearance makes it a showstopper at celebrations, dinner parties, and special occasions throughout the year.
You can count on compliments when serving a dessert that looks as impressive as it tastes, with a moist crumb and frosting that melts on the tongue.
Home bakers have embraced the challenge of recreating the iconic original, finding joy in mastering a recipe that rewards patience and attention to detail.
Every forkful offers proof that some classics never go out of style, remaining just as crave-worthy today as decades ago.
What Makes Brooklyn Blackout Cake So Satisfying
What Goes Into Brooklyn Blackout Cake
Dry Ingredients:Wet Ingredients:Filling and Frosting Ingredients:Tools To Have Ready for Brooklyn Blackout Cake
Steps for Making Brooklyn Blackout Cake
Prepare Oven and Pans
Heat your oven to 350°F. Grab two 9-inch round cake pans and coat them generously with butter or cooking spray so your cake won’t stick.
Mix Dry Ingredients
Grab a large mixing bowl and sift together 2 cups flour, 2 cups granulated sugar, 3/4 cup unsweetened cocoa powder, 2 teaspoons baking soda, 1 teaspoon baking powder, and 1 teaspoon salt. Make sure everything is well combined.
Combine Wet Ingredients
In a separate bowl, whisk 2 large eggs, 1 cup milk, 1/2 cup vegetable oil, and 2 teaspoons vanilla extract until they’re totally blended.
Create Cake Batter
Pour the wet ingredients into your dry ingredient mixture. Stir gently until everything just comes together. Don’t overmix – that makes tough cakes.
Add Boiling Water
Slowly pour in 1 cup of boiling water and stir until your batter looks smooth and silky.
Fill Cake Pans
Divide the batter equally between your prepared pans. Tap the pans gently on the counter to release any air bubbles.
Bake the Cakes
Slide the pans into the 350°F oven and bake for 30-35 minutes. Check doneness by inserting a toothpick – it should come out clean.
Cool Cake Layers
Let the cakes rest in their pans for 10 minutes. Then transfer to a wire rack to cool completely.
Prepare Chocolate Pudding Filling
Grab a saucepan and combine:
Melt these together over low heat, stirring constantly.
Thicken Pudding
In a separate bowl, whisk:
Add this to your melted chocolate and cook for 3-4 minutes until thickened. Let it cool completely.
Make Buttercream Frosting
Cream together 1/2 cup unsalted butter and 1 cup powdered sugar until light and fluffy.
Assemble Cake Layers
Crumble one cake layer and mix with some chocolate pudding. Spread remaining pudding between cake layers.
Decorate and Finish
Frost the entire cake with buttercream. Cover the sides with the cake crumbs you saved. Chill in the refrigerator for at least 1 hour before serving.
Key Cooking Notes For Brooklyn Blackout Cake
Dark Chocolate Variations for Brooklyn Blackout Cake
How To Slice Brooklyn Blackout Cake
Proper Storage For Brooklyn Blackout Cake
Brooklyn Blackout Cake Common Questions
Can I make this cake ahead of time?
The cake layers and pudding can be prepared a day in advance. Assemble and refrigerate for best flavor and texture.
What if my pudding is too runny?
Ensure you cook the pudding until it thickens and let it cool completely. Refrigerating helps it set properly for easier spreading.
Do I need any special equipment?
A stand mixer helps, but a hand mixer works fine. Cake pans, wire rack, and saucepan are essential for this recipe.
Can I substitute ingredients?
Stick to the recipe for best results. Changing key ingredients like cocoa powder or milk might alter the cake’s texture and taste.
How do I know when the cake is done baking?
Insert a toothpick in the center – it should come out clean with a few moist crumbs. Avoid overbaking to keep the cake tender.
Is this cake difficult to make?
The recipe has multiple steps but isn’t complicated. Follow instructions carefully and take your time with each stage.
Classic Brooklyn Blackout Cake Recipe
- Total Time: 1 hour 10 minutes
- Yield: 8 1x
Description
Diving into Brooklyn Blackout Cake means chocolate heaven awaits your taste buds with rich layers of pure indulgence. Creamy chocolate pudding and cocoa-dusted crumbs create a dessert that celebrates classic New York bakery magic.
Ingredients
Main Ingredients:
- 2 cups all-purpose flour
- 2 cups granulated sugar
- ¾ cup unsweetened cocoa powder
- 1 cup milk
- 2 large eggs
- 12 oz semisweet chocolate chips
- ½ cup unsalted butter
Supporting Dry Ingredients:
- 2 teaspoons baking soda
- 1 teaspoon baking powder
- 1 teaspoon salt
- ¼ cup cornstarch
- 1 cup powdered sugar
Liquid and Flavoring Ingredients:
- ½ cup vegetable oil
- 2 teaspoons vanilla extract
- 1 cup boiling water
- 1 cup heavy cream
- ½ cup cold water
Instructions
- Prepare your workspace by heating the oven to 350°F and coating two 9-inch round cake pans with cooking spray.
- Combine 2 cups flour, 2 cups sugar, ¾ cup cocoa powder, 2 tsp baking soda, 1 tsp baking powder, and 1 tsp salt in a large bowl.
- Whisk 2 eggs, 1 cup milk, ½ cup vegetable oil, and 2 tsp vanilla extract in a separate container until thoroughly blended.
- Merge wet and dry ingredients, stirring carefully until just combined.
- Gradually pour 1 cup boiling water into the batter, mixing until silky smooth.
- Distribute batter equally between prepared cake pans.
- Bake for 32-35 minutes, checking with a toothpick for complete doneness.
- Allow cakes to rest in pans for 10 minutes after removing from oven.
- Transfer cake layers to a wire rack for complete cooling.
- Create chocolate pudding by melting 12 oz chocolate chips and 1 cup heavy cream over low heat.
- Whisk ¼ cup cornstarch with ½ cup cold water until completely smooth.
- Incorporate cornstarch mixture into melted chocolate, cooking for 3-4 minutes until thickened.
- Remove pudding from heat and let cool completely.
- Prepare buttercream by blending ½ cup butter with 1 cup powdered sugar until fluffy.
- Crumble one cake layer and mix with a portion of chocolate pudding.
- Layer remaining pudding between cake rounds.
- Cover entire cake with buttercream frosting.
- Press reserved cake crumbs along cake sides for texture.
- Refrigerate cake for minimum 1 hour before serving to set layers.
Notes
- The boiling water helps create an incredibly moist cake texture, so don’t skip this crucial step.
- Ensure all ingredients are at room temperature for smoother mixing and better cake consistency.
- Cooling the chocolate pudding completely prevents it from melting when assembling the cake layers.
- When crumbling a cake layer, aim for fine, even crumbs to create a smooth exterior coating.
- Prep Time: 30 minutes
- Cook Time: 40 minutes
- Category: Cakes
- Method: Baking
- Cuisine: American
Nutrition
- Serving Size: 8
- Calories: 444
- Sugar: 44 g
- Sodium: 220 mg
- Fat: 23 g
- Saturated Fat: 9 g
- Unsaturated Fat: 13 g
- Trans Fat: 0.2 g
- Carbohydrates: 58 g
- Fiber: 4 g
- Protein: 5 g
- Cholesterol: 50 mg
Logan Lemaster
Founder & Culinary Innovator
Expertise
Recipe Development and Innovation, Menu Design and Optimization, Fine Dining Techniques, Ingredient Pairing and Flavor Science
Education
Metropolitan Culinary Arts Institute
Logan’s culinary journey kicked off in his vibrant Chicago family kitchen, where fresh, seasonal ingredients and bold flavors were always front and center.
After graduating from the Metropolitan Culinary Arts Institute in Arlington, Virginia, and honing his skills in renowned restaurants, Logan mastered the art of blending classic techniques with exciting, modern twists.
His kitchen is a dynamic lab for flavor exploration. Through Yum Utopia, Logan aims to empower you to cook with both confidence and creativity, turning simple ingredients into spectacular meals.