Classic Chocolate Snowball Cookies Recipe That Melts on Your Tongue
Classic chocolate snowball cookies bring pure holiday magic to any cookie platter with minimal effort and maximum satisfaction.
Round, powdery, and melt-in-your-mouth tender, they disappear fast at parties and family gatherings throughout the winter season.
The deep cocoa flavor paired with that signature snowy coating makes them feel special without requiring advanced baking skills.
Once you bite through the sweet outer layer, the rich chocolate crumb inside unlocks comfort in every mouthful.
They store beautifully in tins for gifting or keeping on hand when unexpected company drops by.
Whether served alongside hot cocoa or packed into festive boxes, they never fail to put smiles on faces.
Perfect for busy schedules, the simple mixing method means you can have fresh-baked treats cooling on racks in under half an hour.
Go make a batch today and watch how quickly they become a seasonal tradition worth repeating year after year.
Why Classic Chocolate Snowball Cookies Never Fade
Chocolate Snowball Cookie Ingredient Overview
Main Ingredients:Flour and Chocolate Base:Texture and Finishing Ingredients:What Tools Are Needed for Chocolate Snowball Cookies?
How to Prepare Classic Chocolate Snowball Cookies
Warm Up the Oven
Crank your oven to exactly 350°F. Grab a baking sheet and set it nearby.
Cream the Butter and Sugar
Grab a mixing bowl and toss in 1 cup of softened unsalted butter. Add 1/2 cup powdered sugar and beat until the mixture becomes smooth and fluffy. Make sure your butter is super soft so it blends perfectly.
Add Flavor Boost
Pour in 1 teaspoon vanilla extract and mix thoroughly. The vanilla will give these cookies a rich, warm aroma that makes your kitchen smell amazing.
Prepare Dry Ingredients
In a separate bowl, gather your dry ingredients:
Whisk these together until everything is evenly combined.
Combine Wet and Dry
Slowly fold your dry ingredient mixture into the butter mixture. Mix until a soft dough forms. Don’t overmix – just blend until everything comes together.
Shape the Cookies
Roll the dough into small 1-inch balls. Place them about 2 inches apart on your prepared baking sheet.
Bake to Perfection
Pop the baking sheet into the 350°F oven. Bake for exactly 12-15 minutes. The cookies should look set but not too dark.
Sugar Coating Magic
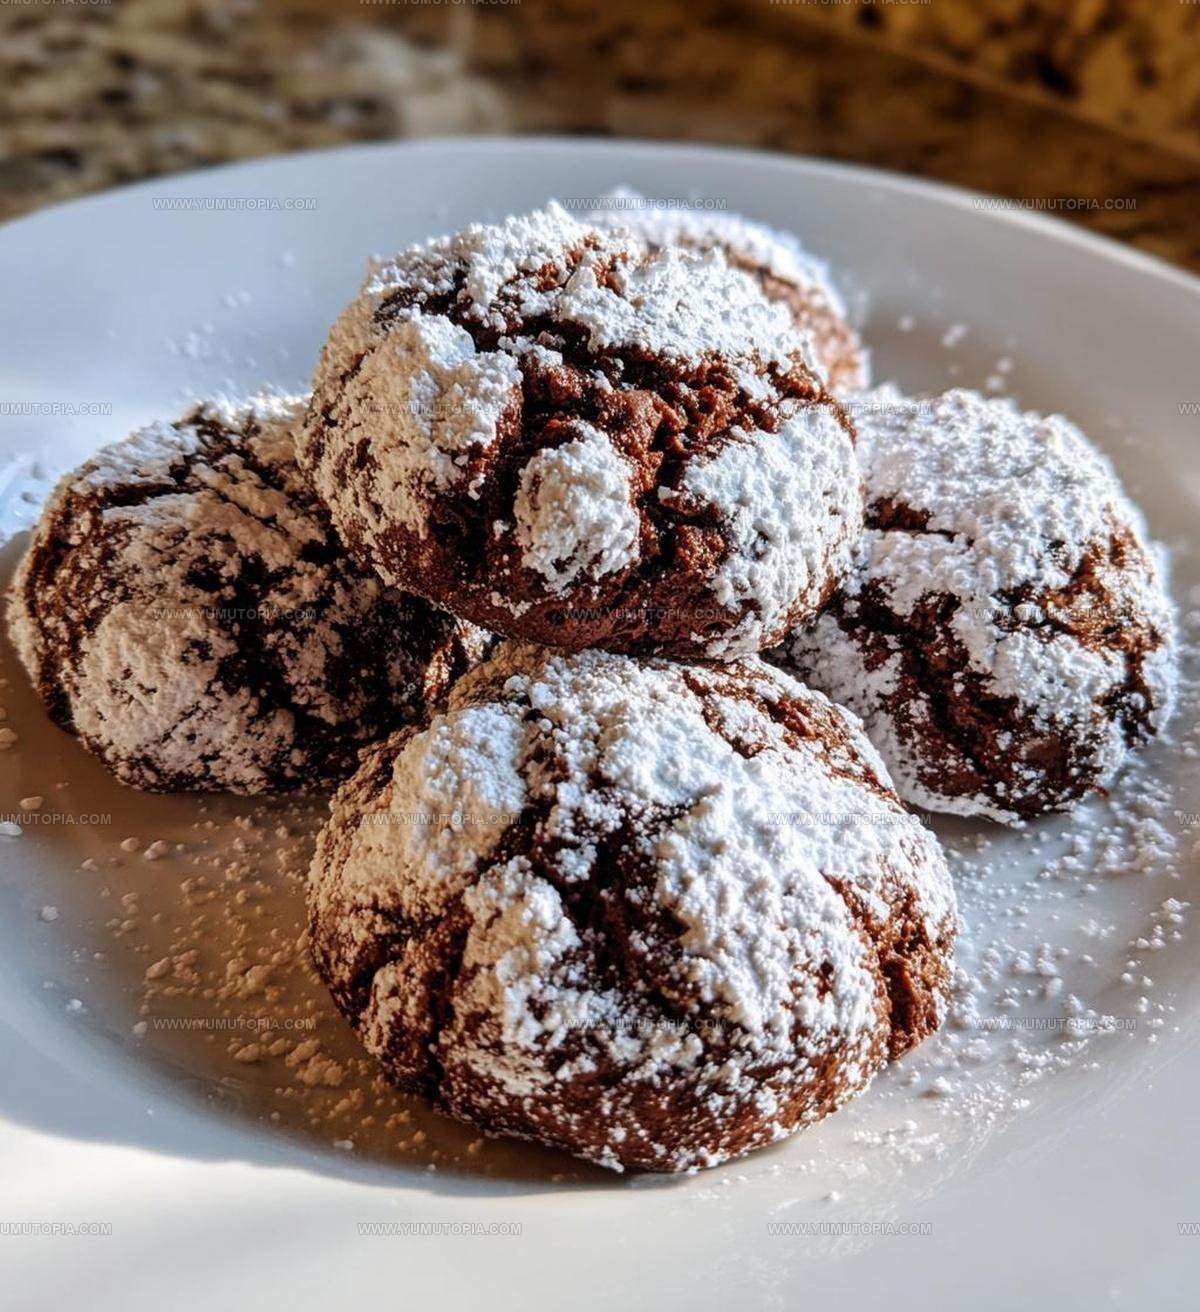
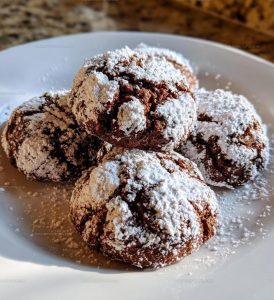
Let the cookies cool for about 5 minutes. Then roll each one in 1 cup of powdered sugar until completely covered. The sugar will create that classic snowball look and add a sweet finish.
Helpful Tips for Classic Chocolate Snowball Cookies
Chocolatey Twist Ideas for Classic Chocolate Snowball Cookies
How to Serve Chocolate Snowball Cookies
How to Store Chocolate Snowball Cookies
Classic Chocolate Snowball Cookies Frequently Asked Questions
Can I use salted butter instead of unsalted?
Salted butter changes the flavor and can make cookies too salty. Stick with unsalted butter to control the salt level perfectly.
What if my dough seems too crumbly?
Add a tiny splash of milk to help bind the ingredients. Sometimes cocoa powder can make the dough drier, so a little liquid helps everything come together smoothly.
Are chocolate snowball cookies gluten-free?
Not in this classic recipe. The flour makes them unsuitable for gluten-free diets. For a gluten-free version, you’ll need special flour substitutions.
Can kids help make these cookies?
Absolutely! Kids love rolling dough into balls and coating them in powdered sugar. Just supervise during oven and hot cookie handling.
Why do the cookies crack sometimes?
Cracking happens when the dough is too dry or the oven temperature is uneven. Ensure ingredients are at room temperature and your oven is properly calibrated.
How finely should nuts be chopped?
Chop nuts into small, consistent pieces – about the size of rice grains. This helps them distribute evenly and prevents large nut chunks from breaking the cookie’s delicate texture.
Classic Chocolate Snowball Cookies Recipe
- Total Time: 27-30 minutes
- Yield: 24 1x
Description
Chocolate snowball cookies bring pure winter joy right to your kitchen, dusting powdered sugar memories across a plate of delightful homemade treats. Crumbly, rich chocolate cookies rolled in sweet snow-white sugar create a simple dessert that melts hearts faster than actual snowflakes.
Ingredients
Primary Ingredients:
- 2 cups all-purpose flour
- ½ cup cocoa powder
- 1 cup unsalted butter, softened
- ½ cup chopped nuts (walnuts or pecans)
Supporting Ingredients:
- ½ cup powdered sugar
- 1 teaspoon vanilla extract
- ¼ teaspoon salt
Coating:
- 1 cup powdered sugar
Instructions
- Warm your oven to exactly 350F and prepare an ungreased baking sheet.
- Blend 1 cup softened butter with ½ cup powdered sugar until smooth and creamy.
- Pour in 1 teaspoon vanilla extract and mix thoroughly.
- Separately whisk 2 cups flour, ½ cup cocoa powder, ½ cup chopped nuts, and ¼ teaspoon salt together.
- Slowly incorporate dry ingredients into butter mixture, stirring until a consistent dough forms.
- Roll dough into 1-inch round balls, spacing them 2 inches apart on the baking sheet.
- Place cookies in preheated 350F oven and bake precisely 12-15 minutes until edges look set.
- Remove from oven and allow cookies to cool for 3-4 minutes on baking sheet.
- Gently tumble warm cookies in 1 cup powdered sugar, ensuring complete coverage.
- Transfer sugar-coated cookies to wire rack and let cool completely before serving.
Notes
- Sifting powdered sugar ensures a smoother, more even coating on the cookies without clumpy residue.
- Chopped pecans or walnuts work best, but feel free to use your favorite nuts for a personal touch.
- Chill the dough for 30 minutes before shaping to help prevent spreading and maintain a perfect round shape.
- Store cookies in an airtight container at room temperature for up to a week, separating layers with parchment paper to keep the powdered sugar coating pristine.
- Prep Time: 15 minutes
- Cook Time: 12-15 minutes
- Category: Cookies
- Method: Baking
- Cuisine: American
Nutrition
- Serving Size: 24
- Calories: 140
- Sugar: 7 g
- Sodium: 30 mg
- Fat: 9 g
- Saturated Fat: 5 g
- Unsaturated Fat: 3 g
- Trans Fat: 0.1 g
- Carbohydrates: 16 g
- Fiber: 1 g
- Protein: 2 g
- Cholesterol: 20 mg
Logan Lemaster
Founder & Culinary Innovator
Expertise
Recipe Development and Innovation, Menu Design and Optimization, Fine Dining Techniques, Ingredient Pairing and Flavor Science
Education
Metropolitan Culinary Arts Institute
Logan’s culinary journey kicked off in his vibrant Chicago family kitchen, where fresh, seasonal ingredients and bold flavors were always front and center.
After graduating from the Metropolitan Culinary Arts Institute in Arlington, Virginia, and honing his skills in renowned restaurants, Logan mastered the art of blending classic techniques with exciting, modern twists.
His kitchen is a dynamic lab for flavor exploration. Through Yum Utopia, Logan aims to empower you to cook with both confidence and creativity, turning simple ingredients into spectacular meals.