Silky Red Velvet Cake Recipe For Special Celebrations
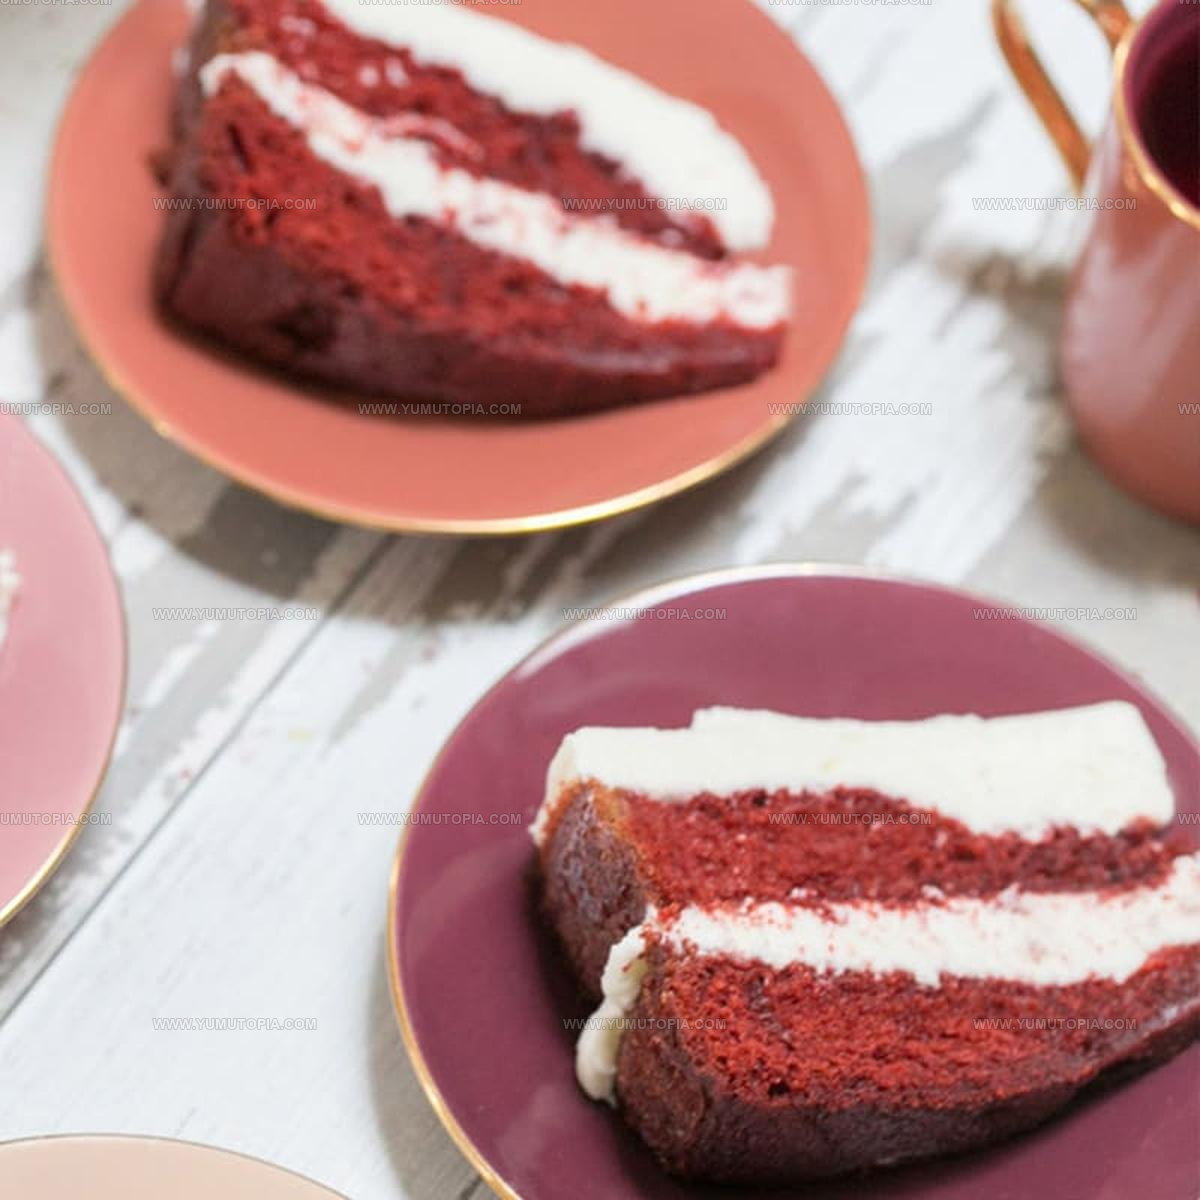
Red velvet cake has captivated dessert lovers for generations with its striking appearance and unforgettable flavor profile.
The combination of cocoa and buttermilk creates something truly special that stands apart from ordinary chocolate desserts.
Smooth cream cheese frosting provides the ideal counterpart to the tender crumb beneath.
Celebrations feel more memorable when sliced servings reveal those signature crimson layers that everyone recognizes instantly.
Home bakers and professional pastry chefs alike return to making it time and again because results consistently impress at gatherings.
The balance between subtle chocolate notes and slight tanginess makes every bite feel both familiar and luxurious.
You can present it at birthdays, holidays, or weekend dinner parties with equal success.
Stop scrolling and head straight to the full recipe below for detailed measurements and baking instructions.
What Makes Classic Red Velvet Cake So Special
Essential Ingredients for Classic Red Velvet Cake
Dry Ingredients:Wet Ingredients:Frosting Ingredients:Standard Cooking Tools for Red Velvet Cake
Preparing Classic Red Velvet Cake Step by Step
Prepare Baking Pans
Grab your cake pans and coat them thoroughly with butter or cooking spray. Dust a light layer of flour over the greased surfaces. Set the pans aside while preheating the oven to 350°F.
Mix Dry Ingredients
Grab a large mixing bowl and sift together 2 1/2 cups all-purpose flour, 1 1/2 cups granulated sugar, 1 tsp baking soda, 1 tsp salt, and 2 tbsp unsweetened cocoa powder. Make sure everything is well combined and free of lumps.
Combine Wet Ingredients
In a separate bowl, whisk together these ingredients:
Blend until the mixture looks smooth and vibrant red.
Create Cake Batter
Pour the wet ingredients into the dry ingredients. Stir gently until everything just comes together. Don’t overmix or your cake might turn tough.
Fill Cake Pans
Divide the batter evenly between the two prepared 9-inch cake pans. Tap the pans gently on the counter to release any air bubbles.
Bake the Cake
Slide the pans into the preheated 350°F oven. Bake for 25-30 minutes. Check doneness by inserting a toothpick into the center – it should come out clean.
Cool First Stage
Remove the cakes from the oven. Let them rest in the pans for 10 minutes to help them set and cool slightly.
Complete Cake Cooling
Carefully transfer the cakes to wire racks. Allow them to cool completely before frosting.
Prepare Cream Cheese Frosting
In a mixing bowl, beat 8 oz cream cheese and 1/2 cup unsalted butter until they’re super smooth.
Finish Frosting
Gradually add 4 cups powdered sugar and 1 tsp vanilla extract to the cream cheese mixture. Beat until the frosting looks light and fluffy.
Assemble Cake
Place one cake layer on your serving plate. Spread a generous layer of frosting on top. Carefully set the second cake layer on top.
Final Frosting
Cover the entire cake with the remaining cream cheese frosting. Make sure to get an even layer all around.
Chill and Serve
Pop the frosted cake into the refrigerator for 30 minutes. This helps the frosting set and makes for cleaner slices. Enjoy your beautiful red velvet creation!
Little Things That Help Classic Red Velvet Cake
Flavorful Options for Classic Red Velvet Cake
Serving Notes For Red Velvet Cake
Proper Storage For Classic Red Velvet Cake
Classic Red Velvet Cake Popular Questions
What gives red velvet cake its signature color?
The deep red color comes from combining cocoa powder with red food coloring. A small amount of vinegar helps activate the vibrant shade.
Can I make this cake without food coloring?
Natural alternatives like beetroot juice can create a reddish tint, but the classic bright red requires food coloring for the traditional look.
Why does the recipe include buttermilk and vinegar?
Buttermilk and vinegar react with baking soda to help the cake rise and create a tender, soft texture that makes red velvet cake so special.
How do I know when the cake is fully baked?
Insert a toothpick into the center of the cake – when it comes out clean with no wet batter, your cake is perfectly done.
What makes cream cheese frosting so creamy?
Beating cream cheese and butter together until smooth, then gradually adding powdered sugar, creates that signature silky, rich frosting texture.
Can I prepare the cake layers in advance?
Absolutely! Bake the cake layers, cool completely, and wrap tightly in plastic wrap. They’ll stay fresh in the refrigerator for 2-3 days before frosting.

Classic Red Velvet Cake Recipe
- Total Time: 1 hours 15-20 minutes
- Yield: 12 1x
Description
Classic red velvet cake delivers pure Southern charm right to your dessert table, bringing together rich cocoa, velvety texture, and that signature crimson color that makes hearts flutter with pure delight.
Ingredients
Dry Ingredients:
- 2 ½ cups all-purpose flour
- 1 ½ cups granulated sugar
- 1 tsp baking soda
- 1 tsp salt
- 2 tablespoons unsweetened cocoa powder
Wet Ingredients:
- 2 large eggs
- 1 ½ cups vegetable oil
- 1 cup buttermilk
- 2 tablespoons red food coloring
- 1 teaspoon white vinegar
- 1 teaspoon vanilla extract
Frosting Ingredients:
- 8 ounces cream cheese
- ½ cup unsalted butter
- 4 cups powdered sugar
- 1 teaspoon vanilla extract
Instructions
- Warm your oven to 350°F and coat two 9-inch round cake pans with cooking spray.
- Sift 2 ½ cups flour, 1 ½ cups sugar, 1 tsp baking soda, 1 tsp salt, and 2 tbsp cocoa powder into a large mixing bowl.
- Whisk 2 eggs, 1 ½ cups vegetable oil, 1 cup buttermilk, 2 tbsp red food coloring, 1 tsp vinegar, and 1 tsp vanilla in a separate bowl until completely blended.
- Pour liquid ingredients into dry mixture and stir until ingredients are just incorporated.
- Evenly distribute cake batter between prepared cake pans, smoothing tops with a spatula.
- Slide pans into preheated oven and bake precisely 25-30 minutes until a toothpick comes out clean.
- Remove cakes from oven and let them rest in pans for 10 minutes.
- Carefully transfer cake layers to wire cooling racks.
- Using an electric mixer, cream 8 oz cream cheese and ½ cup butter until silky smooth.
- Gradually fold 4 cups powdered sugar and 1 tsp vanilla into cream cheese mixture.
- Whip frosting until light and fluffy peaks form.
- Position first cake layer on serving plate and spread a generous layer of frosting.
- Carefully place second cake layer on top and frost entire cake evenly.
- Chill cake for 30 minutes to help frosting set and firm up.
Notes
- Ensure buttermilk is at room temperature for better ingredient incorporation and smoother batter texture.
- Avoid overmixing the batter, which can make the cake dense and tough instead of light and tender.
- Use gel food coloring for a more vibrant red color without changing the cake’s liquid ratio.
- Cool the cake completely before frosting to prevent the cream cheese frosting from melting and sliding off.
- Prep Time: 20 minutes
- Cook Time: 25-30 minutes
- Category: Cakes
- Method: Baking
- Cuisine: American
Nutrition
- Serving Size: 12
- Calories: 409 kcal
- Sugar: 36 g
- Sodium: 233 mg
- Fat: 27 g
- Saturated Fat: 9 g
- Unsaturated Fat: 17 g
- Trans Fat: 0.3 g
- Carbohydrates: 41 g
- Fiber: 1 g
- Protein: 4 g
- Cholesterol: 42 mg
Madison Wyman
Recipe Developer & Food Storyteller
Expertise
Recipe Research and Adaptation, Food Writing and Cultural Storytelling, Sustainable and Ethical Sourcing, Dietary Adaptations (e.g., gluten-free, plant-based)
Education
Oregon Health & Science University
Portland Community College
Madison’s passion for flavor and culture ignited amidst the rich Southern cooking traditions of her upbringing, where cherished family recipes told delicious tales.
Armed with a Master’s in Food Systems and Society from Oregon Health & Science University and a Culinary Arts Certificate from Portland Community College, Madison truly excels at transforming rich, intricate flavors into dishes that are both approachable and heartfelt.
For her, cooking is a vibrant blend of science, art, and heritage – a powerful way to connect us to our roots and each other. Her recipes invite you to delve deeper, uncovering the fascinating stories woven into every ingredient.