
Crispy Washboard Cookies Recipe to Bake Today
Washboard cookies recipe fans know there’s something special about a treat that mixes old-fashioned charm with simple, satisfying results.
These ridged beauties have been passed down through generations, earning their place on cookie plates at family gatherings and afternoon tea times alike.
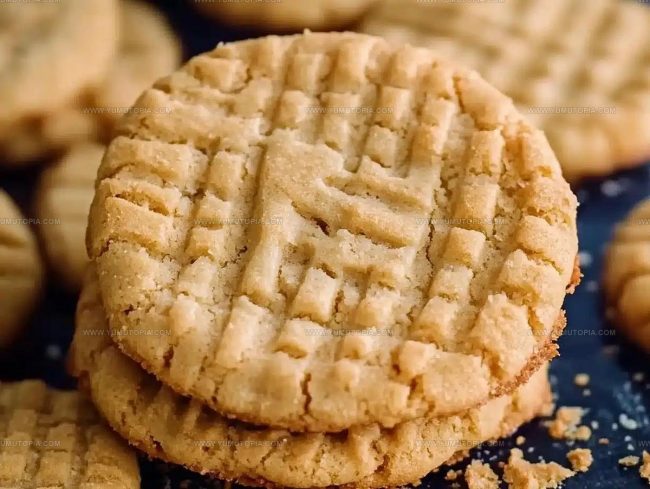
The distinctive pattern pressed into each one makes them instantly recognizable and fun to prepare.
Crisp edges meet tender centers in every bite, creating a texture that pairs beautifully with coffee, milk, or hot chocolate.
You can count on this classic to please everyone from picky eaters to dessert enthusiasts who appreciate timeless baking traditions.
The forked ridges aren’t just decorative; they add delightful texture that sets them apart from ordinary cookies.
Making a batch takes minimal effort but delivers maximum nostalgia and flavor.
Time to roll up your sleeves and fill the cookie jar with homemade goodness that never goes out of style.
Why Washboard Cookies Never Go Out of Style
Washboard Cookies Ingredient Breakdown
Butter Base:Binding Ingredients:Dry Ingredients:Optional Finish:Tools Used for Washboard Cookies
Washboard Cookies Baking Instructions
Prep the Oven
Heat the oven to 350°F. Grab a baking sheet and line it with parchment paper so your cookies won’t stick.
Mix the Creamy Base
In a large mixing bowl, grab 1 cup softened unsalted butter, 1 cup granulated sugar, and 1/2 cup packed brown sugar. Cream these together until they’re smooth and fluffy. Crack in 1 large egg and pour 1 teaspoon vanilla extract. Mix until everything blends perfectly.
Combine Dry Ingredients
In a separate bowl, whisk together these dry ingredients:
Create Cookie Dough
Slowly add the dry mixture into your butter blend. Stir until a soft dough comes together. Don’t overmix – just combine until everything looks even.
Shape the Cookies
Scoop out tablespoon-sized balls of dough. Roll them gently and place them 2 inches apart on your prepared baking sheet. Use a fork to press gentle ridges across the top of each cookie.
Bake to Golden Perfection
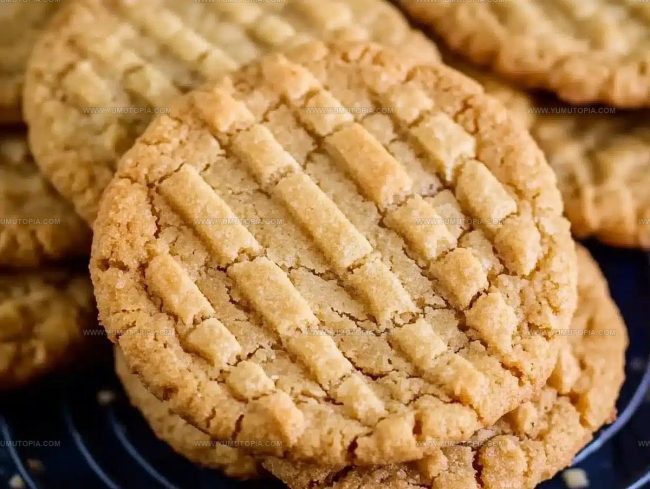
Slide the baking sheet into the 350°F oven. Bake for 11-13 minutes, watching for those edges to turn a light golden color.
Cool and Finish
Let the cookies rest on the baking sheet for a few minutes. Transfer them to a wire rack to cool completely. If you’re feeling fancy, dust them with a sprinkle of powdered sugar for a sweet finishing touch.
Behind the Method of Washboard Cookies
Creative Variations for Washboard Cookies
Classic Serving Ideas for Washboard Cookies
Best Storage Method For Washboard Cookies
Frequently Asked Questions About Washboard Cookies
What creates the classic ridged pattern on these cookies?
A washboard press or fork works perfectly to create the signature texture. Press gently but firmly across the surface of each cookie dough ball to get those traditional ridges.
Can I make these cookies without a special press?
Absolutely! A standard fork works wonderfully to create the classic washboard design. Press the fork in a crisscross pattern to get those signature ridges.
How do I know when the cookies are perfectly baked?
Watch for light golden edges – that’s your signal these cookies are done. They should look slightly soft in the center but set around the edges.
Are these cookies supposed to be crisp or soft?
These washboard cookies have a delightful crumbly, tender texture that’s not too hard and not too soft – just perfect for dunking or enjoying on their own.
Can I use salted butter instead of unsalted?
Salted butter works fine, but reduce the added salt in the recipe to balance the flavor. The cookie’s buttery taste will still shine through beautifully.
What makes these cookies so traditional?
Washboard cookies have roots in farmhouse baking, using simple ingredients that were always on hand. Their rustic design reflects a time of practical, delicious home cooking.

Classic-Pressed Washboard Cookies Recipe
- Total Time: 26-28 minutes
- Yield: 24 1x
Description
Washboard cookies crackle with homemade charm, bringing nostalgic comfort straight from grandma’s kitchen. Crumbly and rich with butter, these classic treats deliver simple pleasure in each delightful bite.
Ingredients
Main Ingredients:
- 2 ¼ cups all-purpose flour
- 1 cup unsalted butter, softened
- 1 cup granulated sugar
Supporting Ingredients:
- ½ cup brown sugar, packed
- 1 large egg
- 1 teaspoon vanilla extract
Finishing Ingredients:
- ½ teaspoon baking soda
- ¼ teaspoon salt
- Powdered sugar for dusting
Instructions
- Set the oven to 350°F and line a baking sheet with parchment paper. Your workspace needs to be prepped and ready.
- Grab your mixer and combine 1 cup softened butter, 1 cup granulated sugar, and ½ cup brown sugar until the mixture becomes creamy and light.
- Add 1 large egg and 1 teaspoon vanilla extract to the butter mixture. Mix thoroughly until everything blends smoothly.
- In a separate bowl, whisk 2 ¼ cups all-purpose flour, ½ teaspoon baking soda, and ¼ teaspoon salt until well combined.
- Slowly incorporate the dry ingredients into your butter mixture. Stir gently until a soft dough develops without overmixing.
- Use a tablespoon to scoop dough and roll into small balls. Space each cookie 2 inches apart on the prepared baking sheet.
- Press down on each dough ball using a fork or potato masher to create distinctive ridged patterns across the surface.
- Slide the baking sheet into the 350°F oven and bake for 11-13 minutes. Watch for golden edges as your signal of doneness.
- Remove cookies and let them rest on the baking sheet for 3 minutes. Transfer to a wire rack for complete cooling.
- Optional: Dust the cooled cookies with powdered sugar for a delicate, rustic finishing touch.
Notes
- Use room temperature butter for the smoothest, most even mixing when creaming with sugars.
- Press the fork or mashing tool gently but firmly to create distinct ridges that give these cookies their classic washboard texture.
- For gluten-free alternatives, swap regular flour with a cup-for-cup gluten-free flour blend that maintains the cookie’s delicate crumb.
- Store cookies in an airtight container at room temperature for up to a week, separating layers with parchment paper to prevent sticking.
- Prep Time: 15 minutes
- Cook Time: 11-13 minutes
- Category: Cookies
- Method: Baking
- Cuisine: American
Nutrition
- Serving Size: 24
- Calories: 158
- Sugar: 8 g
- Sodium: 60 mg
- Fat: 9 g
- Saturated Fat: 5 g
- Unsaturated Fat: 4 g
- Trans Fat: 0 g
- Carbohydrates: 20 g
- Fiber: 0.3 g
- Protein: 1.4 g
- Cholesterol: 17 mg
Logan Lemaster
Founder & Culinary Innovator
Expertise
Recipe Development and Innovation, Menu Design and Optimization, Fine Dining Techniques, Ingredient Pairing and Flavor Science
Education
Metropolitan Culinary Arts Institute
Logan’s culinary journey kicked off in his vibrant Chicago family kitchen, where fresh, seasonal ingredients and bold flavors were always front and center.
After graduating from the Metropolitan Culinary Arts Institute in Arlington, Virginia, and honing his skills in renowned restaurants, Logan mastered the art of blending classic techniques with exciting, modern twists.
His kitchen is a dynamic lab for flavor exploration. Through Yum Utopia, Logan aims to empower you to cook with both confidence and creativity, turning simple ingredients into spectacular meals.