
Coconut Bars Recipe For a Sweet Tropical Treat at Home
Sweet, creamy coconut bars offer a tropical escape right in your kitchen.
Craving a dessert that transports you to a sun-drenched paradise? Delightful coconut bars promise pure comfort with every single bite.
Smooth textures and rich flavors combine to create an irresistible treat that satisfies serious sweet tooth cravings.
Perfectly balanced between decadence and simplicity, these bars work magic for any occasion.
Home bakers and dessert enthusiasts will fall in love with this straightforward yet memorable recipe.
What Makes Coconut Bars So Satisfying
What Ingredients Do You Need to Make Coconut Bars
Base Ingredients:Supporting Ingredients:Finishing Ingredients:Essential Kitchen Tools for Coconut Bars
Classic Way to Make Coconut Bars
Prepare the Buttery Crust
Crank up the oven to 350°F. Grab a mixing bowl and blend these crust ingredients until they form a delicate crumbly mixture:
Press the mixture firmly into a greased 9×13-inch baking dish, creating an even layer. Slide the pan into the preheated oven and bake for 15-18 minutes until the edges look lightly golden.
Create Coconut Mixture
While the crust bakes, whip together the topping ingredients in a separate bowl:
Beat everything until smooth and well combined.
Layer and Finish Baking
Pull the golden crust from the oven and spread the coconut mixture evenly across the surface. Return the pan to the 350°F oven and bake another 20-25 minutes until the top turns a beautiful golden brown and the center looks set.
Cool and Slice
Let the bars rest completely in the pan. Once cooled, slice into squares using a sharp knife. Pro tip: Wipe the knife with a damp cloth between cuts for clean edges.
Key Cooking Insights for Coconut Bars
What Are Coconut Bar Variations
Sweet Serving Ideas For Coconut Bars
Safe Storage Method For Coconut Bars
Coconut Bars Questions And Answers
Can I use sweetened or unsweetened coconut?
Both work great! Sweetened coconut adds extra sweetness, while unsweetened lets you control the sugar level. Choose whichever you prefer or have on hand.
Do I need to toast the coconut first?
No need! The coconut will toast naturally while baking, developing a beautiful golden color and rich flavor during the baking process.
What if my crust seems too crumbly?
Gently press the crust mixture firmly into the pan with the back of a spoon or your fingers. This helps create a solid base that holds together perfectly when baked.
Can this recipe be made gluten-free?
Absolutely! Swap the regular flour with a gluten-free flour blend, and you’ll get the same delicious results without gluten.
How do I know when the bars are fully baked?
Look for a golden-brown top and a set center. When you gently shake the pan, the filling should not jiggle, indicating it’s completely cooked through.
Can I freeze these coconut bars?
Definitely! Wrap them tightly in plastic wrap, then place in a freezer bag. They’ll stay fresh for up to 3 months, ready whenever a coconut craving strikes.
Coconut Bars Recipe
- Total Time: 45-53 minutes
- Yield: 12 1x
Description
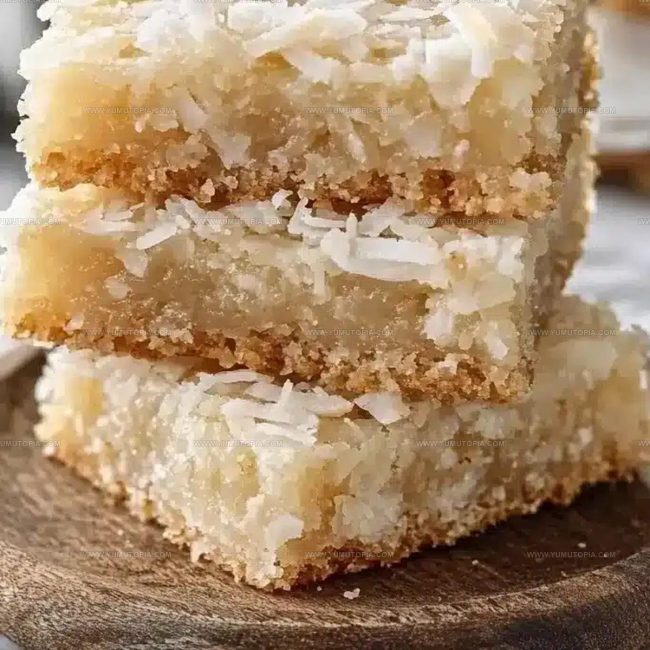
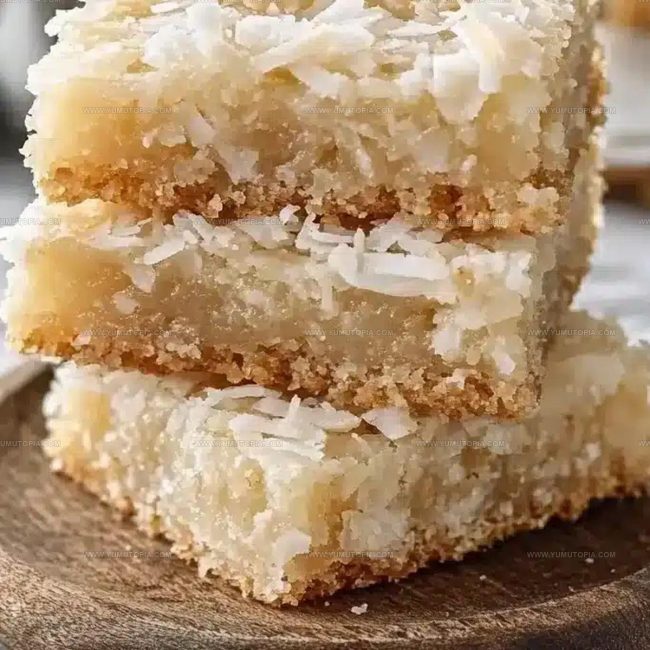
Coconut bars bring sweet memories of summer afternoons when sharing treats with family feels like pure happiness. Crisp graham cracker base topped with creamy coconut filling delivers simple comfort that makes your taste buds dance with delight.
Ingredients
Base Ingredients:
- 2 cups all-purpose flour
- 1 cup unsalted butter
- ¾ cup granulated sugar
Supporting Ingredients:
- 3 large eggs
- 1½ cups shredded sweetened coconut
Finishing Ingredients:
- 1 teaspoon vanilla extract
- ½ cup all-purpose flour
- ¼ teaspoon salt
- ¼ teaspoon salt
Instructions
- Preheat the oven to 350°F. Mix 1 cup softened butter and ½ cup sugar in a large bowl until creamy. The texture should look light and fluffy.
- Add 2 cups flour and ¼ teaspoon salt to the butter mixture. Combine until a crumbly dough forms. Press this evenly into a greased 9×13-inch baking dish.
- Bake the crust for 15-18 minutes until the edges turn lightly golden. The surface should look set but not deeply browned.
- While the crust bakes, whisk 3 large eggs in a separate bowl until they become foamy and slightly frothy.
- Stir 1½ cups sugar, 1 teaspoon vanilla extract, and ¼ teaspoon salt into the eggs. Mix thoroughly until the sugar dissolves.
- Fold ½ cup flour and 1½ cups shredded coconut into the egg mixture. Stir until everything looks evenly distributed.
- Remove the golden crust from the oven. Spread the coconut mixture carefully across the entire surface, making sure it covers the crust completely.
- Return the pan to the oven and bake for 20-25 minutes. The top should become deep golden brown and feel firm when gently touched.
- Remove from the oven and let the bars cool completely in the pan. This helps them set and makes cutting easier.
- Use a sharp knife to slice into squares. Clean the knife with a damp cloth between cuts for neat, precise edges.
Notes
- Ensure butter is softened at room temperature for easier mixing and a smoother crust texture.
- Press the crust mixture firmly and evenly into the pan to create a solid, stable base for the coconut topping.
- Let the bars cool completely before cutting to help them set and make slicing cleaner and more precise.
- Experiment with adding chopped nuts like almonds or pecans to the coconut topping for extra crunch and flavor.
- Prep Time: 10 minutes
- Cook Time: 35-43 minutes
- Category: Dessert Bars
- Method: Baking
- Cuisine: American
Nutrition
- Serving Size: 12
- Calories: 306 kcal
- Sugar: 26 g
- Sodium: 91 mg
- Fat: 18 g
- Saturated Fat: 14 g
- Unsaturated Fat: 4 g
- Trans Fat: 0.5 g
- Carbohydrates: 34 g
- Fiber: 1 g
- Protein: 3 g
- Cholesterol: 45 mg
Logan Lemaster
Founder & Culinary Innovator
Expertise
Recipe Development and Innovation, Menu Design and Optimization, Fine Dining Techniques, Ingredient Pairing and Flavor Science
Education
Metropolitan Culinary Arts Institute
Logan’s culinary journey kicked off in his vibrant Chicago family kitchen, where fresh, seasonal ingredients and bold flavors were always front and center.
After graduating from the Metropolitan Culinary Arts Institute in Arlington, Virginia, and honing his skills in renowned restaurants, Logan mastered the art of blending classic techniques with exciting, modern twists.
His kitchen is a dynamic lab for flavor exploration. Through Yum Utopia, Logan aims to empower you to cook with both confidence and creativity, turning simple ingredients into spectacular meals.