
Coconut Icebox Cake Recipe That Chills Into Creamy Perfection
Coconut icebox cake has become a beloved dessert for anyone who wants impressive results without spending hours in the kitchen.
This no-bake wonder combines layers of creamy filling and crisp wafers that soften beautifully as they chill.
Perfect for warm summer gatherings or casual weekend celebrations, it delivers a tropical sweetness that feels both indulgent and refreshing.
The beauty lies in how effortlessly everything comes together with minimal effort and maximum flavor impact.
You can prepare it well ahead of serving time, making hosting a breeze when life gets busy.
Every chilled slice offers soft, luscious texture that melts on contact and leaves everyone asking for seconds.
Cool down and treat yourself to something special that proves simple desserts can be absolutely unforgettable.
What Makes Coconut Icebox Cake So Enjoyable
Core Ingredients for Coconut Icebox Cake
Main Ingredients:Finishing Touch:Common Prep Tools for Coconut Icebox Cake
Steps for Making Coconut Icebox Cake
Whisk Pudding Base
In a large mixing bowl, whisk together 2 boxes (3.4 oz each) of instant vanilla pudding mix, 3 cups cold milk, and 1 teaspoon coconut extract until the mixture thickens and becomes smooth, about 2 minutes.
Add Coconut Flakes
Stir 1 cup of sweetened coconut flakes into the pudding mixture until they’re evenly distributed throughout.
Incorporate Whipped Topping
Gently fold one 8 oz container of thawed whipped topping into the pudding mixture, making sure no white streaks remain.
Create First Layer
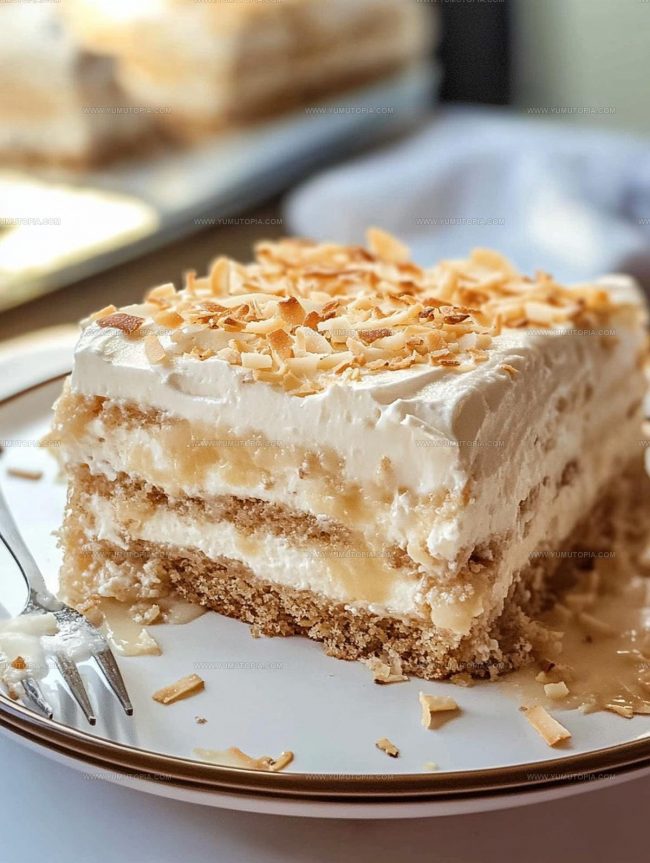
Arrange a single layer of graham crackers across the bottom of a 9×13 inch baking dish, covering the entire surface.
Spread First Pudding Layer
Carefully spread half of the pudding mixture evenly over the graham cracker base, making sure to cover every cracker.
Add Second Cracker Layer
Place another single layer of graham crackers directly on top of the pudding layer.
Add Second Pudding Layer
Spread the remaining pudding mixture over this second layer of graham crackers, ensuring complete coverage.
Final Cracker Layer
Add a final layer of graham crackers on top of the second pudding layer.
Top with Whipped Cream
Spread the remaining 8 oz container of whipped topping across the top layer of crackers, creating a smooth surface.
Chill and Set
Cover the dish and refrigerate for at least 4 hours, or preferably overnight, to allow the layers to soften and blend.
Finish and Serve
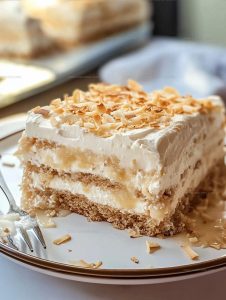
Just before serving, sprinkle 1/2 cup of toasted coconut flakes over the top of the cake. Cut into squares and enjoy chilled.
Store Leftovers
Keep any remaining cake covered in the refrigerator for up to 3 days.
Refined Cooking Notes For Coconut Icebox Cake
Chilled Dessert Options for Coconut Icebox Cake
Serving And Pairing Ideas For Coconut Icebox Cake
Storage Instructions For Coconut Icebox Cake
Coconut Icebox Cake Helpful FAQs
Can I use a different pudding flavor?
Sure! Vanilla pudding works perfectly and keeps the coconut flavor strong.
Do graham crackers need to be whole?
Not at all. Feel free to break crackers to fit your baking dish completely and create solid layers.
What if I cannot find coconut extract?
Swap with vanilla extract or use a bit more coconut flakes to enhance the flavor profile.
Can this dessert be made ahead of time?
Absolutely! This cake tastes better after chilling overnight, making it an excellent make-ahead dessert.
Is toasting coconut flakes necessary?
Toasting adds incredible depth, but untoasted flakes work fine if your time is limited.
Can I use reduced-fat ingredients?
Definitely. Reduced-fat whipped topping and milk will work without compromising the cake’s delicious texture.
Coconut Icebox Cake Recipe
- Total Time: 10 minutes
- Yield: 8 1x
Description
Coconut icebox cake brings layers of creamy, cool deliciousness that will make your summer dessert dreams come true. Chill this simple treat and watch how quickly your friends and family devour every delectable slice.
Ingredients
Main Ingredients:
- 21 full-size graham crackers
- 2 8 oz containers thawed whipped topping
- 3 cups cold milk
Pudding and Flavoring:
- 2 3.4 oz boxes instant vanilla pudding mix
- 1 tsp coconut extract
Coconut Garnish:
- 1 cup sweetened coconut flakes
- ½ cup toasted coconut flakes
Instructions
- Whisk 2 boxes of instant vanilla pudding mix, 3 cups cold milk, and 1 tsp coconut extract in a large bowl for 2 minutes until your mixture thickens smoothly.
- Fold 1 cup sweetened coconut flakes into the pudding mixture until evenly distributed.
- Gently incorporate 1 container of thawed whipped topping, stirring until no white streaks remain in your creamy base.
- Create the first foundation layer by arranging whole graham crackers to completely cover the bottom of a 9×13″ baking dish.
- Carefully spread half the pudding mixture across the graham cracker base, ensuring an even coverage.
- Lay another complete layer of graham crackers directly on top of the pudding layer.
- Distribute the remaining pudding mixture over the second graham cracker layer, smoothing with a spatula.
- Position the final layer of graham crackers across the top of the pudding.
- Generously cover the entire surface with the second container of whipped topping, spreading to the edges.
- Refrigerate the assembled dessert for at least 4 hours or overnight to allow flavors to meld and layers to set.
- Right before serving, sprinkle ½ cup toasted coconut flakes across the top for a delightful crunch.
- Slice into squares and serve chilled directly from the refrigerator.
- Keep any remaining portions covered in the refrigerator for up to 3 days.
Notes
- Toast coconut flakes in a dry skillet over medium heat, stirring constantly to prevent burning and achieve a golden color.
- Use full-fat milk for a richer, creamier pudding mixture that sets up more smoothly.
- For a gluten-free version, swap graham crackers with gluten-free graham-style cookies or vanilla wafers.
- Make the dessert ahead of time for the best texture, as the graham crackers soften and absorb the pudding overnight, creating a cake-like consistency.
- Prep Time: 10 minutes
- Cook Time: 0 minutes
- Category: Cakes
- Method: Refrigerating
- Cuisine: American
Nutrition
- Serving Size: 8
- Calories: 315 kcal
- Sugar: 23 g
- Sodium: 160 mg
- Fat: 18 g
- Saturated Fat: 14 g
- Unsaturated Fat: 3 g
- Trans Fat: 0.5 g
- Carbohydrates: 35 g
- Fiber: 2 g
- Protein: 4 g
- Cholesterol: 10 mg
Madison Wyman
Recipe Developer & Food Storyteller
Expertise
Recipe Research and Adaptation, Food Writing and Cultural Storytelling, Sustainable and Ethical Sourcing, Dietary Adaptations (e.g., gluten-free, plant-based)
Education
Oregon Health & Science University
Portland Community College
Madison’s passion for flavor and culture ignited amidst the rich Southern cooking traditions of her upbringing, where cherished family recipes told delicious tales.
Armed with a Master’s in Food Systems and Society from Oregon Health & Science University and a Culinary Arts Certificate from Portland Community College, Madison truly excels at transforming rich, intricate flavors into dishes that are both approachable and heartfelt.
For her, cooking is a vibrant blend of science, art, and heritage – a powerful way to connect us to our roots and each other. Her recipes invite you to delve deeper, uncovering the fascinating stories woven into every ingredient.