Coconut Lemon Bars Recipe For Sunny Afternoon Treats
Sunshine meets sweetness in these delightful coconut lemon bars that promise pure dessert magic.
Creamy, bright, and utterly charming, this recipe transforms simple ingredients into an extraordinary treat everyone will adore.
Tropical coconut vibes blend perfectly with zesty citrus notes, creating a dessert that feels like a mini vacation.
Soft, buttery, and perfectly balanced, these bars capture the essence of summer in every single bite.
Baking enthusiasts and casual dessert lovers will find themselves completely enchanted by this simple yet spectacular recipe.
Perfect for afternoon tea, potlucks, or spontaneous sweet cravings, these bars offer a refreshing escape from ordinary desserts.
Why Coconut Lemon Bars Bake Fast
Core Ingredients of Coconut Lemon Bars
Main Ingredients:Supporting Ingredients:Kitchen Tools Needed for Coconut Lemon Bars
Making Coconut Lemon Bars From Start To Finish
Prepare Baking Pan
Grab your 9×9-inch pan and get it ready. Grease the inside and line it with parchment paper, letting the edges hang over the sides. This trick makes lifting out the bars super easy later.
Create Crust
In a mixing bowl, combine 1 cup all-purpose flour, 1/2 cup softened butter, and 1/4 cup powdered sugar. Work the ingredients together until they form a crumbly dough that sticks when you press it. Spread this mixture evenly across the bottom of your prepared pan, creating a smooth base.
Bake Crust
Slide the pan into a preheated 350°F oven. Bake for 15-20 minutes until the edges turn a light golden color. Pull the pan out and let it sit while you prepare the filling.
Mix Lemon Coconut Topping
Grab another bowl and whisk together:
Blend everything until the mixture looks smooth and well combined.
Add Topping to Crust
Pour the lemon coconut mixture over the baked crust. Use a spatula to spread it evenly across the surface, making sure it reaches all the corners.
Final Bake
Return the pan to the 350°F oven. Bake for 20-25 minutes until the topping sets and feels slightly firm when you touch it gently.
Cool and Serve
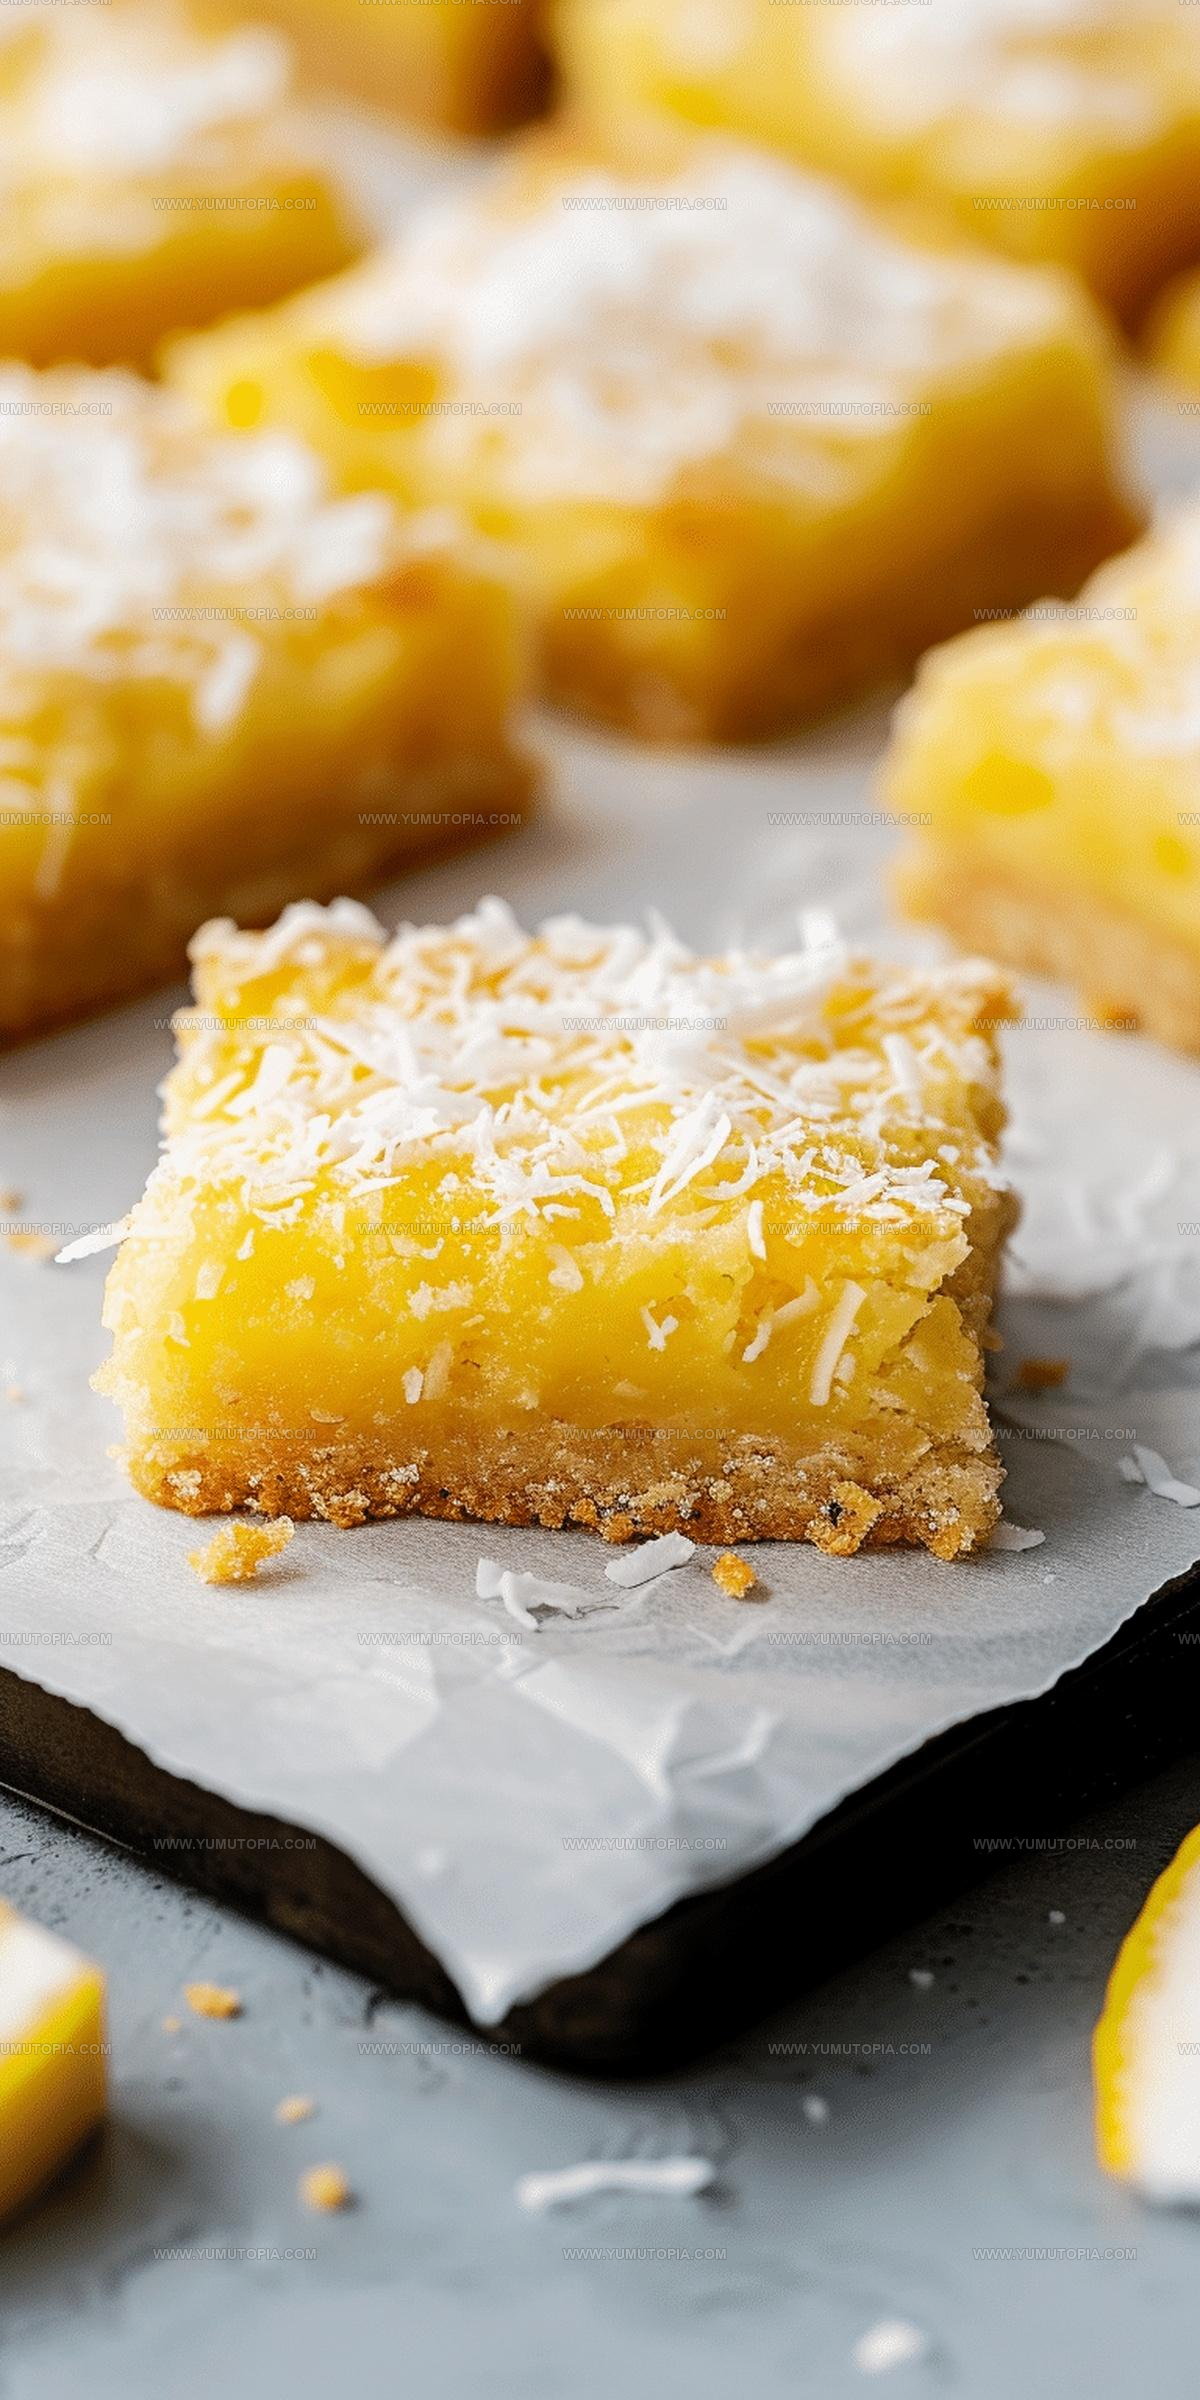
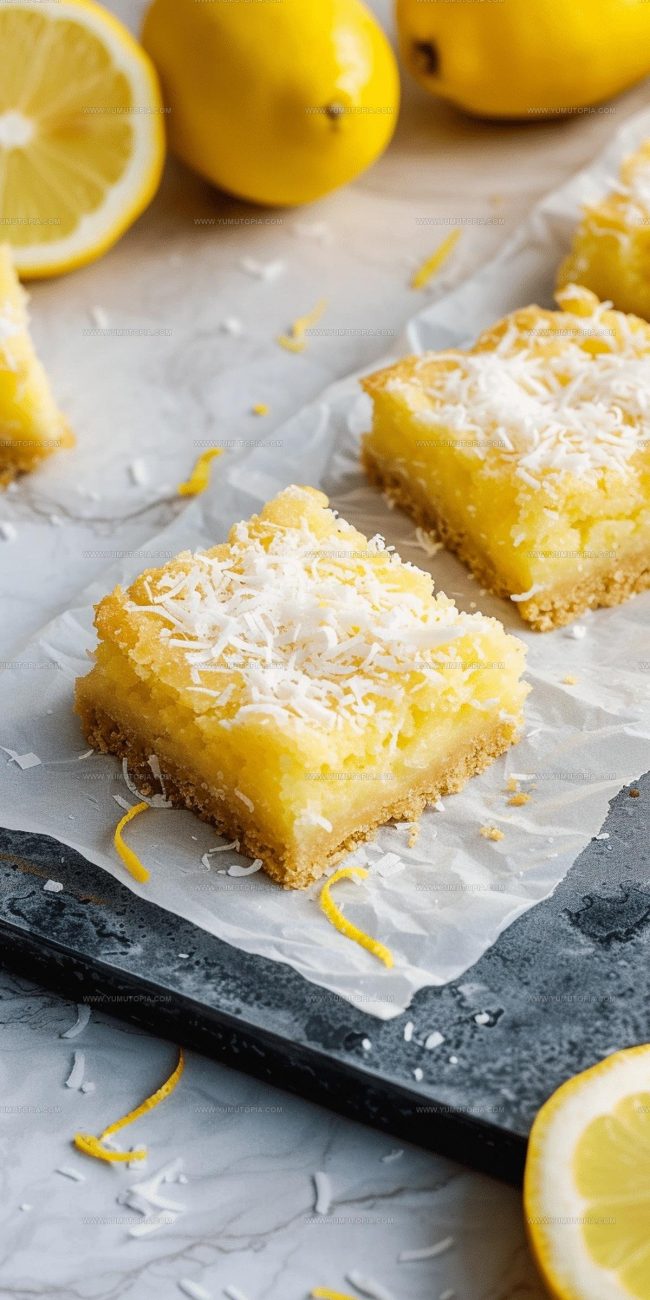
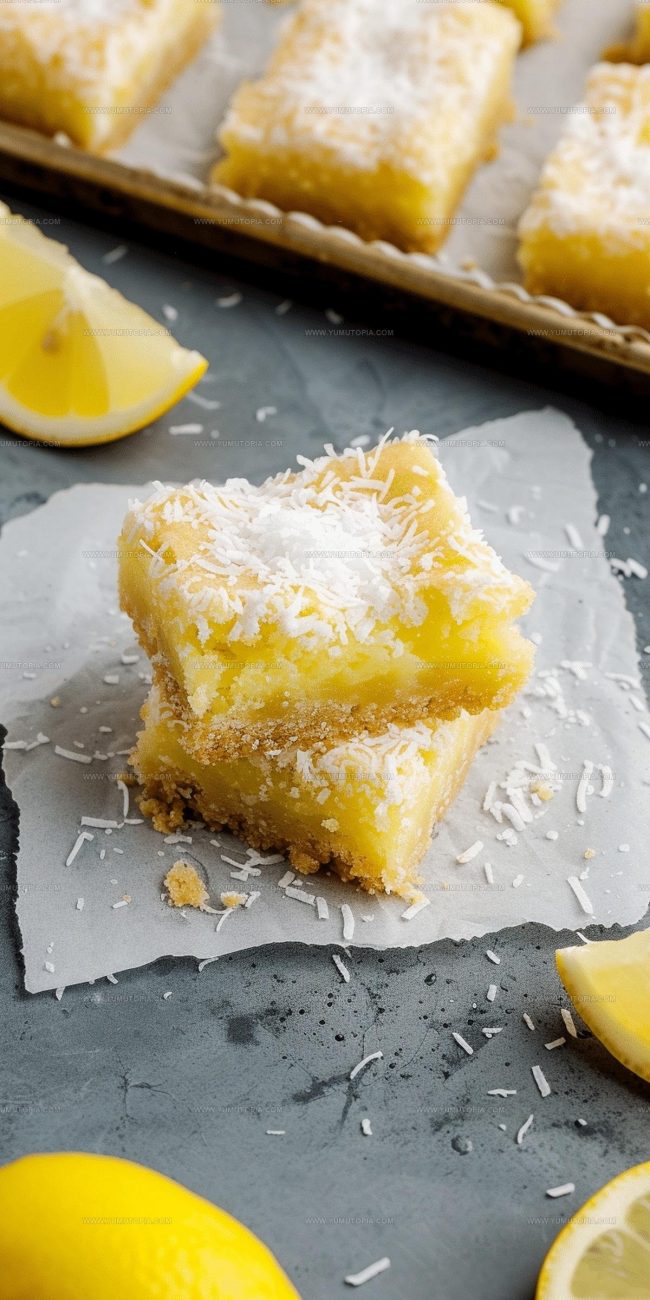
Remove the pan from the oven and let the bars cool completely inside the pan. Once cooled, dust the top with powdered sugar. Use those handy parchment paper edges to lift the entire batch out. Slice into squares and serve.
Little Things That Help Coconut Lemon Bars
Easy Variations for Coconut Lemon Bars
Gluten-Free Coconut Lemon Bars: Swap regular flour with almond flour or gluten-free flour blend in equal amounts for your celiac or gluten-sensitive friends.
Vegan Coconut Lemon Bars: Replace eggs with 1/2 cup applesauce or 3 tablespoons ground flaxseed mixed with water to create a plant-based version that’s just as creamy.
Low-Sugar Coconut Lemon Bars: Use a sugar substitute like stevia or monk fruit sweetener and reduce the total sugar amount by half to make a lighter dessert that’s kinder to your waistline.
Tropical Coconut Lemon Bars: Add some diced mango or passion fruit to the lemon coconut curd for an extra burst of exotic flavor that transports your taste buds to a beachy paradise.
Best Serving Options for Coconut Lemon Bars
Best Storage Method for Coconut Lemon Bars
Questions Readers Often Have About Coconut Lemon Bars
Can I use bottled lemon juice instead of fresh lemons?
Bottled lemon juice works, but fresh lemons provide the brightest, most vibrant flavor. The zest from fresh lemons adds an incredible depth that bottled juice can’t match.
Do coconut flakes need to be toasted first?
No need to toast them beforehand. The shredded coconut will toast naturally during baking and add a wonderful subtle crunch to your bars.
How do I know when the lemon coconut curd is set?
The curd should look slightly firm and not jiggly when you gently shake the pan. A light golden color around the edges indicates it’s perfectly baked.
Can these bars be made gluten-free?
Definitely! Simply substitute the all-purpose flour with a gluten-free flour blend. The texture might be slightly different, but the flavor remains delicious.
What if my curd looks too runny after baking?
Don’t panic. Let the bars cool completely, as they will continue to set and firm up at room temperature. The powdered sugar dusting helps hide any imperfections.
Coconut Lemon Bars Recipe
- Total Time: 1 hour
- Yield: 9 1x
Description
Coconut Lemon Bars bring sunshine to your dessert table with a zesty twist that dances between tangy and sweet. Creamy coconut and bright lemon create a perfect slice of happiness in just one hour.
Ingredients
Main Ingredients:
- 3 large eggs
- 1 cup granulated sugar
- ½ cup shredded coconut
- Zest and juice of 2 lemons
Supporting Ingredients:
- 3 tablespoons all-purpose flour
- Pinch of salt
Instructions
- Preheat oven to 350°F. Grease a 9×9-inch pan and line with parchment paper, creating an overhang for easy removal.
- Mix ½ cup butter, 1 cup flour, and ¼ cup powdered sugar until a crumbly dough forms. Press mixture firmly into prepared pan.
- Bake crust at 350°F for 18 minutes until edges turn light golden. Remove and let stand on counter.
- Whisk 1 cup granulated sugar, 3 tablespoons flour, and a pinch of salt in a separate bowl.
- Add 3 large eggs to sugar mixture. Incorporate lemon zest from 2 lemons and their fresh juice.
- Fold ½ cup shredded coconut into the lemon mixture until evenly distributed.
- Pour lemon-coconut mixture over pre-baked crust, spreading carefully with a spatula to cover entire surface.
- Bake at 350°F for 22 minutes until filling feels slightly firm when touched.
- Remove from oven and allow bars to cool completely in pan for approximately 45 minutes.
- Dust top generously with powdered sugar using a fine-mesh sieve.
- Lift bars from pan using parchment overhang. Cut into 16 even squares using a sharp knife.
Notes
- Toast the coconut before adding to the curd for a deeper, nuttier flavor that enhances the overall taste profile.
- Use fresh lemon juice instead of bottled for the brightest, most vibrant citrus notes in your bars.
- Let the bars cool completely before cutting to ensure clean, precise edges and prevent the curd from running.
- For a gluten-free version, swap regular flour with almond flour or a certified gluten-free blend in both the crust and curd layers.
- Prep Time: 20-25 minutes
- Cook Time: 35-45 minutes
- Category: Dessert Bars
- Method: Baking
- Cuisine: American
Nutrition
- Serving Size: 9
- Calories: 152 kcal
- Sugar: 21 g
- Sodium: 11 mg
- Fat: 6 g
- Saturated Fat: 5 g
- Unsaturated Fat: 1 g
- Trans Fat: 0 g
- Carbohydrates: 22 g
- Fiber: 1 g
- Protein: 2 g
- Cholesterol: 55 mg
Logan Lemaster
Founder & Culinary Innovator
Expertise
Recipe Development and Innovation, Menu Design and Optimization, Fine Dining Techniques, Ingredient Pairing and Flavor Science
Education
Metropolitan Culinary Arts Institute
Logan’s culinary journey kicked off in his vibrant Chicago family kitchen, where fresh, seasonal ingredients and bold flavors were always front and center.
After graduating from the Metropolitan Culinary Arts Institute in Arlington, Virginia, and honing his skills in renowned restaurants, Logan mastered the art of blending classic techniques with exciting, modern twists.
His kitchen is a dynamic lab for flavor exploration. Through Yum Utopia, Logan aims to empower you to cook with both confidence and creativity, turning simple ingredients into spectacular meals.