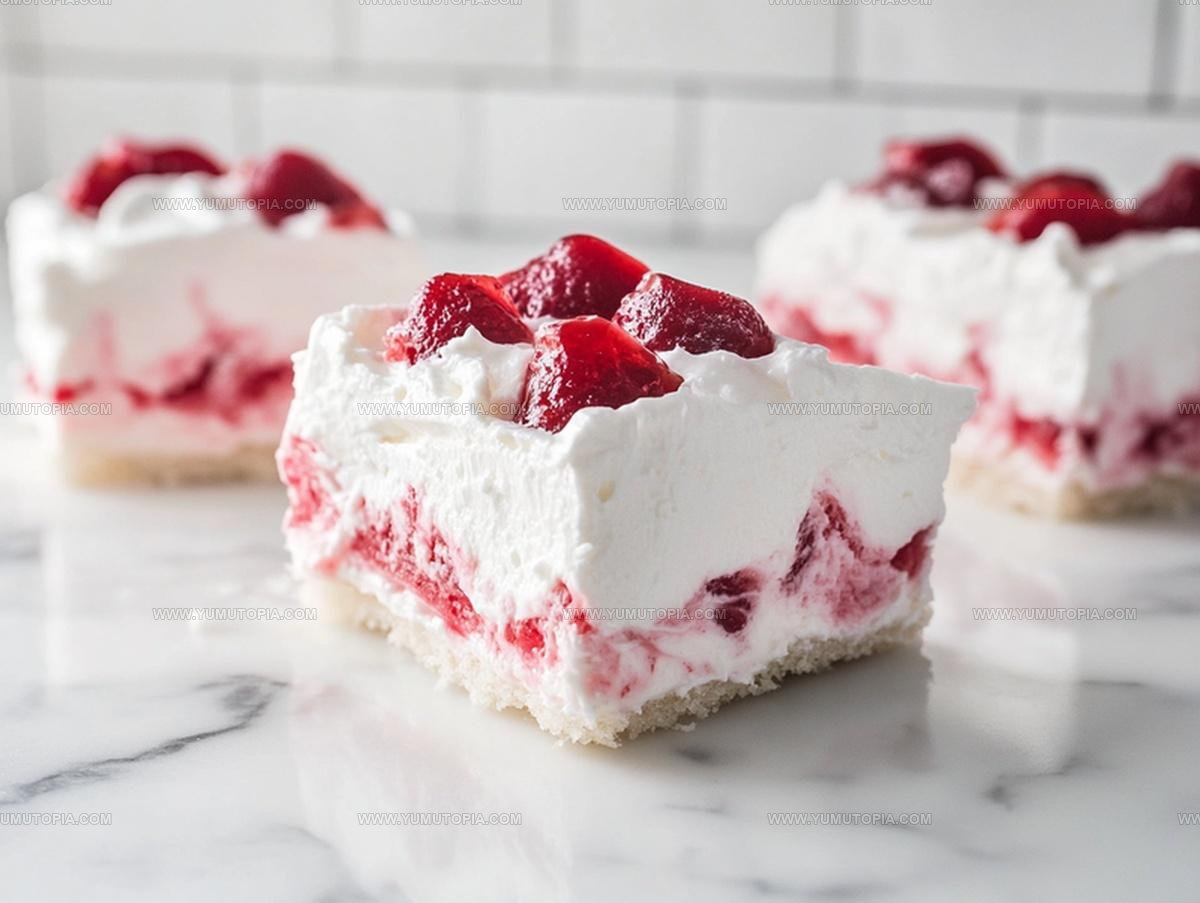
Jiggly Colorful Jello Poke Cake Recipe
Jello poke cake brings out pure joy to any celebration where dessert takes center stage.
Few treats match the fun and excitement of cutting into a dessert that reveals bright, playful layers beneath a fluffy surface.
When you need something that appeals to kids and adults, this option never disappoints.
The combination of light, airy texture with bold, fruity flavors creates a refreshing experience that feels special without being fussy.
Perfect for birthdays, potlucks, or summer gatherings, it always draws compliments and requests for seconds.
Making something that looks impressive but comes together easily is a wonderful feeling.
This recipe brings out exactly that kind of satisfaction every time you serve it.
What Makes Jello Poke Cake Colorful
What Goes Into Making Jello Poke Cake
Cake Base:Jello Filling:Topping:Helpful Kitchen Tools for Jello Poke Cake
How to Make Jello Poke Cake

Prepare Cake Mix
Preheat your oven to 350°F. Mix the white cake mix according to the box instructions. Spread the batter evenly in a 9×13 inch baking pan. Bake for 25-30 minutes until a toothpick comes out clean.
Cool the Cake
Remove the cake from the oven and let it sit for 15 minutes. The cake needs to cool down but still be slightly warm.
Create Poke Holes
Take a fork and poke holes across the entire cake surface. Make sure your holes are about ½ inch apart and go almost to the bottom of the cake.
Prepare Jello Mixture
In a bowl, prepare the Jello by mixing:
Stir until the Jello completely dissolves.
Soak the Cake
Slowly pour the Jello mixture over the cake, making sure it seeps into all the holes. Work carefully so the liquid covers every part of the cake.
Refrigerate
Place the cake in the refrigerator for 3 to 4 hours. This helps the Jello set and allows the flavors to blend.
Add Topping
Once the cake has chilled completely, spread the entire tub of Cool Whip evenly across the top of the cake.
Final Chill
Return the cake to the refrigerator until you’re ready to serve. Keep it chilled for the best texture and flavor.
Which Tips Improve Jello Poke Cake
Top Jello Poke Cake Variations
Best Ways to Enjoy Jello Poke Cake
How to Store Jello Poke Cake
Jello Poke Cake Frequently Asked Questions
What makes the holes in a poke cake so important?
The holes let the Jello seep deep into the cake, creating amazing flavor and moisture throughout every single bite.
Can I use sugar-free Jello for this recipe?
Absolutely! Sugar-free Jello works perfectly and gives the same bright color and tasty result.
How deep should I poke the holes?
Aim for about ½ inch deep across the entire cake surface. A fork works best to create consistent holes that let the Jello spread evenly.
Do I have to use whipped cream on top?
Not at all. While whipped cream adds a creamy touch, your cake will still taste fantastic without it if you prefer.
What boxed cake flavors work best with this method?
Vanilla and white cake mixes are classic choices, but chocolate or yellow cake also create delicious poke cake variations.
Can children help make this dessert?
Definitely! Kids can help poke holes and pour Jello, making it a fun family baking activity.
Colorful Jello Poke Cake Recipe
- Total Time: 3 hours 45 minutes to 4 hours 50 minutes
- Yield: 8 to 12 1x
Description
Jello Poke Cake brings sweet, nostalgic memories of family gatherings where dessert becomes the star of the show. With simple ingredients and a playful technique, your cake turns into a colorful, jiggly treat that sparks smiles around the table.
Ingredients
Main Ingredients:
- 1 white cake mix box and any ingredients listed on box
- 3.3 oz jello mix strawberry
Supporting Ingredients:
- 1 cup boiling water
- 1 cup cold water
Topping:
- 1 tub Cool Whip
Instructions
- Prepare the white cake mix according to the package directions. Use a 9×13 inch pan and bake at the temperature specified on the box.
- Remove the cake from the oven and allow it to cool for exactly 15 minutes at room temperature.
- Take a fork and puncture the entire cake surface, creating holes at half-inch intervals across the entire pan.
- Dissolve the 3.3 oz strawberry jello packet with 1 cup of boiling water. Stir until completely dissolved, then mix in 1 cup of cold water.
- Slowly pour the prepared jello mixture over the cake, ensuring it seeps into all the holes created by the fork.
- Refrigerate the cake for 3 to 4 hours, allowing the jello to set completely and infuse the cake with flavor.
- After chilling, spread the entire tub of Cool Whip evenly across the top of the cake, covering the entire surface.
- Return the cake to the refrigerator until you are ready to serve, keeping it chilled to maintain its texture and flavor.
Notes
- Choose a cake mix flavor that complements your Jello color for extra flavor coordination.
- Make sure to poke holes deep enough to let the Jello seep in, but not so deep that the cake falls apart.
- When spooning Jello over the cake, work slowly to ensure even coverage and prevent pooling.
- Refrigerate the cake for the full recommended time to let the Jello set completely and infuse flavor into every bite.
- Prep Time: 15 minutes
- Cook Time: 30-35 minutes
- Category: Cakes
- Method: Baking
- Cuisine: American
Nutrition
- Serving Size: 8 to 12
- Calories: 250 kcal
- Sugar: 28 g
- Sodium: 180 mg
- Fat: 9 g
- Saturated Fat: 3.5 g
- Unsaturated Fat: 4.5 g
- Trans Fat: 0.1 g
- Carbohydrates: 38 g
- Fiber: 0.5 g
- Protein: 2 g
- Cholesterol: 10 mg
Logan Lemaster
Founder & Culinary Innovator
Expertise
Recipe Development and Innovation, Menu Design and Optimization, Fine Dining Techniques, Ingredient Pairing and Flavor Science
Education
Metropolitan Culinary Arts Institute
Logan’s culinary journey kicked off in his vibrant Chicago family kitchen, where fresh, seasonal ingredients and bold flavors were always front and center.
After graduating from the Metropolitan Culinary Arts Institute in Arlington, Virginia, and honing his skills in renowned restaurants, Logan mastered the art of blending classic techniques with exciting, modern twists.
His kitchen is a dynamic lab for flavor exploration. Through Yum Utopia, Logan aims to empower you to cook with both confidence and creativity, turning simple ingredients into spectacular meals.