
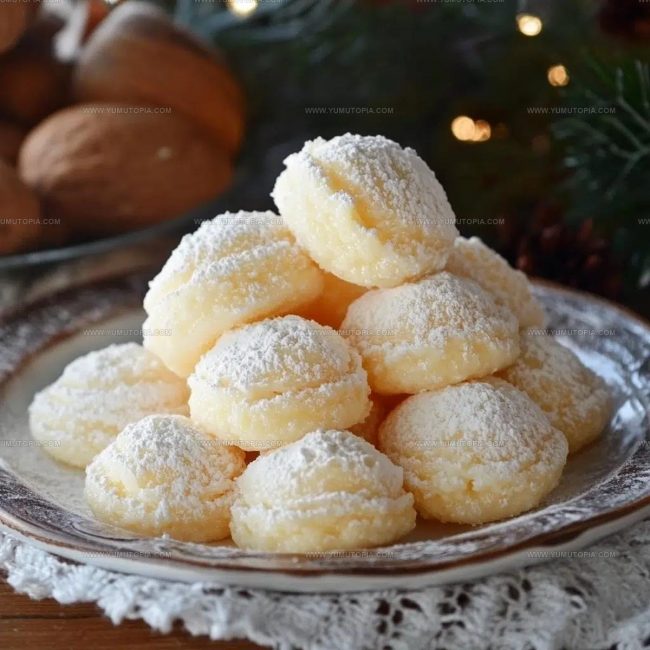
Snowball Cookies Recipe for a Festive Touch
Powdered snowball cookies have been delighting people for generations with a melt-in-your-mouth texture that feels downright magical.
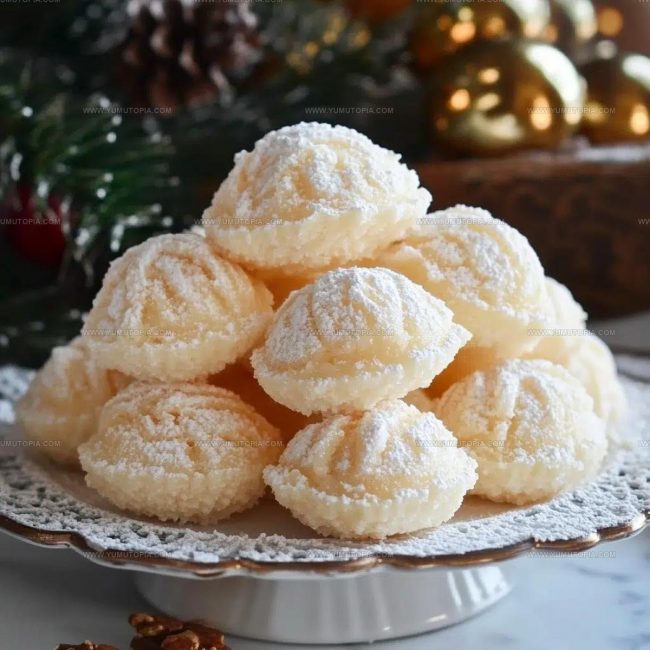
These little round treats show up at winter gatherings, holiday cookie exchanges, and cozy afternoon tea times throughout the year.
What makes them so beloved is how they manage to be both elegant and approachable at the same time.
The delicate crumb paired with a snowy coating creates something truly special that appeals to cookie lovers of all ages.
They’re perfect when you want something sweet but not overly rich or heavy.
Baking a batch fills the house with warmth and wonderful aromas that make everyone smile.
Once you take that first bite and feel the soft texture against the sweet dusting, you’ll understand why these cookies never go out of style.
Keep scrolling to find out how simple it is to make them at home.
What Makes Condensed Milk Snowballs So Tender
Ingredients For Tender Condensed Milk Snowballs
Main Ingredients:Dry Ingredients:Finishing Ingredient:Bowls Sheets And Tools For Snowball Cookies
Directions for Condensed Milk Snowballs
Prepare Baking Space
Preheat your oven to 350°F (175°C). Grab a baking sheet and line it with parchment paper or a silicone mat to prevent sticking.
Blend Creamy Base
In a large mixing bowl, cream together 1 cup softened unsalted butter and ½ cup sweetened condensed milk. Whip these ingredients for 2-3 minutes until the mixture becomes light and fluffy. Your arm might get a little tired, but keep mixing until it looks smooth and airy.
Add Flavor Boost
Pour 1 teaspoon pure vanilla extract into the butter mixture. Stir until the vanilla is completely blended throughout.
Form Cookie Dough
Gradually add 2 ¼ cups all-purpose flour and ½ teaspoon salt to your mixture. Gently stir the ingredients until a soft dough forms. Be careful not to overmix – you want a tender cookie, not a tough one.
Shape Cookies
Roll the dough into small 1-inch balls with your hands. Place each ball about 1 inch apart on the prepared baking sheet. These little rounds will transform into delicate cookies.
Bake to Golden Perfection
Slide the baking sheet into the preheated oven. Bake for 12-14 minutes. Watch for light golden bottoms while keeping the tops pale and soft.
Sugar Coating Magic
Let the cookies cool for 5 minutes right on the baking sheet. While they’re still warm, roll each cookie in 1 cup of powdered sugar until completely covered. The sugar will stick beautifully to the warm surface.
Final Cool Down
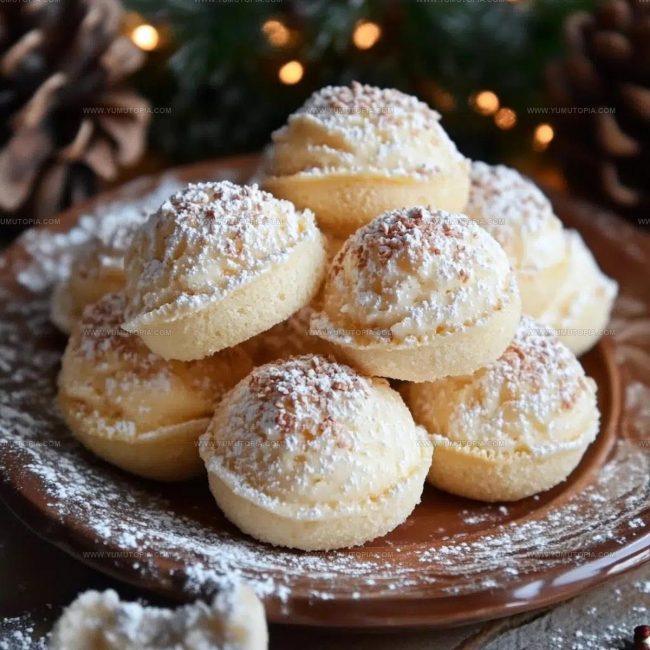
Allow the sugar-coated cookies to cool completely on a wire rack. The powdered sugar will set, creating a delicate, melt-in-your-mouth exterior.
Tricks For Soft Round Snowball Cookies
Flavor Variations For Snowball Fans
Serving Snowballs For Holidays And Parties
Storing Snowball Cookies To Keep Them Fresh
Snowball Cookie Helpful Q&A
Can chocolate chips be added to the dough?
Absolutely! Fold in 1/2 cup of mini chocolate chips when mixing the dry ingredients for extra flavor.
Are these cookies good for holiday gifting?
These snowballs package beautifully in clear cellophane bags tied with ribbon and taste delicate enough for special occasions.
What if the dough seems too sticky?
Chill the dough in the refrigerator for 30 minutes before shaping to make rolling easier and prevent sticking.
Can gluten-free flour work in this recipe?
Substitute an equal amount of gluten-free all-purpose flour blend for standard flour to make these cookies celiac-friendly.
How do professionals get perfectly round cookies?
Wear disposable gloves when rolling the dough and use a small cookie scoop for consistent sizing.
Why roll cookies in powdered sugar while warm?
Warm cookies absorb the sugar better, creating a delicate, melt-in-your-mouth coating that looks professionally finished.
Condensed-Milk Powdered Snowball Cookies Recipe
- Total Time: 40-42 minutes
- Yield: 24 1x
Description
Sweetened Condensed Milk Snowballs are my go-to holiday treat that always brings smiles to family gatherings. Rolled in powdered sugar and packed with sweet, creamy goodness, these delicate cookies melt in your mouth and disappear faster than you can make them.
Ingredients
Main Ingredients:
- 2.25 cups all-purpose flour
- 1 cup unsalted butter, softened
Binding Ingredients:
- 0.5 cup sweetened condensed milk
- 1 teaspoon pure vanilla extract
Finishing Ingredients:
- 0.5 teaspoon salt
- 1 cup powdered sugar (for coating after baking)
Instructions
- Grab your softened 1 cup unsalted butter and ½ cup sweetened condensed milk. Cream these ingredients in a large mixing bowl for 2-3 minutes until the mixture transforms into a smooth, pale consistency.
- Pour 1 teaspoon pure vanilla extract into the butter mixture. Blend thoroughly until the liquid integrates completely.
- Measure 2 ¼ cups all-purpose flour and ½ teaspoon salt. Gradually fold these dry ingredients into your creamy base, stirring gently until a tender dough emerges.
- Use your palms to roll small portions of dough into 1-inch spherical shapes. Position each ball approximately 1 inch apart on a parchment-lined baking sheet.
- Slide the baking sheet into an oven preheated to 350°F (175°C). Bake for 12-14 minutes, watching for golden-brown edges while maintaining a pale top surface.
- Remove the sheet from the oven. Allow cookies to rest for 5 minutes, maintaining their delicate structure.
- Prepare 1 cup powdered sugar in a separate bowl. While cookies are still warm, roll each one completely in the sugar, ensuring a full, even coating.
- Transfer coated cookies to a wire rack. Let them cool completely, allowing the powdered sugar to set and create a delicate exterior.
Notes
- When beating butter and condensed milk, aim for a fluffy, light consistency that helps create tender cookies.
- Use room temperature butter for easier mixing and smoother dough texture.
- For gluten-free version, replace wheat flour with almond flour or a gluten-free blend that matches the same weight measurement.
- Storing these snowballs in an airtight container keeps them soft and fresh for 5-7 days at room temperature.
- Prep Time: 28 minutes
- Cook Time: 12-14 minutes
- Category: Cookies
- Method: Baking
- Cuisine: American
Nutrition
- Serving Size: 24
- Calories: 292 kcal
- Sugar: 15 g
- Sodium: 77 mg
- Fat: 17 g
- Saturated Fat: 11 g
- Unsaturated Fat: 6 g
- Trans Fat: 0.5 g
- Carbohydrates: 32 g
- Fiber: 1 g
- Protein: 3 g
- Cholesterol: 47 mg
Logan Lemaster
Founder & Culinary Innovator
Expertise
Recipe Development and Innovation, Menu Design and Optimization, Fine Dining Techniques, Ingredient Pairing and Flavor Science
Education
Metropolitan Culinary Arts Institute
Logan’s culinary journey kicked off in his vibrant Chicago family kitchen, where fresh, seasonal ingredients and bold flavors were always front and center.
After graduating from the Metropolitan Culinary Arts Institute in Arlington, Virginia, and honing his skills in renowned restaurants, Logan mastered the art of blending classic techniques with exciting, modern twists.
His kitchen is a dynamic lab for flavor exploration. Through Yum Utopia, Logan aims to empower you to cook with both confidence and creativity, turning simple ingredients into spectacular meals.