
Creamy Oreo Cheesecake Recipe for Cookie Lovers
Oreo cheesecake merges two beloved desserts into one show-stopping creation that feels both decadent and comforting at the same time.
Rich, creamy, and loaded with cookie goodness throughout, it has become a favorite for celebrations and casual gatherings.
The combination gives that perfect balance between smooth and crunchy textures that makes every bite satisfying.
Whether you need something impressive for a special occasion or just want to treat yourself on a weekend, it fits the moment beautifully.
The appeal spans across all age groups, making it one of those crowd-pleasers that rarely has leftovers.
It looks as stunning as it tastes, which means you can serve it with pride at any event.
The best part is how it manages to feel fancy without being overly complicated, so you won’t spend all day in the kitchen.
Head to the full recipe and see just how rewarding homemade cheesecake can be when cookies join the party.
Practical Reasons to Try Oreo Cheesecake
What You’ll Need for Oreo Cheesecake
Crust:Cheesecake Filling:Topping:Tools for Oreo Cheesecake
Baking Instructions for Classic Oreo Cheesecake
Prepare the Oven
Heat the oven to 325°F (160°C). This perfect temperature ensures a smooth, creamy cheesecake.
Create the Crust
Grab a mixing bowl and combine the cookie base. Here’s how:
Press this mixture firmly into the bottom of a 9-inch springform pan, creating a solid foundation for your cheesecake.
Mix the Cream Cheese Filling
Grab another bowl and whip up the creamy center:
Beat these ingredients until they become silky smooth and fully combined.
Add the Eggs
Incorporate the eggs one at a time, mixing thoroughly after each addition:
Blend carefully to keep the mixture light and airy.
Finish the Filling
Fold in the remaining creamy ingredients:
Stir gently until everything is perfectly incorporated.
Bake the Cheesecake
Pour the filling over the Oreo crust in the springform pan. Slide the pan into the preheated oven and bake for 55-60 minutes. The cheesecake is done when the center is almost set but still has a slight wiggle.
Cool and Chill
Remove the cheesecake from the oven and let it cool completely at room temperature. Once cooled, refrigerate for at least 4 hours or overnight to set completely.
Decorate and Serve
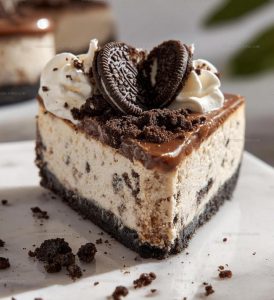
Before serving, sprinkle some extra crushed Oreos on top. Add a dollop of whipped cream for an extra special touch. Slice and enjoy your delicious creation!
Handy Kitchen Notes for Oreo Cheesecake
Oreo Cheesecake Flavor Twists
How to Serve Oreo Cheesecake
Best Storage Advice for Oreo Cheesecake
Oreo Cheesecake Reader FAQs
Can I use reduced-fat Oreos for the crust?
Absolutely! Reduced-fat Oreos work perfectly and won’t change the delicious texture of your cheesecake base.
What if my cream cheese isn’t at room temperature?
Cold cream cheese can create lumps, so let it sit out for about 30 minutes before mixing to ensure a super smooth filling.
How do I prevent cracks in my cheesecake?
Bake in a water bath and avoid overmixing the batter. Gently fold ingredients together to keep the texture silky and crack-free.
Can this cheesecake be frozen?
Wrap it tightly in plastic wrap and freeze for up to 2 months. Thaw overnight in the refrigerator before serving.
Do I need a springform pan?
While a springform pan makes removal easier, you can use a regular cake pan lined with parchment paper if needed.
What if I don’t have sour cream?
Replace sour cream with Greek yogurt for a similar creamy texture and tangy flavor.
Cookies-and-Cream Oreo Cheesecake Recipe
- Total Time: 5 hours 15-20 minutes
- Yield: 8 1x
Description
Oreo Cheesecake will rock your dessert world with its creamy, crunchy layers of pure chocolate sandwich cookie bliss. Whip up this crowd-pleaser in no time and watch your friends go crazy for this simple yet irresistible treat.
Ingredients
Main Ingredients:
- 16 oz cream cheese
- 3 large eggs
- 1 cup sugar
Supporting Ingredients:
- 1 cup sour cream
- 1 cup whipped cream
- 1 teaspoon vanilla extract
Crust Ingredients:
- 24 Oreo cookies
- 4 tablespoons butter
Topping:
- Extra Oreos
Instructions
- Crush 24 Oreo cookies into fine crumbs using a food processor or rolling pin.
- Melt 4 tablespoons butter and blend thoroughly with cookie crumbs.
- Transfer crumb mixture into a 9-inch springform pan, pressing firmly to create an even bottom crust.
- Soften 16 oz cream cheese at room temperature for smooth mixing.
- Combine cream cheese, 1 cup sugar, and 1 teaspoon vanilla extract in a mixer, beating until completely smooth.
- Crack 3 large eggs into the mixture, incorporating one egg at a time and mixing completely between additions.
- Fold in 1 cup sour cream and 1 cup whipped cream gently until ingredients are well integrated.
- Preheat oven to 325°F and position rack in center of oven.
- Pour cream cheese mixture over prepared Oreo crust, ensuring even distribution.
- Bake for 55-60 minutes until center is slightly jiggly but not liquid.
- Remove cheesecake from oven and allow to cool at room temperature for 1 hour.
- Refrigerate cheesecake for minimum 4 hours to set completely.
- Garnish with additional whipped cream and crushed Oreo cookies just before serving.
Notes
- Check the cream cheese temperature to ensure it’s at room temperature, which helps create a smoother, lump-free filling.
- Crush Oreos finely for a more compact and even crust that holds together perfectly.
- Avoid overmixing the batter after adding eggs to prevent air bubbles that can cause cracking during baking.
- Wrap the springform pan’s outside with aluminum foil to prevent water from seeping in during the water bath baking method, which helps create a creamy texture.
- Prep Time: 20 minutes
- Cook Time: 55 minutes – 1 hour
- Category: Cheesecakes
- Method: Baking
- Cuisine: American
Nutrition
- Serving Size: 8
- Calories: 456
- Sugar: 36 g
- Sodium: 240 mg
- Fat: 32 g
- Saturated Fat: 19 g
- Unsaturated Fat: 10 g
- Trans Fat: 0.5 g
- Carbohydrates: 34 g
- Fiber: 1 g
- Protein: 6 g
- Cholesterol: 110 mg
Logan Lemaster
Founder & Culinary Innovator
Expertise
Recipe Development and Innovation, Menu Design and Optimization, Fine Dining Techniques, Ingredient Pairing and Flavor Science
Education
Metropolitan Culinary Arts Institute
Logan’s culinary journey kicked off in his vibrant Chicago family kitchen, where fresh, seasonal ingredients and bold flavors were always front and center.
After graduating from the Metropolitan Culinary Arts Institute in Arlington, Virginia, and honing his skills in renowned restaurants, Logan mastered the art of blending classic techniques with exciting, modern twists.
His kitchen is a dynamic lab for flavor exploration. Through Yum Utopia, Logan aims to empower you to cook with both confidence and creativity, turning simple ingredients into spectacular meals.