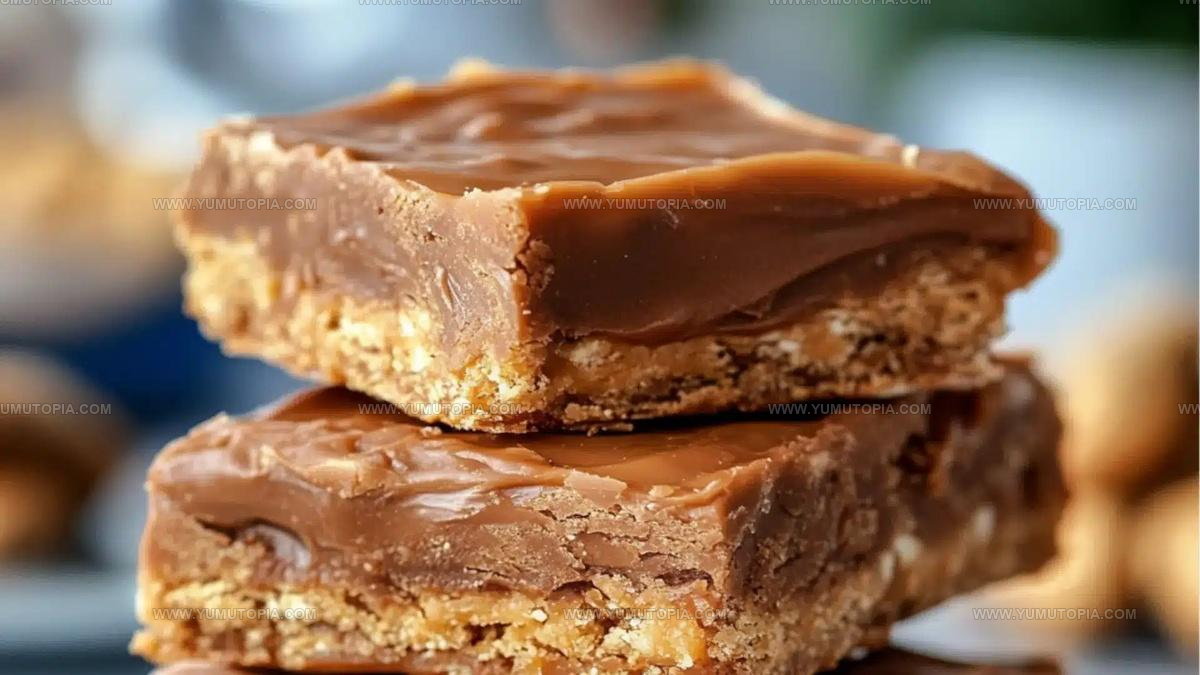
Disneyland Peanut Butter Sandwich Bars Recipe to Enjoy
Disneyland peanut butter sandwich bars recipe adds back memories of sunny afternoons at the happiest place on earth, where sweet treats make magic feel real.
Fans of the theme park have been swooning over the nutty, creamy goodness tucked between soft cookie layers for decades.
What makes it so special is how it balances rich flavors with a satisfying texture that never feels too heavy.
Families love sharing it during movie nights, picnics, or casual gatherings when something simple yet impressive is needed.
The combination of sweet and salty notes appeals to all ages, making it a crowd-pleaser at any occasion.
Recreating the famous park treat at home means enjoying that same delightful experience without the long lines or ticket prices.
When cravings hit for something comforting and fun, nothing quite compares to biting into one of the iconic treats inspired by the beloved destination.
The recipe waiting below will show you exactly how to make the magic happen in your own kitchen.
Why Disneyland-Style Peanut Butter Sandwich Bars Stand Out
Disneyland Peanut Butter Sandwich Bars Ingredient List
Graham Cracker Base:Peanut Butter Filling:Chocolate Topping:What Supports Peanut Butter Sandwich Bars
Disneyland-Style Peanut Butter Sandwich Bars Instructions
Prepare the Baking Pan
Grab an 8×8 or 9×9-inch pan and line it with parchment paper. Make sure the paper hangs over the edges so you can easily lift out the bars later.
Create Graham Cracker Base
Arrange 9 whole graham crackers across the bottom of the pan. If needed, break some crackers to completely cover the base. These crackers will be your delicious foundation.
Mix Peanut Butter Filling
In a medium bowl, whip together the filling ingredients:
Stir until the mixture becomes smooth and creamy. The texture should be thick and dreamy.
Spread the Filling
Pour the peanut butter mixture over the graham cracker base. Use a spatula to spread it evenly, making sure every corner gets covered.
Top with Graham Crackers
Carefully place another layer of whole graham crackers on top of the peanut butter filling. Gently press down to make sure they stick.
Prepare Chocolate Topping
Grab a microwave-safe bowl and melt the chocolate topping at 50% power:
Heat in 30-second intervals, stirring between each session until completely smooth. Pour the melted chocolate over the top graham cracker layer and spread evenly.
Chill and Set
Pop the pan in the refrigerator for 1-2 hours at 40°F. Wait until the chocolate firms up completely and the bars are set.
Slice and Serve
Remove the bars from the refrigerator. Use the parchment paper to lift the entire batch out of the pan. Slice into squares or rectangles with a sharp knife. These taste great chilled or at room temperature.
Making It Better with Peanut Butter Bars
Different Takes on Disneyland Peanut Butter Bars
What Goes Well With Peanut Butter Sandwich Bars
Best Storage Method For Peanut Butter Sandwich Bars
Simple Questions And Answers for Peanut Butter Sandwich Bars
Can I use a different type of nut butter?
Definitely! Almond or cashew butter work great and add unique flavor profiles to the bars.
Do graham crackers have to be name brand?
Not at all. Store-brand or generic graham crackers will work perfectly fine in this recipe.
What kind of chocolate chips work best?
Semi-sweet or milk chocolate chips both create delicious results. Just choose your personal chocolate preference.
How long will these bars stay fresh?
Stored in an airtight container in the refrigerator, these bars will keep for about 5-7 days.
Can these bars be frozen?
Absolutely. Wrap them tightly in plastic wrap, then place in a freezer bag. They’ll stay fresh for up to 3 months.
Are these bars gluten-free?
No, traditional graham crackers contain wheat. You would need to substitute gluten-free graham-style crackers to make this recipe celiac-friendly.

Copycat Disneyland Peanut Butter Sandwich Bars Recipe
- Total Time: 1 hour 17 minutes to 2 hours 17 minutes
- Yield: 9 1x
Description
Disneyland’s peanut butter sandwich bars bring pure childhood nostalgia straight to your kitchen counter. Creamy peanut butter nestled between crisp graham crackers creates a quick treat that makes snack time feel like a magical moment.
Ingredients
Main Ingredients:
- 1 sleeve graham crackers
- 1 cup creamy peanut butter
- 1 ½ cups semi-sweet chocolate chips
Supporting Ingredients:
- ½ cup unsalted butter
- 1 ½ cups powdered sugar
Seasoning Ingredients:
- 1 teaspoon vanilla extract
- ¼ teaspoon salt
- 2 tablespoons peanut butter
Instructions
- Grab an 8×9-inch pan and line it completely with parchment paper, ensuring enough overhang for easy removal later.
- Arrange 9 whole graham crackers across the bottom of the pan, carefully breaking pieces to create a solid base layer.
- Combine ½ cup melted butter, 1 cup peanut butter, 1 ½ cups powdered sugar, 1 teaspoon vanilla, and ¼ teaspoon salt in a medium bowl, whisking until your mixture becomes ultra-smooth and creamy.
- Pour the peanut butter mixture over the graham cracker foundation, using a spatula to spread it evenly across every corner.
- Layer additional graham crackers on top of the peanut butter filling, gently pressing down to create a stable surface.
- Melt 1 ½ cups chocolate chips with 2 tablespoons peanut butter in the microwave at 50% power for 30-second intervals, stirring between each interval until completely liquid and glossy.
- Drizzle the melted chocolate mixture over the top graham cracker layer, carefully spreading it to cover every inch with a smooth, even coating.
- Refrigerate the pan for 1-2 hours at 40°F until the chocolate becomes completely firm and the bars hold their shape.
- Remove the bars from the refrigerator and lift them out using the parchment paper edges.
- Slice into 16 uniform squares using a sharp knife, serving them chilled for the best texture and flavor.
Notes
- Check graham cracker sizes to ensure they perfectly cover your pan bottom without leaving gaps.
- Use room temperature ingredients for smoother mixing of the peanut butter filling.
- Melt chocolate slowly and carefully to prevent burning, stirring between each microwave interval.
- For a gluten-free version, swap graham crackers with gluten-free graham-style crackers or a nut-based crust.
- Prep Time: 15 minutes
- Cook Time: 2 minutes (melting chocolate)
- Category: Dessert Bars
- Method: Chilling
- Cuisine: American
Nutrition
- Serving Size: 9
- Calories: 330 kcal
- Sugar: 23 g
- Sodium: 110 mg
- Fat: 22 g
- Saturated Fat: 8 g
- Unsaturated Fat: 12 g
- Trans Fat: 0.1 g
- Carbohydrates: 28 g
- Fiber: 2 g
- Protein: 7 g
- Cholesterol: 15 mg
Logan Lemaster
Founder & Culinary Innovator
Expertise
Recipe Development and Innovation, Menu Design and Optimization, Fine Dining Techniques, Ingredient Pairing and Flavor Science
Education
Metropolitan Culinary Arts Institute
Logan’s culinary journey kicked off in his vibrant Chicago family kitchen, where fresh, seasonal ingredients and bold flavors were always front and center.
After graduating from the Metropolitan Culinary Arts Institute in Arlington, Virginia, and honing his skills in renowned restaurants, Logan mastered the art of blending classic techniques with exciting, modern twists.
His kitchen is a dynamic lab for flavor exploration. Through Yum Utopia, Logan aims to empower you to cook with both confidence and creativity, turning simple ingredients into spectacular meals.