Disneyland Peanut Butter Sandwich Bars Recipe for Sweet Fans
Sweet memories of Disneyland peanut butter sandwich bars instantly transport you to the magical world of theme park treats.
Nostalgia hits hard when recalling those iconic snacks that made park adventures extra special.
Theme park desserts have a unique way of capturing pure joy and excitement.
Comfort and happiness blend seamlessly in this beloved classic that has delighted generations of park visitors.
Decadent layers of creamy goodness promise a delightful escape from ordinary desserts.
Recreating this signature snack allows you to bring a touch of Disney magic right into your own kitchen.
Prepare to experience a delightful journey of flavor that connects you with cherished memories of magical moments.
Why Disneyland Peanut Butter Sandwich Bars Are Always A Hit
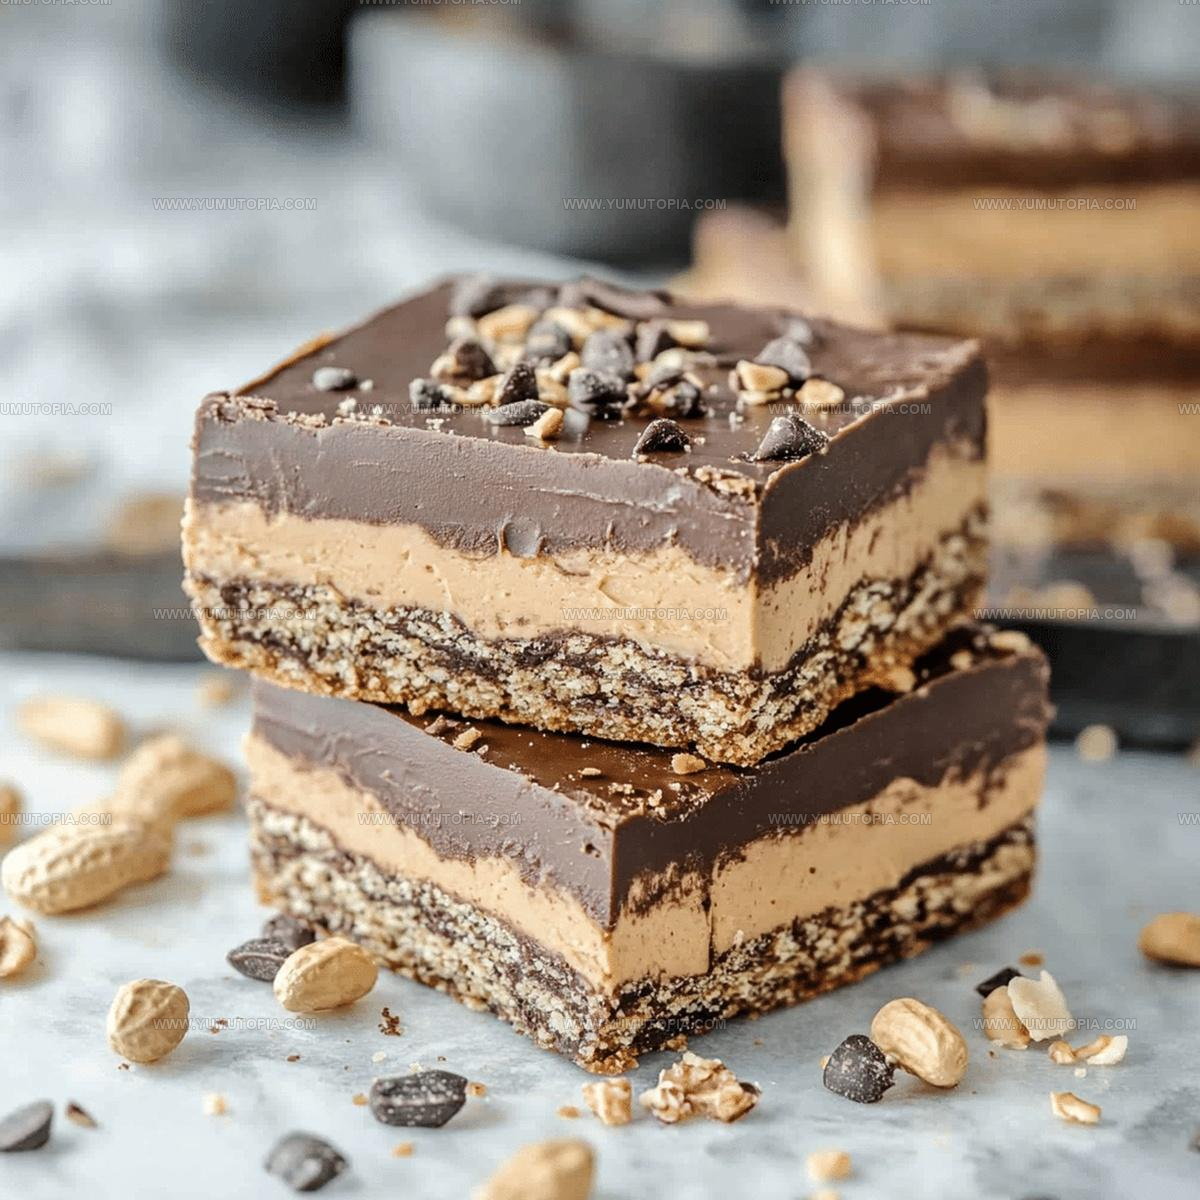
What Goes Into Disneyland Peanut Butter Sandwich Bars
Base Layer:Chocolate Topping:Common Prep Tools for Peanut Butter Sandwich Bars
Cooking Method for Disneyland Peanut Butter Bars

Prepare the Base
Grab a large mixing bowl and combine 1 cup melted unsalted butter, 2 cups graham cracker crumbs, 2 cups powdered sugar, and 1 cup creamy peanut butter. Mix everything until the texture becomes smooth and everything blends perfectly. Your mixture should look consistent and creamy.
Create the Bottom Layer
Take a 9×13-inch pan and line it with parchment paper. Gently press the peanut butter mixture into the pan, making sure it covers the entire bottom evenly. Use the back of a spoon or your clean hands to smooth out the surface.
Melt the Chocolate Topping
Grab a microwave-safe bowl and add these ingredients:
Microwave the mixture in 30-second intervals, stirring between each interval. Continue until the chocolate and peanut butter blend completely and become silky smooth.
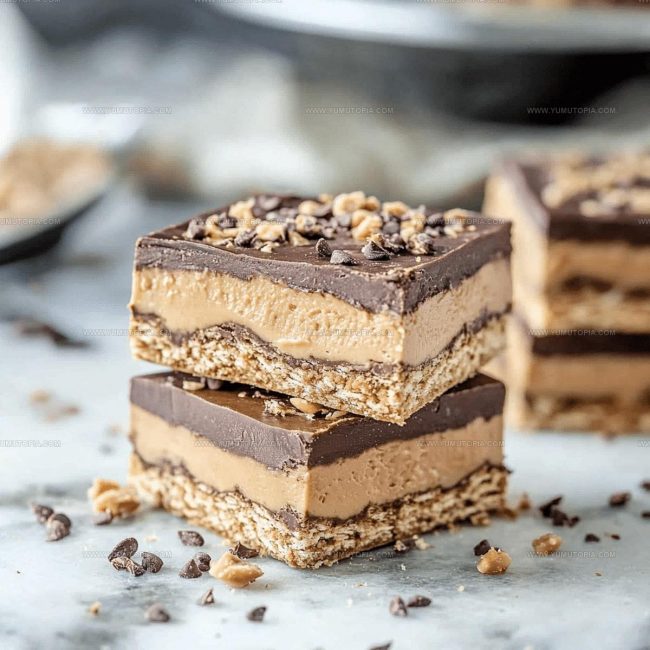
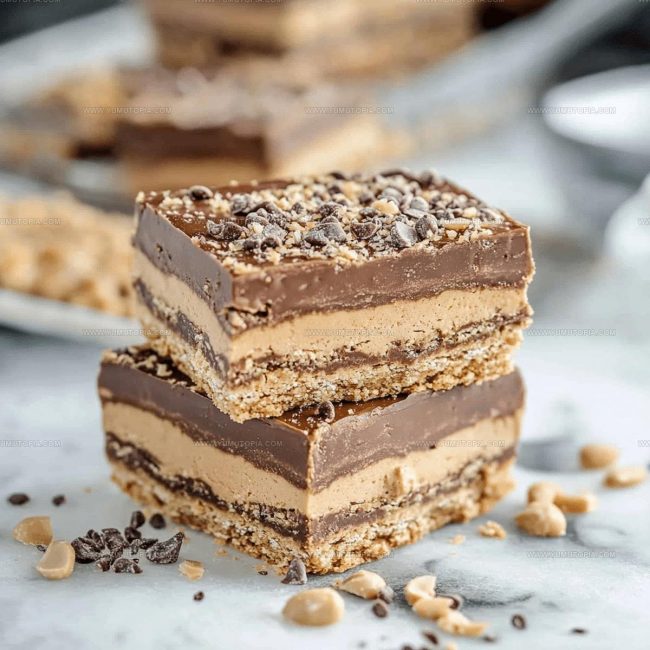
Add the Chocolate Layer
Pour the melted chocolate mixture over the peanut butter base. Use a spatula to spread the chocolate evenly, covering the entire surface of the base.
Chill and Set
Place the pan in the refrigerator for 2 hours or in the freezer for 45 minutes. You want the bars to become completely firm and set.
Slice and Serve
Take a warm, clean knife and slice the bars into neat squares. The warmth of the knife helps create clean, sharp edges. Enjoy your delicious peanut butter chocolate bars!
Key Cooking Insights For Disneyland Style Peanut Butter Sandwich Bars
Creative Variations For Disneyland Peanut Butter Sandwich Bars
Popular Serving Options For Peanut Butter Sandwich Bars
Recommended Storage Method For Peanut Butter Sandwich Bars
Questions Explained For Disneyland Peanut Butter Sandwich Bars
Can I use a different type of nut butter?
Natural peanut butter works best for this recipe. Almond or cashew butter might change the texture and flavor, making the bars less stable.
How do I prevent the chocolate from cracking when cutting?
Letting the bars sit at room temperature for 5-10 minutes before cutting helps create smooth, clean edges without chocolate fracturing.
Do I need a mixer for this recipe?
No mixer needed! A simple whisk or spatula works perfectly to blend the ingredients smoothly and evenly.
Can kids help make these bars?
Absolutely! Kids can help mix ingredients, press the base into the pan, and spread chocolate – just supervise melting and cutting steps.
What if my chocolate seizes when melting?
Stop microwaving immediately, add a tiny splash of neutral oil, and stir gently to restore smooth consistency.
How thick should the layers be?
Aim for an even, compact base about 1/2-inch thick, with a chocolate layer roughly the same thickness for balanced flavor and texture.

Copycat Treat Disneyland Peanut Butter Sandwich Bars Recipe
- Total Time: 2 hours 10 minutes (refrigeration) or 55 minutes (freezing)
- Yield: 12 1x
Description
Disneyland peanut butter sandwich bars bring nostalgic theme park flavors straight to your kitchen counter. Recreate this classic Disney treat with simple ingredients and quick assembly for a sweet snack that transports you to magical memories.
Ingredients
Main Ingredients:
- 1 cup creamy peanut butter
- 1 ½ cups semisweet chocolate chips
- 2 cups graham cracker crumbs
Supporting Ingredients:
- 1 cup unsalted butter, melted
- 2 cups powdered sugar
Topping:
- ¼ cup peanut butter
Instructions
- Melt 1 cup unsalted butter completely in a large microwave-safe bowl at 50% power for 45-60 seconds.
- Mix 2 cups graham cracker crumbs, 2 cups powdered sugar, and 1 cup creamy peanut butter with the melted butter until your mixture becomes a smooth, uniform consistency.
- Line a 9×13-inch baking pan with parchment paper, ensuring sides are slightly overlapping for easy removal.
- Press your peanut butter mixture firmly and evenly into the bottom of the prepared pan using the back of a spatula.
- Combine 1 ½ cups semisweet chocolate chips and ¼ cup peanut butter in a microwave-safe bowl.
- Microwave the chocolate mixture at 50% power for 30-second intervals, stirring between each interval until completely smooth and glossy.
- Pour the melted chocolate mixture over your peanut butter base, using a clean spatula to spread it evenly to all corners.
- Refrigerate the pan for 2 hours or freeze for 45 minutes until the bars are completely set and firm.
- Remove the bars from the refrigerator and let them sit at room temperature for 5 minutes before cutting.
- Use a sharp knife dipped in hot water and wiped clean to slice into clean, precise bars.
Notes
- Use room temperature butter for easier mixing and a smoother graham cracker base.
- Ensure the parchment paper hangs slightly over the pan edges for easy removal of the bars.
- Stir the chocolate and peanut butter mixture gently to prevent burning and achieve a glossy finish.
- Let the bars sit at room temperature for 5-10 minutes before cutting to prevent cracking and get clean slices.
- Prep Time: 10 minutes
- Cook Time: 2 hours (refrigeration) or 45 minutes (freezing)
- Category: Dessert Bars
- Method: Chilling
- Cuisine: American
Nutrition
- Serving Size: 12
- Calories: 320 kcal
- Sugar: 18 g
- Sodium: 90 mg
- Fat: 22 g
- Saturated Fat: 7 g
- Unsaturated Fat: 13 g
- Trans Fat: 0.1 g
- Carbohydrates: 32 g
- Fiber: 2 g
- Protein: 6 g
- Cholesterol: 20 mg
Madison Wyman
Recipe Developer & Food Storyteller
Expertise
Recipe Research and Adaptation, Food Writing and Cultural Storytelling, Sustainable and Ethical Sourcing, Dietary Adaptations (e.g., gluten-free, plant-based)
Education
Oregon Health & Science University
Portland Community College
Madison’s passion for flavor and culture ignited amidst the rich Southern cooking traditions of her upbringing, where cherished family recipes told delicious tales.
Armed with a Master’s in Food Systems and Society from Oregon Health & Science University and a Culinary Arts Certificate from Portland Community College, Madison truly excels at transforming rich, intricate flavors into dishes that are both approachable and heartfelt.
For her, cooking is a vibrant blend of science, art, and heritage – a powerful way to connect us to our roots and each other. Her recipes invite you to delve deeper, uncovering the fascinating stories woven into every ingredient.