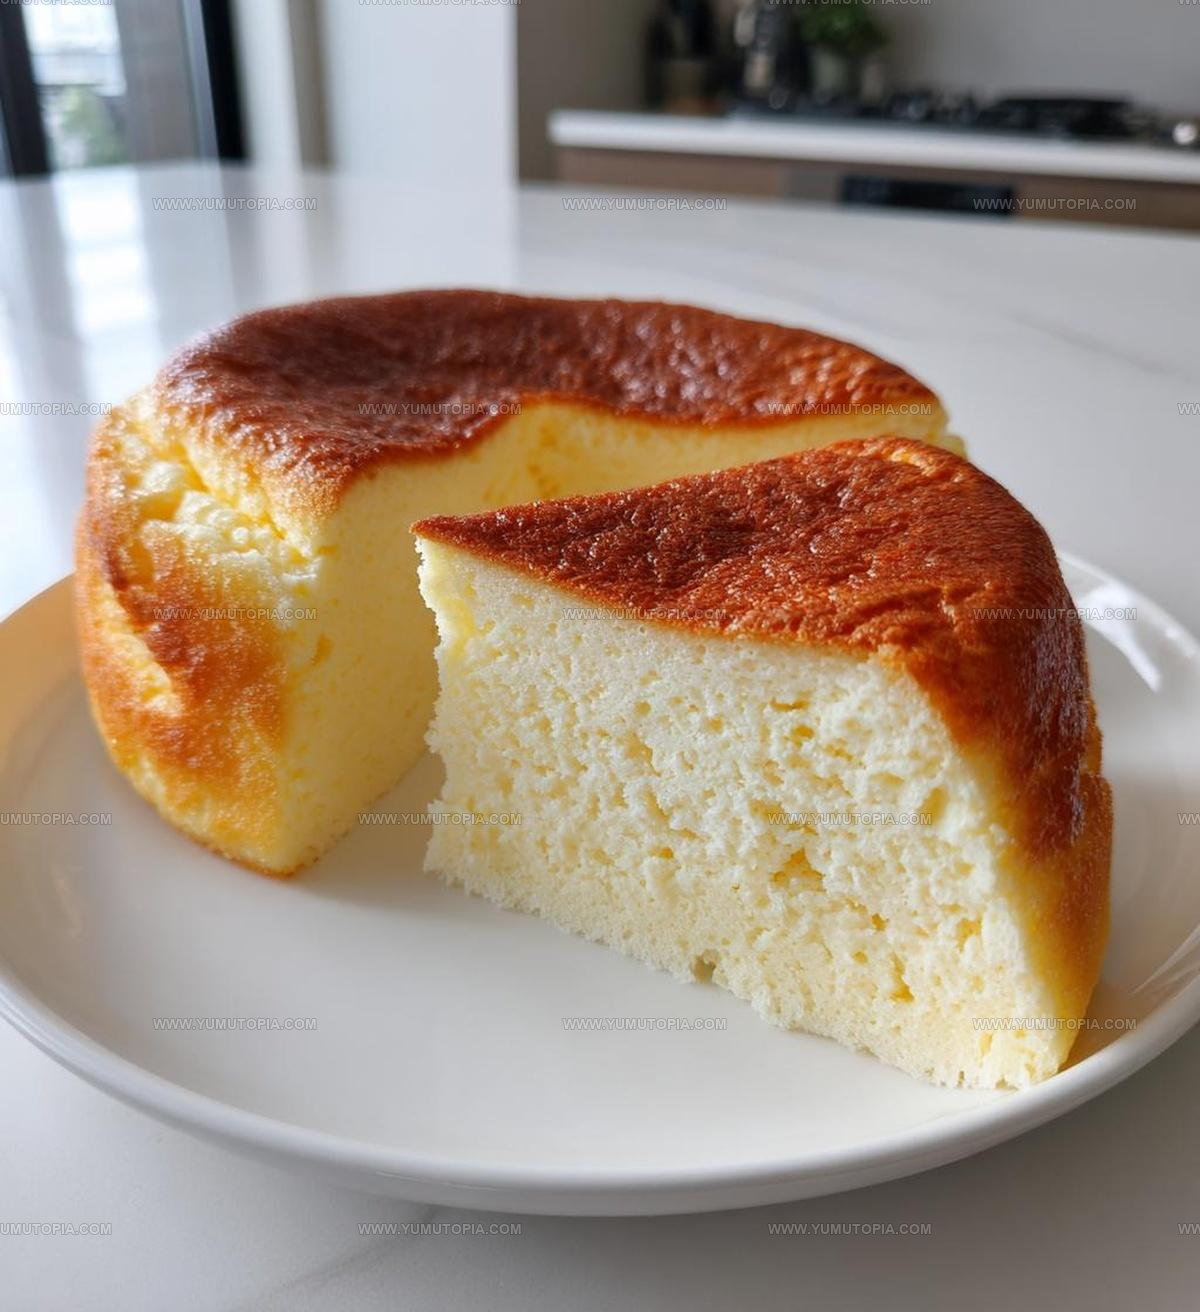
Japanese Cheesecake Recipe That Jiggles Like a Cloud
Japanese cheesecake has earned its reputation as one of the most delicate and cloud-like desserts to come from Asia.
The texture alone sets it apart from traditional dense versions, offering something that feels almost impossibly light when you take a bite.
With origins in Osaka, where bakers sought to create a gentler alternative to Western-style cheesecakes, what emerged was a dessert that wobbles delightfully on the plate.
The appeal spans continents, drawing fans who appreciate treats that feel both sophisticated and comforting at once.
Bakeries across Tokyo and beyond have built devoted followings around their signature jiggly creations.
The experience of eating one provides a unique satisfaction that’s hard to replicate with other desserts.
Achieving that signature wobble and airy crumb at home is completely within reach when following the right approach.
What Makes Japanese Cheesecake So Light
Japanese Cheesecake Ingredient Breakdown
Dairy Base:Sweeteners:Binding Ingredients:What Baking Tools Are Necessary for Japanese Cheesecake?
Full Baking Instructions for Japanese Cheesecake
Warm Up the Oven
Crank your oven to exactly 320°F. This precise temperature is crucial for getting that perfect Japanese cheesecake texture.
Prepare the Baking Dish
Grab an 8-inch round cake pan. Butter the sides generously and line the bottom with parchment paper. This will help your cake slide out smoothly later.
Cream the Base
In a large mixing bowl, combine these ingredients until silky smooth:
Use an electric mixer to beat everything until there are absolutely no lumps.
Add Liquid Ingredients
Pour in these ingredients and mix thoroughly:
Blend until the mixture looks completely uniform.
Handle the Eggs
Separate your 3 large eggs carefully. Add the egg yolks to the cream cheese mixture and stir until well incorporated.
Prepare the Dry Ingredients
Sift together:
Fold these dry ingredients into the cream cheese mixture until everything looks perfectly smooth.
Whip the Egg Whites
In a clean, separate bowl, beat the egg whites until soft peaks form. This step adds incredible lightness to your cheesecake.
Combine Mixtures
Gently fold the whipped egg whites into the cream cheese mixture. Be super gentle – you want to keep all that lovely air in the batter.
Bake in Water Bath
Pour the batter into your prepared pan. Place the pan inside a larger baking dish filled with about 1 inch of hot water. This water bath helps the cake bake evenly.
Bake to Perfection
Slide the water bath into the 320°F oven and bake for exactly 60 minutes. The cake should look slightly golden and set but still have a gentle jiggle in the center.
Cool and Serve
Remove the cake from the oven and let it cool completely in the pan. This helps it settle and makes cutting easier. Enjoy your light, airy Japanese cheesecake straight from the pan or chilled!
Easy Tips for Light Japanese Cheesecake
Japanese Cheesecake Variations With Light And Fluffy Spins
Best Serving Suggestions for Japanese Cheesecake
How to Store Japanese Cheesecake Without Collapse
Japanese Cheesecake Q&A for Curious Bakers
Why does the egg white need to be beaten separately?
Beating egg whites creates air pockets that make the cheesecake light and fluffy, giving your cake its signature soft, cloud-like texture.
Can regular flour work for this recipe?
Cake flour is recommended because it has lower protein content, which helps create a tender, delicate crumb in your Japanese cheesecake.
What makes this cheesecake different from American-style cheesecake?
The key difference is the texture – Japanese cheesecake is much lighter, almost souffle-like, compared to the dense, rich American version.
Do I really need a water bath for baking?
The water bath helps distribute heat evenly and prevents the cake from cracking, ensuring a smooth, creamy surface on your cheesecake.
Why should I sift the flour?
Sifting breaks up flour clumps and aerates it, which helps create a smoother batter and prevents lumps in your final cheesecake.
What if my egg whites don’t form soft peaks?
Take your time when beating egg whites, and ensure your bowl and whisk are completely clean and dry for the best results.
Cotton-Soft Japanese Cheesecake Recipe
- Total Time: 1 hour 20 minutes
- Yield: 8 1x
Description
Whipping up Japanese Cheesecake is a delightful journey that brings silky smoothness right to your kitchen. Delicate yet rich, this cloud-like dessert delivers pure comfort with each tender, melt-in-your-mouth bite.
Ingredients
Cake Base:
- 1 cup cream cheese
- 3 large eggs
- ½ cup all-purpose flour
Sweeteners and Liquids:
- ½ cup granulated sugar
- ¼ cup milk
- ¼ cup unsalted butter
- 1 teaspoon lemon juice
Seasoning:
- ¼ teaspoon salt
Instructions
- Configure your oven to 320F and place a rack in the center position.
- Coat an 8-inch round cake pan with butter and line the bottom with parchment paper, ensuring full coverage.
- Combine 1 cup cream cheese, ¼ cup unsalted butter, and ½ cup sugar in a mixing bowl. Whisk until the texture becomes completely smooth and no lumps remain.
- Pour ¼ cup milk and 1 teaspoon lemon juice into the cream cheese mixture. Blend thoroughly until ingredients are fully incorporated.
- Separate 3 large eggs. Add the egg yolks to the cream cheese mixture and blend until consistent.
- Sift ½ cup all-purpose flour and ¼ teaspoon salt directly into the mixture. Stir until the batter becomes silky and uniform.
- Clean your mixing bowl and whisk carefully. Beat the egg whites until soft, billowy peaks develop when you lift the whisk.
- Carefully fold the whipped egg whites into the cream cheese mixture using gentle, sweeping motions to maintain airiness.
- Transfer the batter into the prepared cake pan, smoothing the surface with a spatula.
- Create a water bath by placing the cake pan inside a larger pan filled with 1 inch of hot water.
- Bake at 320F for exactly 60 minutes, avoiding opening the oven door during cooking.
- Remove the cheesecake from the oven and let it rest in the pan for 10 minutes before transferring to a cooling rack.
Notes
- Always use room temperature ingredients for smoother blending and better texture.
- Creating a water bath helps distribute heat evenly and prevents cracking on the cheesecake surface.
- Whip egg whites carefully, stopping when soft peaks form to maintain the cake’s delicate, fluffy structure.
- For a gluten-free version, substitute regular flour with almond flour or a gluten-free blend to accommodate dietary needs.
- Prep Time: 20 minutes
- Cook Time: 1 hour
- Category: Cheesecakes
- Method: Baking
- Cuisine: Japanese
Nutrition
- Serving Size: 8
- Calories: 217 kcal
- Sugar: 11 g
- Sodium: 120 mg
- Fat: 16 g
- Saturated Fat: 9 g
- Unsaturated Fat: 6 g
- Trans Fat: 0.5 g
- Carbohydrates: 12 g
- Fiber: 0.3 g
- Protein: 5 g
- Cholesterol: 85 mg
Logan Lemaster
Founder & Culinary Innovator
Expertise
Recipe Development and Innovation, Menu Design and Optimization, Fine Dining Techniques, Ingredient Pairing and Flavor Science
Education
Metropolitan Culinary Arts Institute
Logan’s culinary journey kicked off in his vibrant Chicago family kitchen, where fresh, seasonal ingredients and bold flavors were always front and center.
After graduating from the Metropolitan Culinary Arts Institute in Arlington, Virginia, and honing his skills in renowned restaurants, Logan mastered the art of blending classic techniques with exciting, modern twists.
His kitchen is a dynamic lab for flavor exploration. Through Yum Utopia, Logan aims to empower you to cook with both confidence and creativity, turning simple ingredients into spectacular meals.