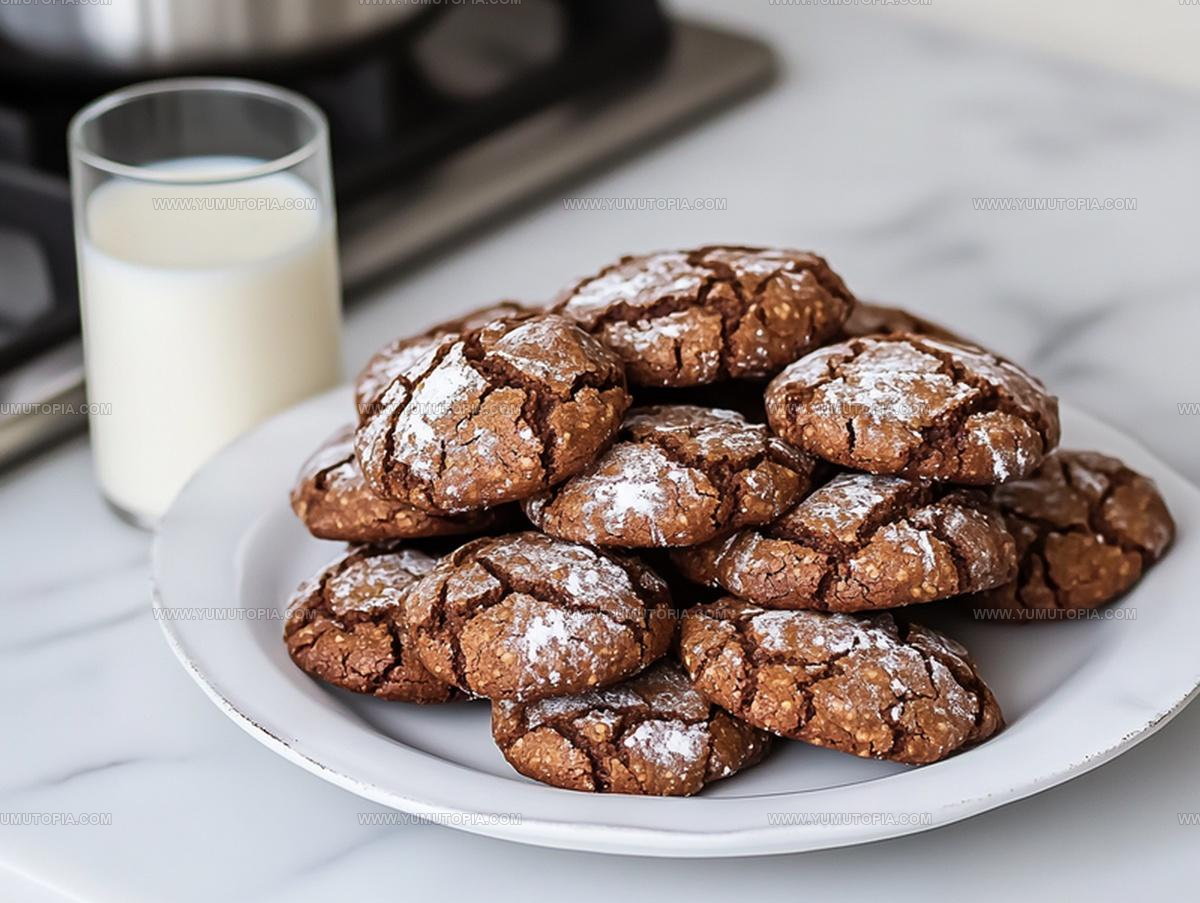
Crispy Chocolate Crinkle Cookies Recipe With Powdered Sugar
Chocolate crinkle cookies deliver pure joy in every powdered-sugar-coated bite.
Baking fans love how reliably satisfying they turn out, making them perfect for holidays, potlucks, or casual weekends at home.
The contrast between dark chocolate and snowy white coating creates visual appeal that draws everyone in before they even take a first bite.
You can count on compliments when serving them at gatherings or gifting them to friends and neighbors.
They strike that rare balance between looking impressive and being genuinely fun to make in any home kitchen.
The cookies stay soft and fudgy inside while developing slight crispness around the edges.
Nothing beats the satisfaction of pulling a tray from the oven and watching those signature crackles form right before you.
Make a full batch today and watch how quickly they disappear from the cooling rack.
What Makes Chocolate Crinkle Cookies So Appealing
Core Ingredients for Chocolate Crinkle Cookies
Chocolate Base:Moisture and Binding:Dry Ingredients:Finishing Touch:Kitchen Tools Overview for Chocolate Crinkle Cookies
Step-By-Step Guide to Chocolate Crinkle Cookies
Mixing Base Ingredients
Grab your mixing bowl and toss in 1¾ cups granulated sugar, 1 cup unsweetened cocoa powder, and ½ cup vegetable oil.
Whip these together using an electric mixer until the mixture looks smooth and glossy.
Adding Eggs
Crack 4 large room temperature eggs into the bowl one at a time. After each egg, mix thoroughly. Pour in 2 teaspoons vanilla extract and blend completely.
Creating Dry Mixture
In a separate bowl, whisk together 2 cups all-purpose flour, 2 teaspoons baking powder, and ¾ teaspoon salt.
Gradually fold this dry mixture into your chocolate base, mixing on low speed until everything just comes together.
Chilling the Dough
Cover your cookie dough with plastic wrap and park it in the refrigerator. Let the dough chill for at least 4 hours or overnight – this helps develop deep chocolate flavor and makes the dough easier to handle.
Preparing to Bake
Heat your oven to exactly 350°F. Line two baking sheets with parchment paper. Pour 1 cup powdered sugar into a small bowl for rolling.
Forming Cookies
Scoop out chilled dough and roll into 1-inch balls. Roll each ball completely in powdered sugar, making sure they’re totally coated. Space these sugary balls 2 inches apart on your prepared baking sheets.
Baking the Cookies
Slide the baking sheets into the 350°F oven. Bake for 10-12 minutes – you want edges that look set but centers that still seem slightly soft and puffy.
Cooling Cookies
Let the cookies rest on the baking sheet for a few minutes. Then transfer them to a wire rack to cool completely. The powdered sugar will create beautiful crackly surfaces as they cool.
Helpful Notes for Chocolate Crinkle Cookies
Creative Variations for Chocolate Crinkle Cookies
Serving Suggestions for Chocolate Crinkle Cookies
Best Way To Store Chocolate Crinkle Cookies
Chocolate Crinkle Cookies Q&A
Can I skip chilling the dough?
Chilling is crucial for chocolate crinkle cookies. Without refrigeration, the dough spreads too much and loses its signature crackly texture. The cold helps the cookies hold their shape and develop deep chocolate flavor.
Why do the cookies crack on top?
The powdered sugar coating creates those beautiful crackles when the cookies bake. As the dough expands and rises, the sugar coating breaks, revealing the dark chocolate underneath – a classic crinkle cookie effect.
How do I know when the cookies are done?
Check the edges – they should look firm and set, while the centers remain slightly soft and puffy. The cookies continue cooking slightly after removing from the oven, so don’t overbake.
Can I use cocoa powder alternatives?
Natural unsweetened cocoa powder works best. Dutch-processed cocoa might change the texture and rise. Stick with standard unsweetened cocoa for the most reliable results.
How much powdered sugar should coat each cookie?
Roll the dough balls generously in powdered sugar, ensuring a complete and thick coating. This helps create the signature crackled, snowy appearance that makes crinkle cookies so distinctive.
Crackle-Top Chocolate Crinkle Cookies Recipe
- Total Time: 4 hours 25-27 minutes
- Yield: 12 to 16 1x
Description
Chocolate crinkle cookies will melt hearts faster than chocolate melts in your hand, bringing pure romance to your Valentine’s celebration with their powdery white exterior and rich chocolate center. Baking these treats means spreading sweet love, one delightful cookie at a time.
Ingredients
Main Ingredients:
- 4 large eggs
- 2 cups all-purpose flour
- 1 cup unsweetened cocoa powder
- 1¾ cups granulated sugar
Supporting Ingredients:
- ½ cup vegetable oil
- 2 teaspoons vanilla extract
- 2 teaspoons baking powder
Finishing Ingredients:
- 1 cup powdered sugar
- ¾ teaspoon salt
Instructions
- Combine 1 cup cocoa powder, 1¾ cups granulated sugar, and ½ cup vegetable oil in a large mixing bowl. Use an electric mixer to blend until the mixture transforms into a glossy, smooth consistency.
- Add 4 large eggs one at a time, beating thoroughly after each addition. Pour in 2 teaspoons vanilla extract and mix completely.
- Whisk 2 cups all-purpose flour, 2 teaspoons baking powder, and ¾ teaspoon salt in a separate bowl. Slowly incorporate these dry ingredients into the cocoa mixture, mixing on low speed until just combined.
- Seal the dough tightly with plastic wrap and refrigerate for 4 hours or overnight to develop rich flavors and proper texture.
- Heat your oven to 350°F and line two baking sheets with parchment paper. Pour 1 cup powdered sugar into a shallow dish for coating.
- Scoop out chilled dough and roll into 1-inch balls. Generously coat each ball in powdered sugar, ensuring complete coverage.
- Arrange cookie balls 2 inches apart on prepared baking sheets. Bake at 350°F for 10-12 minutes until cookie edges look firm but centers remain slightly soft.
- Allow cookies to rest on the baking sheet for 3-4 minutes, then carefully transfer to a wire cooling rack. The cookies will continue to set as they cool.
Notes
- Chilling the dough is crucial for achieving the perfect texture and preventing spread during baking.
- Roll the dough balls generously in powdered sugar to create those signature crackly, snowy exteriors.
- For gluten-free friends, swap regular flour with a 1:1 gluten-free baking blend to keep the recipe accessible.
- Store cookies in an airtight container at room temperature for up to 5 days, separating layers with parchment to prevent sticking.
- Prep Time: 15 minutes
- Cook Time: 10-12 minutes
- Category: Cookies
- Method: Baking
- Cuisine: American
Nutrition
- Serving Size: 12 to 16
- Calories: 176
- Sugar: 16 g
- Sodium: 110 mg
- Fat: 7 g
- Saturated Fat: 1 g
- Unsaturated Fat: 6 g
- Trans Fat: 0 g
- Carbohydrates: 27 g
- Fiber: 2 g
- Protein: 3 g
- Cholesterol: 37 mg
Logan Lemaster
Founder & Culinary Innovator
Expertise
Recipe Development and Innovation, Menu Design and Optimization, Fine Dining Techniques, Ingredient Pairing and Flavor Science
Education
Metropolitan Culinary Arts Institute
Logan’s culinary journey kicked off in his vibrant Chicago family kitchen, where fresh, seasonal ingredients and bold flavors were always front and center.
After graduating from the Metropolitan Culinary Arts Institute in Arlington, Virginia, and honing his skills in renowned restaurants, Logan mastered the art of blending classic techniques with exciting, modern twists.
His kitchen is a dynamic lab for flavor exploration. Through Yum Utopia, Logan aims to empower you to cook with both confidence and creativity, turning simple ingredients into spectacular meals.