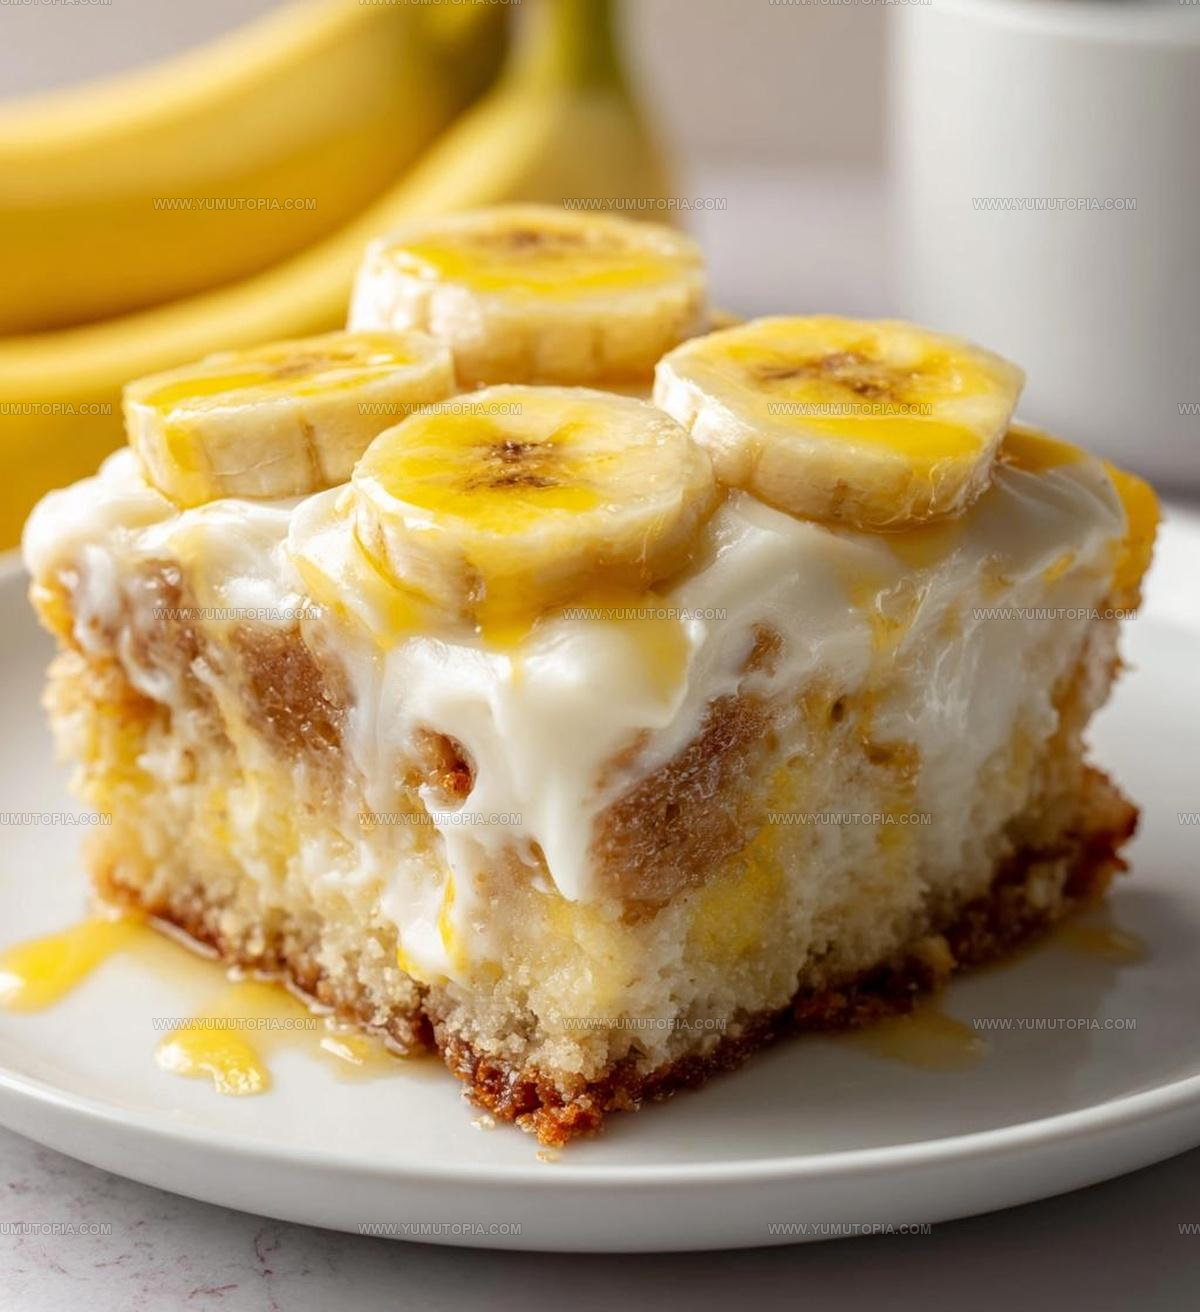
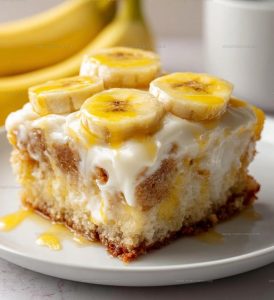
Banana Bars with Cream Cheese Frosting Recipe
Banana bars with cream cheese frosting bring together two crowd-pleasing flavors in one convenient dessert that works for any occasion.
The soft, cake-like texture makes every bite feel like a treat, while the smooth topping adds just the right amount of richness.
Potlucks, bake sales, and casual gatherings all benefit from a dessert that travels well and serves a crowd without fuss.
Overripe fruit sitting on the counter finally has a purpose that everyone can appreciate.
The bars slice neatly into portions, so serving becomes effortless when friends or family stop by unexpectedly.
Simple enough for weeknight baking yet impressive enough for special events, this dessert strikes a balance that busy schedules demand.
When you need something comforting but not overly complicated, this recipe offers satisfaction in every square.
Why You Should Try Banana Bars With Cream Cheese Frosting
Ingredients You’ll Need for Banana Bars with Cream Cheese Frosting
Main Ingredients:Tools Used for Banana Bars With Frosting
Step-by-Step Directions for Banana Bars with Cream Cheese Frosting
Prepare the Oven
Heat the oven to 350°F and grab a 9×13 inch baking pan. Spray the pan with cooking spray to prevent sticking.
Mix Wet Ingredients
Grab a large mixing bowl and mash those 3 ripe bananas until they’re smooth. Then mix in:
Blend everything until it looks creamy and well combined.
Combine Dry Ingredients
In a separate bowl, whisk together:
Make sure these dry ingredients are well mixed.
Create the Batter
Slowly add the dry ingredient mixture to the wet ingredients. Stir gently until everything just comes together. Don’t overmix or your bars will get tough.
Bake the Bars
Pour the batter into the prepared pan. Spread it evenly with a spatula. Slide the pan into the preheated oven and bake for 25-30 minutes. Check doneness by inserting a toothpick – it should come out clean.
Prepare the Frosting
While the bars cool, make the cream cheese frosting. In a bowl, beat together:
Mix until the frosting is smooth and creamy.
Frost and Serve
Once the bars are completely cool, spread the frosting evenly across the top. Cut into squares and serve. These taste best at room temperature and will keep for 3-4 days in an airtight container.
Easy Notes for Banana Bars with Frosting
Banana Bars With Cream Cheese Frosting Flavor Options
Ideal Serving Ideas For Banana Bars With Cream Cheese Frosting
Banana Bars With Cream Cheese Frosting Storage Help
Banana Bars With Cream Cheese Frosting Common FAQs
Can I use frozen bananas for this recipe?
Absolutely! Thaw them completely and drain excess liquid before mashing. Frozen bananas work great and can add extra moisture to your bars.
How ripe should my bananas be?
The riper, the better. Look for bananas with dark brown or black spots – these provide the most intense banana flavor and natural sweetness.
Can this recipe be made gluten-free?
Replace the all-purpose flour with a gluten-free flour blend. Make sure to choose one designed for baking to maintain the right texture.
Do I need a stand mixer for the frosting?
No, a hand mixer or even whisking by hand works perfectly. The key is getting the cream cheese smooth and combining ingredients thoroughly.
What if my cream cheese is cold?
Let it sit at room temperature for about 30 minutes before making the frosting. This helps create a smoother, easier-to-spread consistency.
How can I tell if the bars are fully baked?
Insert a toothpick in the center – it should come out clean with no wet batter. The edges will also look lightly golden and slightly pulled away from the pan.
Cream Cheese Iced Banana Bars Recipe
- Total Time: 40-45 minutes
- Yield: 9 1x
Description
Banana Bars with Cream Cheese Frosting deliver pure comfort straight from your kitchen. Moist banana-packed bars topped with silky smooth frosting make weekend baking feel like a warm hug from grandma.
Ingredients
Main Ingredients:
- 3 ripe bananas
- ½ cup butter
- 1 cup sugar
- 2 eggs
- 1 ½ cups all-purpose flour
Supporting Ingredients:
- 1 teaspoon vanilla extract
- 1 teaspoon baking soda
- ¼ teaspoon salt
Frosting Ingredients:
- 8 oz cream cheese
- ½ cup powdered sugar
- 1 teaspoon vanilla extract
Instructions
- Crush 3 ripe bananas in a mixing bowl until they form a smooth, creamy consistency.
- Blend ½ cup softened butter with the mashed bananas until fully incorporated.
- Whisk in 1 cup sugar, 2 eggs, and 1 teaspoon vanilla extract until the mixture becomes light and fluffy.
- Sift together 1 ½ cups flour, 1 teaspoon baking soda, and ¼ teaspoon salt in a separate bowl.
- Gradually fold the dry ingredients into the banana mixture, stirring gently until just combined.
- Grease a 9×13-inch baking pan thoroughly with butter or cooking spray.
- Pour the batter evenly into the prepared pan, smoothing the top with a spatula.
- Bake at 350°F for exactly 27 minutes, checking with a toothpick for doneness near the end of baking.
- Remove from the oven and let the bars cool completely on a wire rack for about 45 minutes.
- Beat 8 oz softened cream cheese with ½ cup powdered sugar and 1 teaspoon vanilla until silky smooth.
- Spread the cream cheese frosting evenly across the cooled banana bars using an offset spatula.
- Slice into squares and serve at room temperature.
Notes
- Ripe bananas are key to maximum flavor, so wait until they’re heavily speckled and soft before using.
- Use room temperature cream cheese and butter for the smoothest, lump-free frosting that spreads easily.
- For a healthier version, swap half the all-purpose flour with whole wheat flour and reduce sugar by 25%.
- Store these bars in the refrigerator to keep the cream cheese frosting fresh and prevent spoiling, and they’ll stay delicious for 3-4 days.
- Prep Time: 15 minutes
- Cook Time: 25-30 minutes
- Category: Dessert Bars
- Method: Baking
- Cuisine: American
Nutrition
- Serving Size: 9
- Calories: 274 kcal
- Sugar: 19 g
- Sodium: 176 mg
- Fat: 14 g
- Saturated Fat: 8 g
- Unsaturated Fat: 5 g
- Trans Fat: 0.3 g
- Carbohydrates: 34 g
- Fiber: 1 g
- Protein: 4 g
- Cholesterol: 48 mg
Madison Wyman
Recipe Developer & Food Storyteller
Expertise
Recipe Research and Adaptation, Food Writing and Cultural Storytelling, Sustainable and Ethical Sourcing, Dietary Adaptations (e.g., gluten-free, plant-based)
Education
Oregon Health & Science University
Portland Community College
Madison’s passion for flavor and culture ignited amidst the rich Southern cooking traditions of her upbringing, where cherished family recipes told delicious tales.
Armed with a Master’s in Food Systems and Society from Oregon Health & Science University and a Culinary Arts Certificate from Portland Community College, Madison truly excels at transforming rich, intricate flavors into dishes that are both approachable and heartfelt.
For her, cooking is a vibrant blend of science, art, and heritage – a powerful way to connect us to our roots and each other. Her recipes invite you to delve deeper, uncovering the fascinating stories woven into every ingredient.