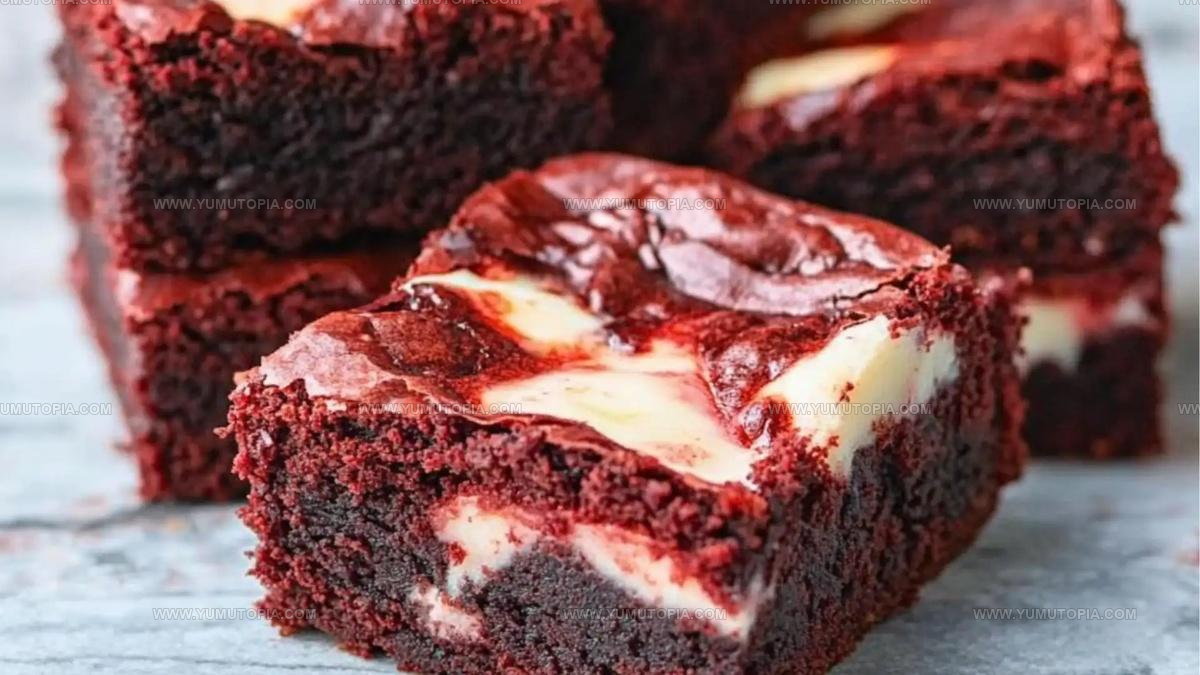
Red Velvet Brownies Recipe With Cream Cheese Swirl
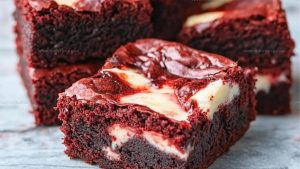
Red velvet brownies recipe fans know there’s something magical about the deep crimson color and rich cocoa flavor that makes any occasion feel special.
The soft, fudgy texture combined with a hint of sweetness creates a dessert that feels both familiar and luxurious at the same time.
Perfect for celebrations, potlucks, or simply treating yourself on a quiet afternoon, they never fail to impress anyone who takes a bite.
The stunning appearance alone is enough to draw attention, but the flavor is what keeps people coming back for more.
You can serve them at birthday parties, holiday gatherings, or pack them in lunchboxes for a delightful surprise.
They’re also wonderful as an after-dinner treat when you want something decadent without spending hours in the kitchen.
Everyone from chocolate lovers to those who prefer something a little different will find these irresistible.
Make them soon and watch how quickly they disappear from the plate.
Why Red Velvet Brownies Feel Extra Indulgent
Red Velvet Brownies Core Ingredients
Base Ingredients:Wet Ingredients:Dry Ingredients:Cream Cheese Swirl:Equipment Used for Red Velvet Brownies
Red Velvet Brownies Preparation from Start to Finish
Prepare the Oven
Heat the oven to 350°F (conventional). Line an 8×8-inch baking pan with parchment paper and give it a quick spray of cooking oil so nothing sticks.
Create the Base Mixture
Grab a large mixing bowl and melt 1 cup (200g) of unsalted butter. Dump in 1 cup (250g) of caster sugar and 1/2 cup (100g) of light brown sugar. Whisk these together until they look smooth and glossy.
Add Wet Ingredients
Crack 3 large eggs into the sugar mixture one at a time. Stir in 1 teaspoon of vanilla extract and 1 tablespoon of red food coloring. Mix until the batter turns a vibrant red color.
Mix Dry Ingredients
In a separate bowl, combine:
Sift these dry ingredients into the red batter and fold gently until everything blends smoothly.
Prepare Cream Cheese Swirl
In another small bowl, whip together:
Mix until completely smooth.
Layer the Batter
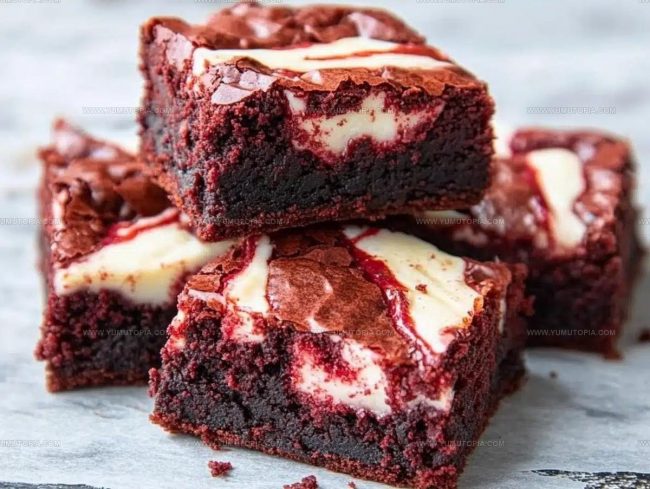
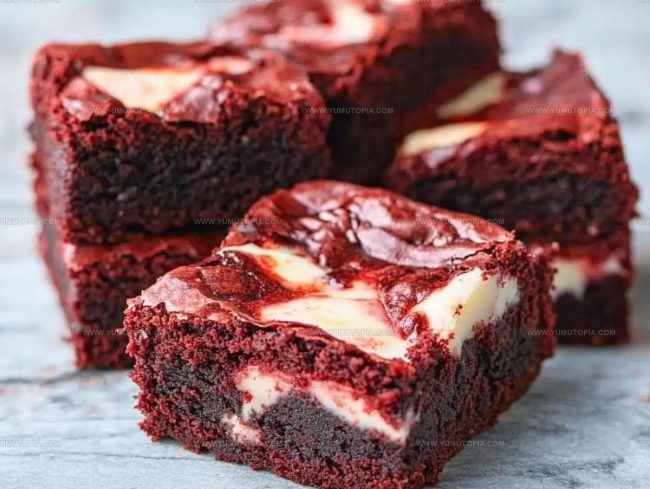
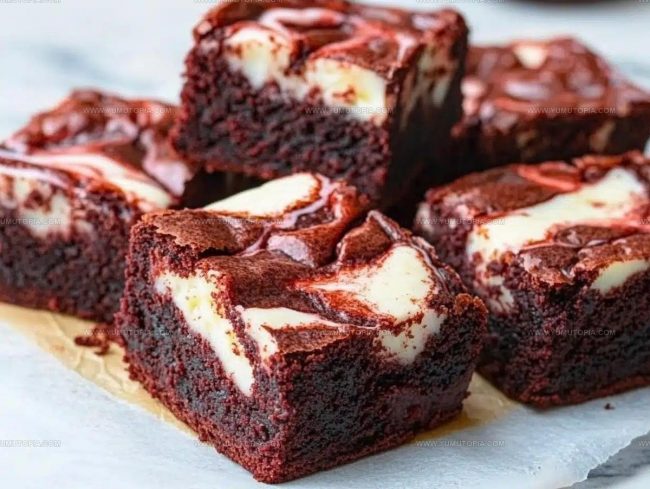
Pour the red brownie batter into the prepared pan. Dollop the cream cheese mixture on top in small spoonfuls. Use a knife to create beautiful swirls across the surface.
Bake the Brownies
Slide the pan into the preheated oven. Bake for 25-30 minutes. The edges should look set, and a toothpick inserted in the center should come out with just a few moist crumbs.
Cool and Slice
Let the brownies rest in the pan for about 30 minutes. Lift out the parchment paper and slice into 16 delicious squares. Enjoy warm or at room temperature!
Key Cooking Notes for Red Velvet Brownies
Different Takes on Red Velvet Brownies
How to Serve Red Velvet Brownies
Best Storage Method For Red Velvet Brownies
Common Recipe Questions for Red Velvet Brownies
Can I make these brownies without food coloring?
The red color comes from food coloring, but you can skip it for a standard chocolate brownie taste without changing the recipe’s core ingredients.
How do I get the perfect cream cheese swirl?
Drop small dollops of cream cheese mixture across the surface, then drag a knife through in gentle zigzag motions to create beautiful marbled patterns.
What cocoa powder works best for this recipe?
Dutch-processed cocoa gives the richest chocolate flavor and deepest color, but standard unsweetened cocoa powder will also work perfectly.
Can I freeze these brownies?
Wrap individual brownies tightly in plastic wrap, then store in a freezer container for up to three months. Thaw at room temperature before serving.
Are these brownies very sweet?
The combination of white and brown sugar creates a balanced sweetness that’s not overwhelmingly sugary, with deep chocolate undertones.
What makes the texture so special?
The careful mixing technique and precise baking time ensure a fudgy center with slightly crisp edges, creating a perfect brownie texture.
Cream Cheese Swirled Red Velvet Brownies Recipe
- Total Time: 40-45 minutes
- Yield: 8 1x
Description
Red Velvet Brownies bring rich chocolate charm straight to your dessert plate. Dive into these crimson-hued squares that combine classic brownie texture with Southern baking magic.
Ingredients
Main Ingredients:
- 200g unsalted butter
- 250g caster sugar
- 100g light brown sugar
- 130g plain all-purpose flour
- 225g cream cheese
Supporting Ingredients:
- 3 large eggs
- 1 egg yolk
- 112 tablespoons cocoa powder
Flavor and Seasoning Ingredients:
- 1 teaspoon vanilla extract
- 12 teaspoon vanilla extract
- 1 tablespoon red food coloring
- 12 teaspoon baking powder
- 14 teaspoon salt
- 60g granulated sugar
Instructions
- Preheat the oven to 350°F. Prepare a 9×13 inch baking pan with parchment paper and a light spray of cooking oil to prevent sticking.
- Melt 200g of unsalted butter in a large mixing bowl. Add 250g caster sugar and 100g light brown sugar, whisking until the mixture becomes smooth and glossy.
- Crack 3 large eggs into the butter-sugar mixture one at a time. Stir in 1 teaspoon vanilla extract and 1 tablespoon red food coloring until the batter turns a vibrant red color.
- Sift 130g all-purpose flour, 112 tablespoons cocoa powder, 12 teaspoon baking powder, and 14 teaspoon salt directly over the wet ingredients. Fold gently with a spatula until the batter becomes uniform and no dry streaks remain.
- Pour the red velvet batter into the prepared pan, spreading it evenly with a rubber spatula to create a smooth surface.
- In a separate bowl, blend 225g softened cream cheese, 60g granulated sugar, 1 egg yolk, and 12 teaspoon vanilla extract until completely smooth.
- Drop spoonfuls of the cream cheese mixture across the brownie batter. Use a knife to create elegant swirls, dragging the cream cheese through the red batter.
- Slide the pan into the preheated oven and bake for 25-30 minutes. Check doneness by inserting a toothpick – it should come out with a few moist crumbs.
- Remove from the oven and let the brownies cool completely in the pan for at least 1 hour before cutting into squares.
Notes
- Store leftover brownies in an airtight container at room temperature for up to 3 days to keep them soft and fresh.
- For a gluten-free version, swap regular flour with a cup-for-cup gluten-free flour blend to ensure the same rich texture.
- Getting that perfect marbled cream cheese swirl requires a gentle hand – use a skewer and make light, random zigzag motions across the surface.
- Red food coloring can vary in intensity, so start with less and add gradually to control the vibrant red color without overwhelming the chocolate flavor.
- Prep Time: 15 minutes
- Cook Time: 25-30 minutes
- Category: Brownies
- Method: Baking
- Cuisine: American
Nutrition
- Serving Size: 8
- Calories: 354 kcal
- Sugar: 33 g
- Sodium: 118 mg
- Fat: 22 g
- Saturated Fat: 12 g
- Unsaturated Fat: 9 g
- Trans Fat: 0.5 g
- Carbohydrates: 37 g
- Fiber: 3 g
- Protein: 5 g
- Cholesterol: 70 mg
Logan Lemaster
Founder & Culinary Innovator
Expertise
Recipe Development and Innovation, Menu Design and Optimization, Fine Dining Techniques, Ingredient Pairing and Flavor Science
Education
Metropolitan Culinary Arts Institute
Logan’s culinary journey kicked off in his vibrant Chicago family kitchen, where fresh, seasonal ingredients and bold flavors were always front and center.
After graduating from the Metropolitan Culinary Arts Institute in Arlington, Virginia, and honing his skills in renowned restaurants, Logan mastered the art of blending classic techniques with exciting, modern twists.
His kitchen is a dynamic lab for flavor exploration. Through Yum Utopia, Logan aims to empower you to cook with both confidence and creativity, turning simple ingredients into spectacular meals.