Creamy Coffee Cheesecake Recipe for Sweet Mornings
Creamy coffee cheesecake dessert recipe combines two beloved flavors into one show-stopping treat that works beautifully for any celebration or quiet evening at home.
Coffee brings a sophisticated edge to classic cheesecake, creating a dessert that feels both comforting and special.
The smooth, velvety texture melts on the tongue while rich flavors balance sweetness with just enough depth to keep things interesting.
Whether serving at a dinner party or treating the family to something memorable, this dessert never fails to impress.
Making cheesecake at home might seem intimidating, but the process becomes surprisingly straightforward once you understand the basics.
The result is a dessert that looks bakery-worthy yet carries that irreplaceable homemade quality.
Coffee lovers especially appreciate how the flavors complement each other without overpowering the palate.
Scroll down to see exactly how to make something truly worth sharing.
Why Coffee Cheesecake Feels Rich
Ingredients That Define Coffee Cheesecake
Crust Ingredients:Cheesecake Filling Ingredients:Topping Ingredients:Tools Used for Creamy Coffee Cheesecake
Step by Step Instructions for Creamy Coffee Cheesecake Dessert
Prepare Crust
Heat the oven to 350°F. Grab a mixing bowl and toss in these ingredients:
Mix everything until the crumbs look like damp sand. Press this mixture firmly into the bottom of a 9-inch springform pan, making sure it’s packed tight.
Bake Crust
Slide the pan into the preheated oven and bake for 8-10 minutes until it turns a light golden color. Pull it out and let it cool while getting ready for the next part.
Make Cream Cheese Base
Grab your electric mixer and beat the cream cheese until it’s super smooth. This takes about 2-3 minutes. Drop in these ingredients:
Keep mixing until everything blends nicely.
Add Eggs
Crack the eggs into the mixture one at a time. Mix on low speed after each egg, being careful not to overwork the batter.
Create Coffee Mixture
In a separate bowl, whisk together these ingredients:
Combine Mixtures
Slowly pour the coffee mixture into the cream cheese blend. Mix on low speed until everything looks smooth and combined.
Bake Cheesecake
Pour the filling over the cooled crust. Wrap the outside of the pan with aluminum foil and place it in a larger baking dish filled with hot water halfway up the pan’s sides.
Bake at 350°F for 50-60 minutes. The edges should look set, but the center will have a slight wiggle.
Cool Slowly
Turn off the oven, crack the door open, and let the cheesecake rest inside for one hour. This helps prevent cracking.
Chill Cheesecake
Remove from the oven and let it cool to room temperature. Refrigerate for at least 4 hours or overnight.
Make Whipped Topping
Whip together these ingredients:
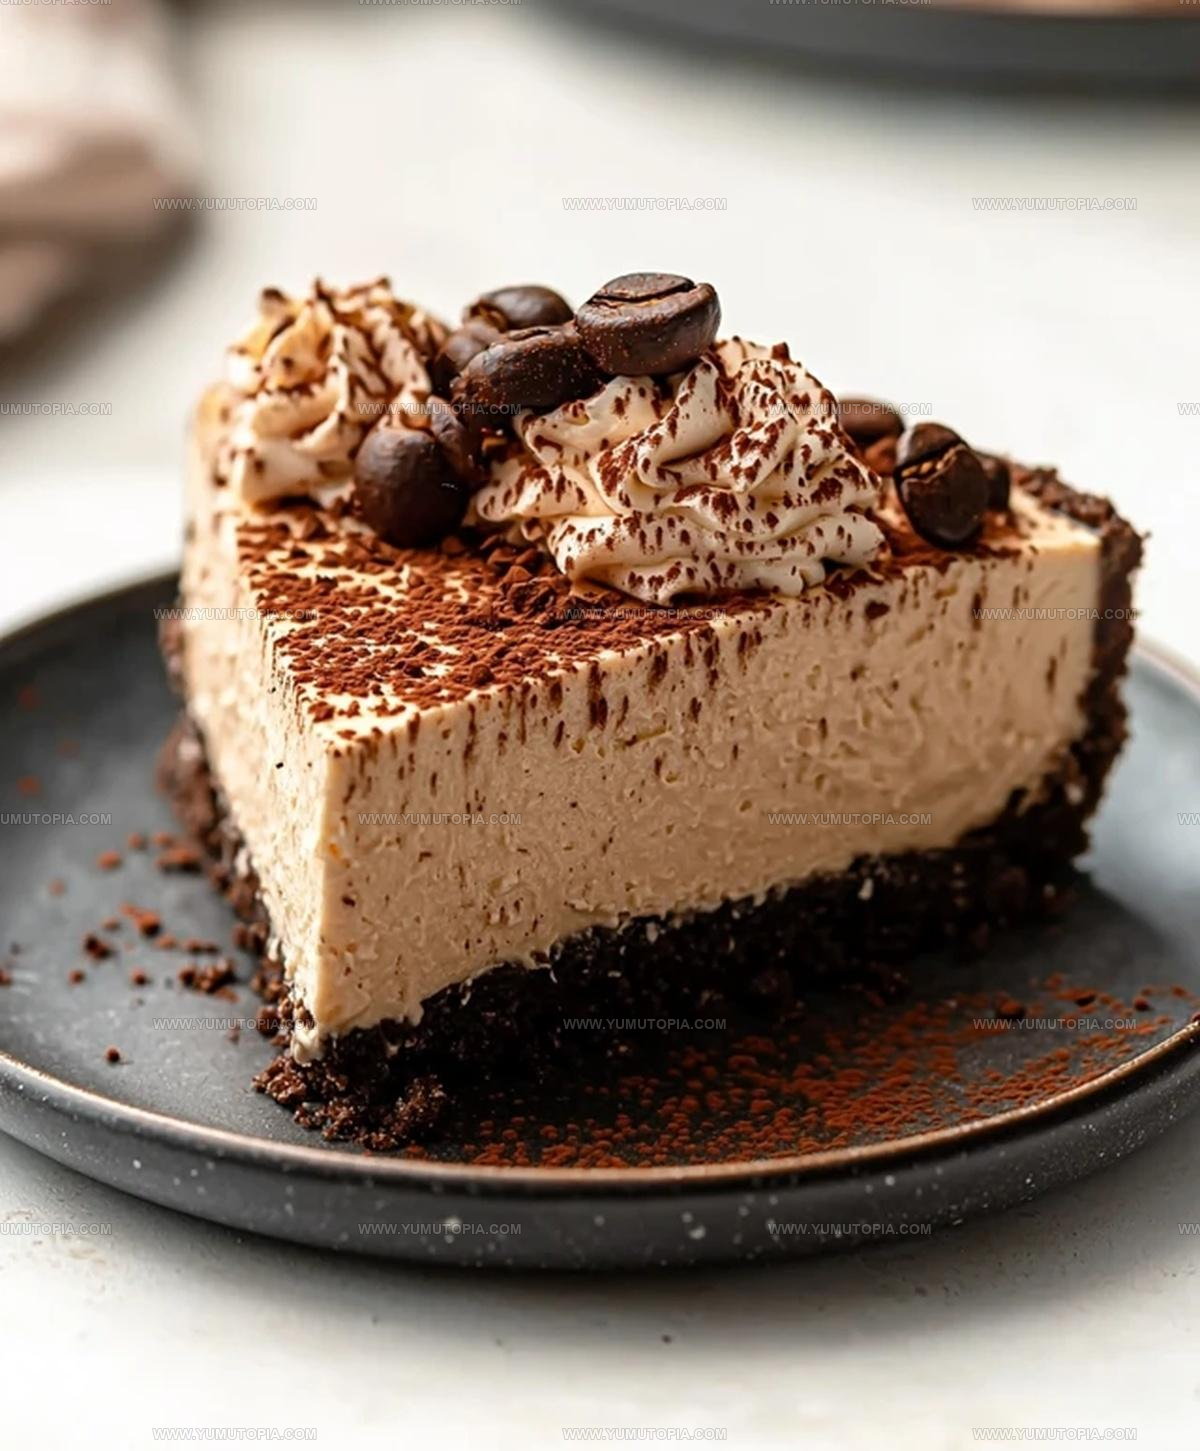
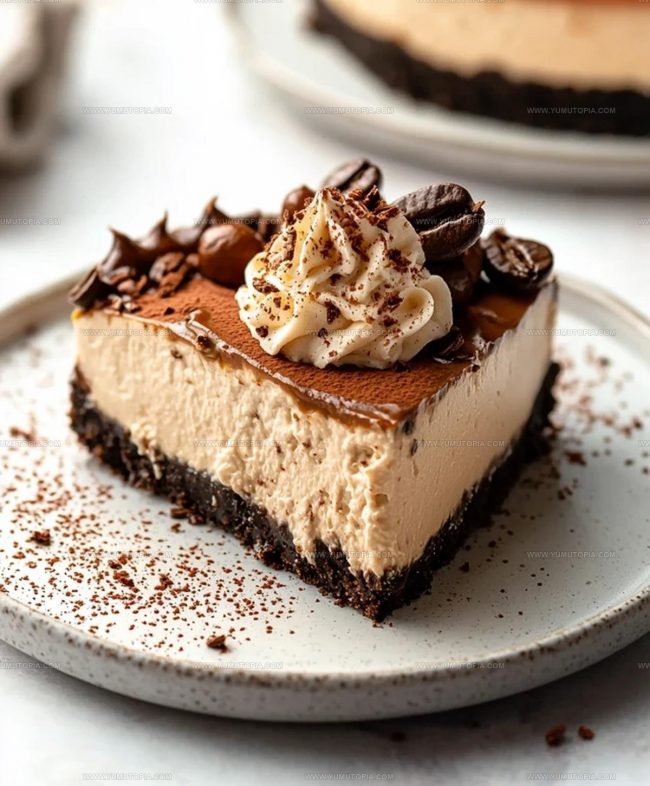
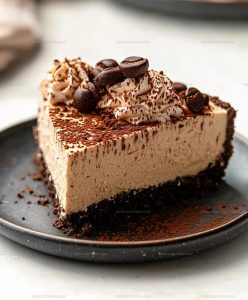
Spread the topping over the chilled cheesecake. Dust with chocolate shavings or cocoa powder if you’d like.
Which Tips Improve Coffee Cheesecake
How Can You Customize Coffee Cheesecake
How to Enjoy Creamy Coffee Cheesecake
How to Store Creamy Coffee Cheesecake?
Creamy Coffee Cheesecake Dessert Reader Questions
Can I use instant coffee instead of brewed coffee?
Instant coffee works perfectly. Dissolve the granules in a small amount of hot water before adding to the recipe for the best flavor and smooth texture.
What if I don’t have a springform pan?
A standard cake pan with high sides can work, but removing the cheesecake will be tricky. Consider lining the pan with parchment paper for easier removal.
How do I know when the cheesecake is done baking?
Look for set edges with a slight wobble in the center. The cheesecake should jiggle like soft pudding when gently shaken, not be liquid-like.
Can I freeze this coffee cheesecake?
Absolutely! Wrap the cooled cheesecake tightly in plastic wrap and freeze for up to 3 months. Thaw overnight in the refrigerator before serving.
What prevents cracks in the cheesecake?
Using a water bath, avoiding overmixing, and cooling the cheesecake gradually in the oven helps prevent unsightly surface cracks.
Creamy Coffee Cheesecake Dessert Recipe
- Total Time: 5 hours 15 minutes to overnight
- Yield: 8 1x
Description
Whipping up this creamy coffee cheesecake brings pure delight to your dessert table, with rich espresso notes dancing through a silky smooth cream cheese base that’ll make your taste buds dance. Smooth graham cracker crust and a luxurious coffee-infused filling guarantee a memorable sweet moment for anyone craving a delectable treat.
Ingredients
Primary Ingredients:
- 16 oz cream cheese
- 1 ½ cups graham cracker crumbs
- 1 cup granulated sugar
- 1 cup heavy whipping cream
- ½ cup unsalted butter
Supporting Ingredients:
- ½ cup sour cream
- ½ cup heavy cream
- ½ cup brewed coffee
- 2 large eggs
Finishing Ingredients:
- 2 tablespoons powdered sugar
- 1 tablespoon instant coffee granules
- 1 teaspoon vanilla extract
- 1 teaspoon ground cinnamon
- 1 teaspoon vanilla extract
Instructions
- Preheat the oven to 350°F. Grab your 9-inch springform pan and get ready for a delicious coffee-infused dessert.
- Mix 1 ½ cups graham cracker crumbs, ½ cup melted butter, ¼ cup sugar, and 1 teaspoon cinnamon in a medium bowl until the mixture feels like damp sand.
- Press the crumb mixture firmly into the bottom of the springform pan, creating a compact base for your cheesecake.
- Bake the crust for 8-10 minutes until it turns a light golden color. Remove from the oven and let it cool completely.
- Beat 16 oz softened cream cheese with an electric mixer for 2-3 minutes until smooth and creamy.
- Add 1 cup sugar and 1 teaspoon vanilla extract to the cream cheese. Mix until well combined.
- Incorporate 2 eggs one at a time, mixing on low speed after each addition to keep the batter silky.
- Whisk ½ cup sour cream, ½ cup heavy cream, ½ cup cooled brewed coffee, and 1 tablespoon instant coffee granules in a separate bowl.
- Slowly blend the coffee mixture into the cream cheese mixture on low speed until perfectly smooth.
- Pour the filling over the cooled crust, smoothing the top with a spatula.
- Wrap the springform pan in aluminum foil and place it in a larger baking dish filled with hot water halfway up the pan sides.
- Bake for 50-60 minutes at 350°F until the edges are set but the center still wobbles slightly.
- Turn off the oven, crack the door open, and let the cheesecake rest for 1 hour to prevent cracking.
- Cool the cheesecake to room temperature, then refrigerate for at least 4 hours or overnight.
- Whip 1 cup heavy cream with 2 tablespoons powdered sugar and 1 teaspoon vanilla until soft peaks form.
- Spread the whipped cream over the chilled cheesecake and dust with chocolate shavings or cocoa powder if desired.
Notes
- Create a rock-solid crust by pressing graham cracker mixture firmly and evenly into the pan, using the bottom of a measuring cup to compact the crumbs.
- Ensure cream cheese is at room temperature before mixing to achieve a smooth, lump-free filling that blends perfectly.
- Use a water bath when baking to prevent cracks and create a silky, even texture that melts in your mouth.
- For a gluten-free version, swap graham crackers with almond flour or gluten-free cookie crumbs, maintaining the same proportions.
- Prep Time: 15 minutes
- Cook Time: 58-70 minutes
- Category: Cheesecakes
- Method: Baking
- Cuisine: American
Nutrition
- Serving Size: 8
- Calories: 357 kcal
- Sugar: 24 g
- Sodium: 167 mg
- Fat: 28 g
- Saturated Fat: 16 g
- Unsaturated Fat: 11 g
- Trans Fat: 0.5 g
- Carbohydrates: 21 g
- Fiber: 0.8 g
- Protein: 6 g
- Cholesterol: 94 mg
Logan Lemaster
Founder & Culinary Innovator
Expertise
Recipe Development and Innovation, Menu Design and Optimization, Fine Dining Techniques, Ingredient Pairing and Flavor Science
Education
Metropolitan Culinary Arts Institute
Logan’s culinary journey kicked off in his vibrant Chicago family kitchen, where fresh, seasonal ingredients and bold flavors were always front and center.
After graduating from the Metropolitan Culinary Arts Institute in Arlington, Virginia, and honing his skills in renowned restaurants, Logan mastered the art of blending classic techniques with exciting, modern twists.
His kitchen is a dynamic lab for flavor exploration. Through Yum Utopia, Logan aims to empower you to cook with both confidence and creativity, turning simple ingredients into spectacular meals.