
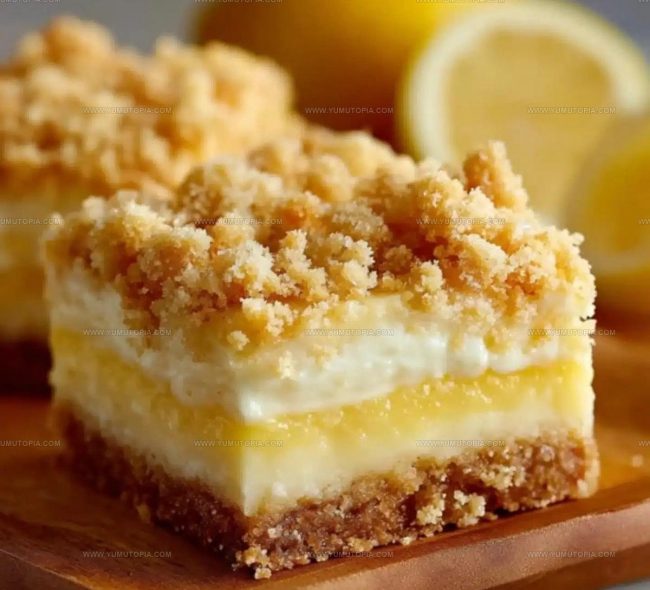
Lemon Cheesecake Crumb Bars Recipe That’s Smooth and Tangy
A creamy lemon cheesecake crumb bars recipe captures the perfect balance of smooth richness and bright citrus flavor in every bite.
These bars have become a favorite at gatherings because they’re easy to serve and disappear quickly from the dessert table.
The buttery base provides wonderful texture while the velvety filling creates pure satisfaction with each forkful.
Everyone loves how portable these treats are, making them ideal for potlucks, picnics, or afternoon coffee breaks.
The combination of sweet and tart flavors appeals to dessert lovers who crave something refreshing yet indulgent.
Preparing a batch takes less effort than a traditional cake but captures impressive results that look bakery-worthy.
Roll up those sleeves and start creating bars that will have everyone asking for seconds.
What Sets These Lemon Cheesecake Crumb Bars Apart For Citrus Lovers
Reasons Why These Lemon Cheesecake Crumb Bars Are A Zesty Dream
Bakeware Essentials For Lemon Cheesecake Crumb Bars
How to Cut Neat Edges on Lemon Cheesecake Crumb Bars
Prepare the Oven
Heat your oven to 350°F (177°C). Grab a 9×13-inch baking pan and line it with parchment paper, letting the sides hang over so you can easily lift out the bars later.
Create the Crumb Base
In a large bowl, mix together these ingredients:
Pour in 1 cup melted unsalted butter and stir until the mixture looks like damp sand that clumps when you squeeze it.
Form the Crust
Scoop out and set aside 1½ cups of the crumb mixture for topping. Press the remaining crumbs firmly into the bottom of your prepared pan. Slide the pan into the oven and bake for 10 minutes. Pull it out and let it cool down a bit.
Whip Up the Lemon Cheesecake Filling
Grab another bowl and blend these ingredients until super smooth:
Layer and Bake
Pour the lemony cream cheese mixture over the warm crust, spreading it evenly. Sprinkle the reserved crumb mixture on top. Bake at 350°F (177°C) for 25-30 minutes, until the center looks set and the crumble turns golden.
Cool and Chill
Let the bars cool completely at room temperature. Then park them in the refrigerator for at least 3 hours – overnight works even better for perfect texture.
Slice and Serve
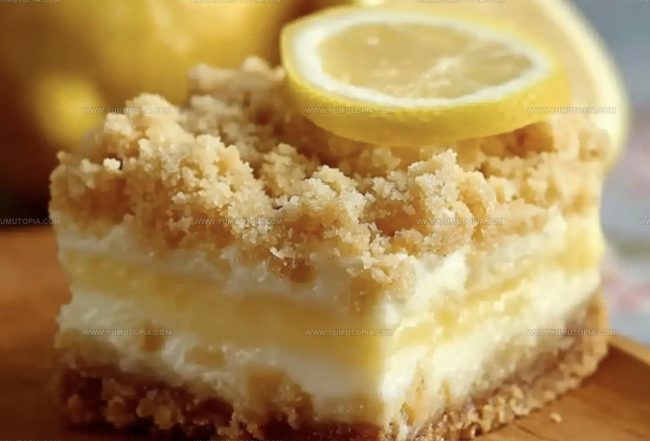
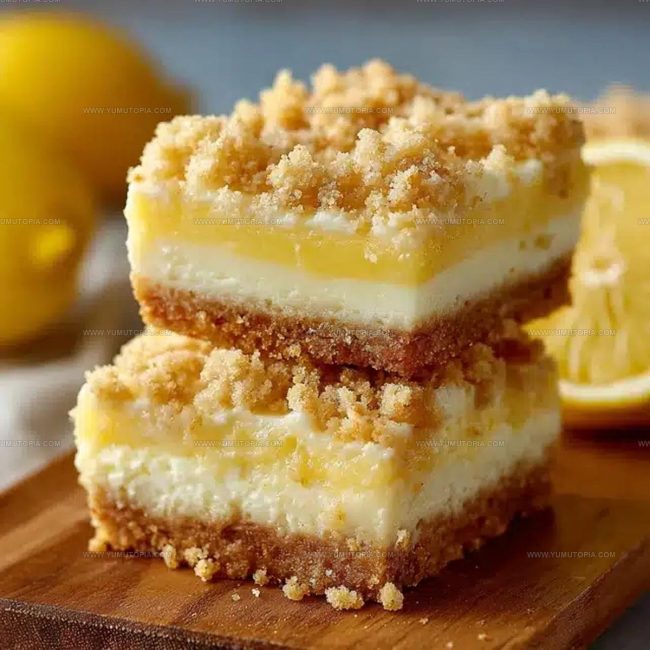
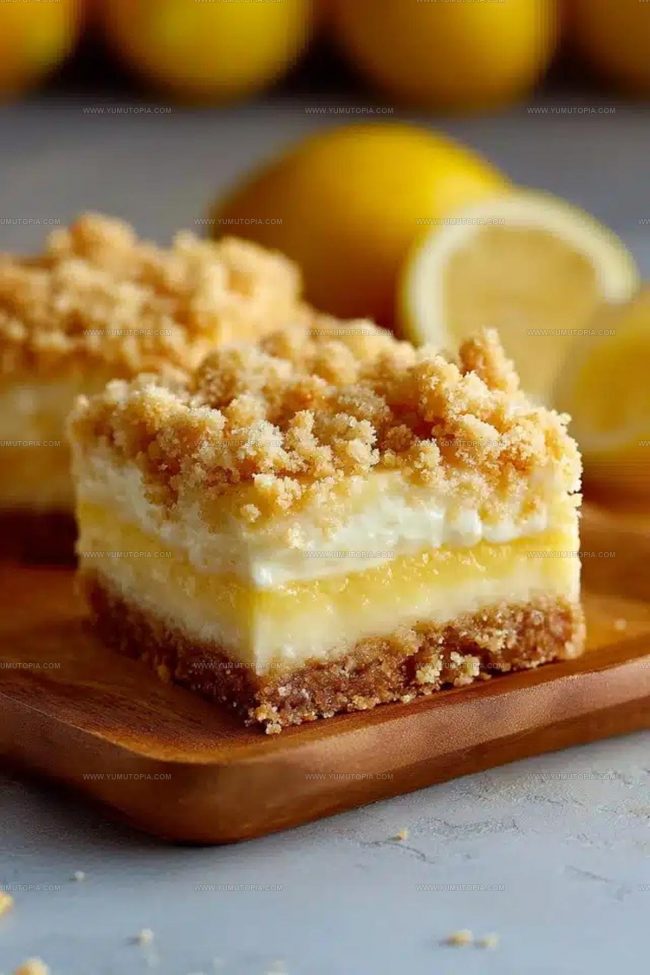
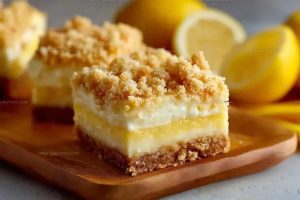
Lift the bars out using the parchment paper sides. Slice into squares and serve straight from the fridge. These bars are packed with tangy lemon and creamy cheesecake goodness.
Berry Citrus And Nut Add Ons For Lemon Cheesecake Crumb Bars
Zesty Fruit and Texture Modifications for Cheesecake Bars
How to Serve Lemon Cheesecake Crumb Bars Cool and Creamy
Storing Creamy Lemon Cheesecake Crumb Bars
Creamy Lemon Cheesecake Crumb Bars Common Questions Collected
Can I use bottled lemon juice instead of fresh?
Fresh lemon juice gives the best flavor, but bottled works in a pinch. Just ensure it’s 100% pure lemon juice without added preservatives.
How do I know when the cheesecake layer is done baking?
The filling should look set around the edges with a slightly jiggly center. When you gently shake the pan, it shouldn’t ripple like liquid.
What if my crumb mixture is too dry or too wet?
For a dry mixture, add a touch more melted butter. If too wet, sprinkle a bit more flour to achieve that sandy, crumbly texture that holds when pinched.
Can these bars be frozen?
Absolutely! Wrap the bars tightly in plastic wrap, then aluminum foil. They’ll stay delicious in the freezer for up to 3 months.
How do I get clean, sharp cuts?
Chill the bars completely, then use a sharp knife wiped clean between each slice for neat, professional-looking edges.
Creamy Lemon Cheesecake Crumb Bars Recipe
- Total Time: 3 hours 50 minutes – overnight
- Yield: 12 1x
Description
Lemon Cheesecake Crumb Bars bring zesty sunshine right to your dessert plate with a tangy twist that makes taste buds dance. Buttery graham cracker crust topped with silky cream cheese and bright citrus will have friends begging for seconds at your next gathering.
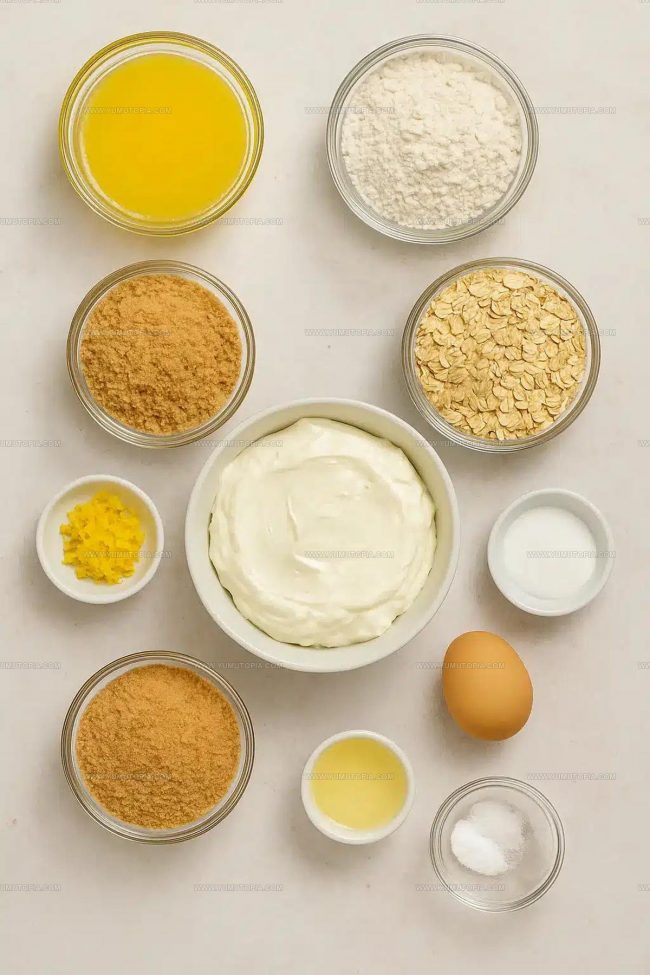
Ingredients
Main Ingredients:
- 2 cups all-purpose flour
- 1 cup old-fashioned rolled oats
- 16 ounces (450 grams) cream cheese
- 1 cup packed light brown sugar
Supporting Ingredients:
- 1 cup unsalted butter
- ½ cup granulated sugar
- ¼ cup fresh lemon juice
- 1 large egg
Finishing Ingredients:
- 1 tablespoon lemon zest
- ½ teaspoon baking soda
- ¼ teaspoon salt
- 1 teaspoon pure vanilla extract
Instructions
- Preheat the oven to 350°F (177°C). Grab a 9×13-inch pan and line it with parchment paper, ensuring extra paper hangs over the sides for easy bar removal.
- Combine 2 cups flour, 1 cup oats, 1 cup brown sugar, ½ teaspoon baking soda, and ¼ teaspoon salt in a large bowl. Pour 1 cup melted butter over the dry ingredients and mix until the mixture resembles coarse, moist sand.
- Separate 1½ cups of the crumb mixture and set it aside for topping. Press the remaining crumbs firmly into the pan’s bottom, creating an even crust layer. Bake the crust for exactly 10 minutes at 350°F, then let it cool slightly.
- Beat 16 oz softened cream cheese with ½ cup granulated sugar until completely smooth. Add 1 tablespoon lemon zest, ¼ cup lemon juice, 1 large egg, and 1 teaspoon vanilla extract. Mix until the filling looks creamy and well-blended.
- Spread the lemon cheesecake filling evenly across the warm crust. Sprinkle the reserved crumb mixture over the top, creating a rustic, textured surface.
- Bake at 350°F for 25–30 minutes, watching for a set center and golden-brown crumble topping. The filling should look slightly firm but not dry.
- Allow the bars to cool completely at room temperature. Refrigerate for 3 hours or overnight to help the bars set and develop deeper flavors.
- Lift the bars from the pan using parchment paper edges. Slice into neat squares or rectangles. Serve chilled for the best texture and taste.
Notes
- Use room temperature cream cheese and eggs for the smoothest, most even texture in your filling.
- Zest the lemon before juicing to maximize flavor and ensure you capture all the bright citrus notes.
- Chill the bars completely before cutting to get clean, precise slices that showcase the beautiful layers.
- For a gluten-free version, swap the all-purpose flour with a cup-for-cup gluten-free baking blend in the crumb base and topping.
- Prep Time: 15 minutes
- Cook Time: 35-40 minutes
- Category: Dessert Bars
- Method: Baking
- Cuisine: American
Nutrition
- Serving Size: 12
- Calories: 410 kcal
- Sugar: 23 g
- Sodium: 160 mg
- Fat: 27 g
- Saturated Fat: 15 g
- Unsaturated Fat: 11 g
- Trans Fat: 0.5 g
- Carbohydrates: 35 g
- Fiber: 1.5 g
- Protein: 6 g
- Cholesterol: 65 mg
Madison Wyman
Recipe Developer & Food Storyteller
Expertise
Recipe Research and Adaptation, Food Writing and Cultural Storytelling, Sustainable and Ethical Sourcing, Dietary Adaptations (e.g., gluten-free, plant-based)
Education
Oregon Health & Science University
Portland Community College
Madison’s passion for flavor and culture ignited amidst the rich Southern cooking traditions of her upbringing, where cherished family recipes told delicious tales.
Armed with a Master’s in Food Systems and Society from Oregon Health & Science University and a Culinary Arts Certificate from Portland Community College, Madison truly excels at transforming rich, intricate flavors into dishes that are both approachable and heartfelt.
For her, cooking is a vibrant blend of science, art, and heritage – a powerful way to connect us to our roots and each other. Her recipes invite you to delve deeper, uncovering the fascinating stories woven into every ingredient.