
No Bake Pineapple Cake Recipe for Easy Creamy Indulgence
A creamy no bake pineapple cake recipe is exactly what you need when the weather turns warm and the oven feels like too much effort.
This dessert delivers tropical sweetness with a light, refreshing quality that feels like a mini vacation on a plate.
Everyone loves something cool and fruity after dinner, especially when it looks impressive but comes together so easily.
The best part? You won’t break a sweat making it, which means more time to relax and enjoy the company around you.
It’s perfect for potlucks, casual gatherings, or simply treating yourself on a lazy afternoon.
People always ask for seconds because the flavor combination hits just right every single time.
There’s something wonderful about a dessert that tastes fancy but requires minimal fuss in the kitchen.
Why Should You Try No-Bake Pineapple Cake
No Bake Pineapple Cake Elements For Fruity, Velvety Layers
Crust Ingredients:Filling Ingredients:Fruit Ingredient:Tools Useful In Building A Smooth No Bake Pineapple Cake
Directions for No-Bake Pineapple Cake
Prepare Graham Cracker Crust
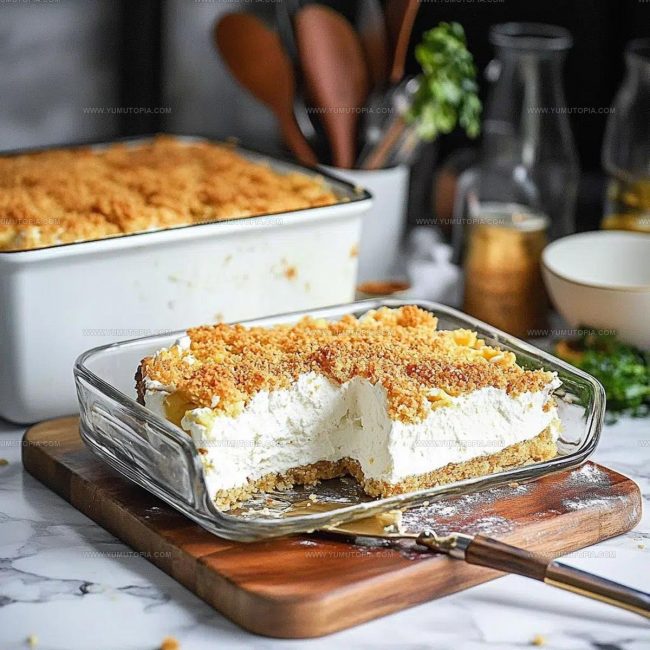
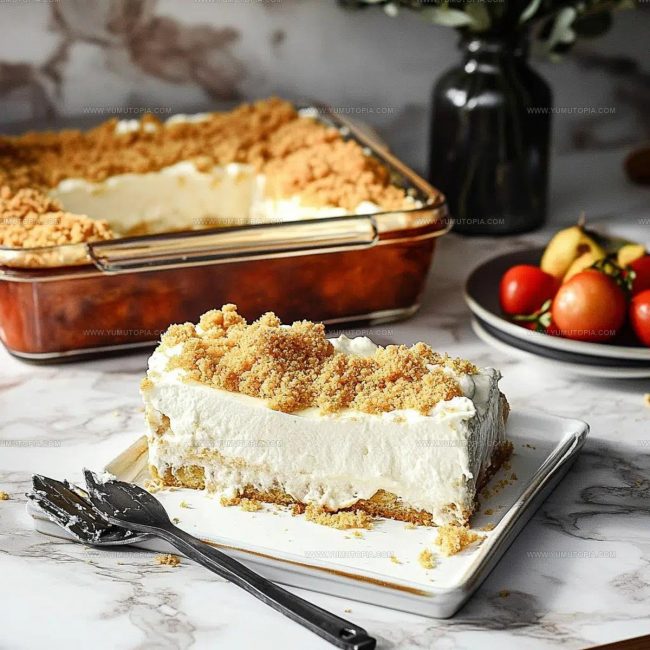
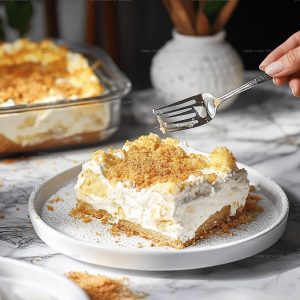
Combine 2 ½ cups (250g) graham cracker crumbs with ½ cup (113g) melted unsalted butter. Press the mixture firmly into the bottom of a 9×9-inch dish. Refrigerate the crust while preparing the filling to help it set firmly.
Cream the Cream Cheese
Using an electric mixer, beat 8 oz (225g) softened cream cheese until it becomes light and fluffy. Gradually add 1 cup (120g) powdered sugar, mixing until the mixture is completely smooth and creamy.
Fold in Whipped Topping
Gently fold 8 oz (225g) whipped topping into the cream cheese mixture. Use a spatula and mix carefully to keep the mixture light and airy.
Add Pineapple
Drain 1 can (20 oz or 567g) of crushed pineapple thoroughly. Fold the pineapple into the cream cheese mixture until it’s evenly distributed throughout.
Layer and Smooth
Spread the pineapple cream cheese filling evenly over the chilled graham cracker crust. Use a spatula to create a smooth, even surface.
Chill and Set
Refrigerate the dessert for at least 4 hours, or preferably overnight. This allows the flavors to meld and the cake to set completely. Remove from the refrigerator just before serving.
No Bake Pineapple Cake Improvements For Better Balance
No Bake Pineapple Cake Variations For Tropical Themes
Best Moments To Share A Chilled Pineapple Cake
How No Bake Pineapple Cake Maintains Its Fresh Feel
No Bake Pineapple Cake FAQs For Easy Dessert Makers
Can graham crackers be substituted?
Definitely! Vanilla wafers or digestive biscuits work perfectly as crust alternatives. Each option brings a slightly different flavor, so feel free to experiment with what sounds tasty.
Does the pineapple need to be completely dry?
Absolutely drain the pineapple thoroughly. Extra moisture can make the filling runny, so press out liquid using paper towels or a fine mesh strainer before mixing.
What if cream cheese isn’t soft?
Let cream cheese sit at room temperature for about 30 minutes. Cold cream cheese creates lumps, and we want a super smooth filling that blends beautifully.
How do know the crust is ready?
Press the graham cracker mixture firmly into the pan. When it feels compact and doesn’t crumble when touched, the crust is perfectly prepared.
Can dessert be frozen?
Freezing works great! Wrap tightly in plastic wrap, and the cake will keep for 2-3 weeks. Thaw in refrigerator before serving for best texture.
Does brand of whipped topping matter?
Not really. Any standard whipped topping like Cool Whip will work wonderfully. Just ensure it’s fully thawed before mixing.
Creamy No Bake Pineapple Cake Recipe
- Total Time: 15 minutes
- Yield: 8 1x
Description
Pineapple cake delivers a tropical twist without switching on the oven, combining creamy layers and fruity freshness in a simple no-bake dessert. Chilled and smooth, this quick treat becomes my go-to summer solution when craving something sweet and easy.
Ingredients
Cake Base:
- 2.5 cups graham cracker crumbs (250g)
- 0.5 cup unsalted butter, melted (113g)
Filling:
- 8 oz cream cheese, softened (225g)
- 1 cup powdered sugar (120g)
- 8 oz whipped topping (225g)
Fruit Layer:
- 1 can crushed pineapple, drained (20 oz / 567g)
Instructions
- Crush 2 ½ cups (250g) graham cracker crumbs into fine texture. Pour ½ cup (113g) melted unsalted butter over crumbs and blend thoroughly until mixture resembles damp sand.
- Transfer crumb mixture into 9×9-inch dish. Press firmly and evenly across bottom using flat-bottomed measuring cup or fingers. Place prepared crust into refrigerator while preparing filling.
- Place 8 oz (225g) softened cream cheese into mixing bowl. Whip with electric mixer at medium speed for 2-3 minutes until creamy and light.
- Gradually add 1 cup (120g) powdered sugar to cream cheese. Beat for additional 1-2 minutes until completely smooth and no sugar lumps remain.
- Gently incorporate 8 oz (225g) whipped topping into cream cheese mixture. Fold carefully using silicone spatula to maintain airy texture.
- Drain 20 oz (567g) crushed pineapple completely. Press with paper towels to remove excess moisture.
- Fold drained pineapple into cream cheese mixture until ingredients are evenly distributed.
- Spread filling across chilled crust. Smooth surface using offset spatula for even layer.
- Refrigerate dessert for minimum 4 hours or ideally overnight. Slice into squares when thoroughly chilled.
Notes
- Drain pineapple thoroughly to prevent excess moisture from making the cake soggy, using a fine-mesh strainer or cheesecloth to squeeze out liquid.
- Use room temperature cream cheese for the smoothest, lump-free filling that blends easily with other ingredients.
- For a gluten-free version, swap graham cracker crumbs with almond flour or gluten-free cookie crumbs to keep the same delicious crust texture.
- Decorate the top with toasted coconut flakes or additional crushed pineapple just before serving to add extra flavor and visual appeal.
- Prep Time: 15 minutes
- Cook Time: 0 minutes
- Category: Cakes
- Method: Chilling
- Cuisine: American
Nutrition
- Serving Size: 8
- Calories: 360
- Sugar: 24 g
- Sodium: 140 mg
- Fat: 25 g
- Saturated Fat: 15 g
- Unsaturated Fat: 9 g
- Trans Fat: 0.5 g
- Carbohydrates: 29 g
- Fiber: 1 g
- Protein: 3 g
- Cholesterol: 40 mg
Logan Lemaster
Founder & Culinary Innovator
Expertise
Recipe Development and Innovation, Menu Design and Optimization, Fine Dining Techniques, Ingredient Pairing and Flavor Science
Education
Metropolitan Culinary Arts Institute
Logan’s culinary journey kicked off in his vibrant Chicago family kitchen, where fresh, seasonal ingredients and bold flavors were always front and center.
After graduating from the Metropolitan Culinary Arts Institute in Arlington, Virginia, and honing his skills in renowned restaurants, Logan mastered the art of blending classic techniques with exciting, modern twists.
His kitchen is a dynamic lab for flavor exploration. Through Yum Utopia, Logan aims to empower you to cook with both confidence and creativity, turning simple ingredients into spectacular meals.