Creamy Peanut Butter Pie Recipe for Smooth Dessert Lovers
Creamy peanut butter pie recipe options have become a beloved choice for celebrations, potlucks, and quiet evenings when something sweet sounds just right.
Rich, smooth, and satisfying, pies like this one hit the spot when dessert calls for something a little more special than usual.
There’s a reason why peanut butter desserts remain popular year after year, they deliver comfort and flavor in every single bite.
Whether serving a crowd or treating the family, this pie works beautifully for any occasion that calls for a memorable finish to the meal.
Simple enough for weeknight baking yet impressive enough for holidays, it fits seamlessly into busy schedules without compromising on taste.
Everyone at the table will appreciate the balance of sweetness and nutty richness that makes each slice feel like a real treat.
When you need a dessert that consistently delivers smiles, this recipe won’t disappoint.
What Makes Peanut Butter Pie So Comforting
The Classic Ingredients Behind Peanut Butter Pie
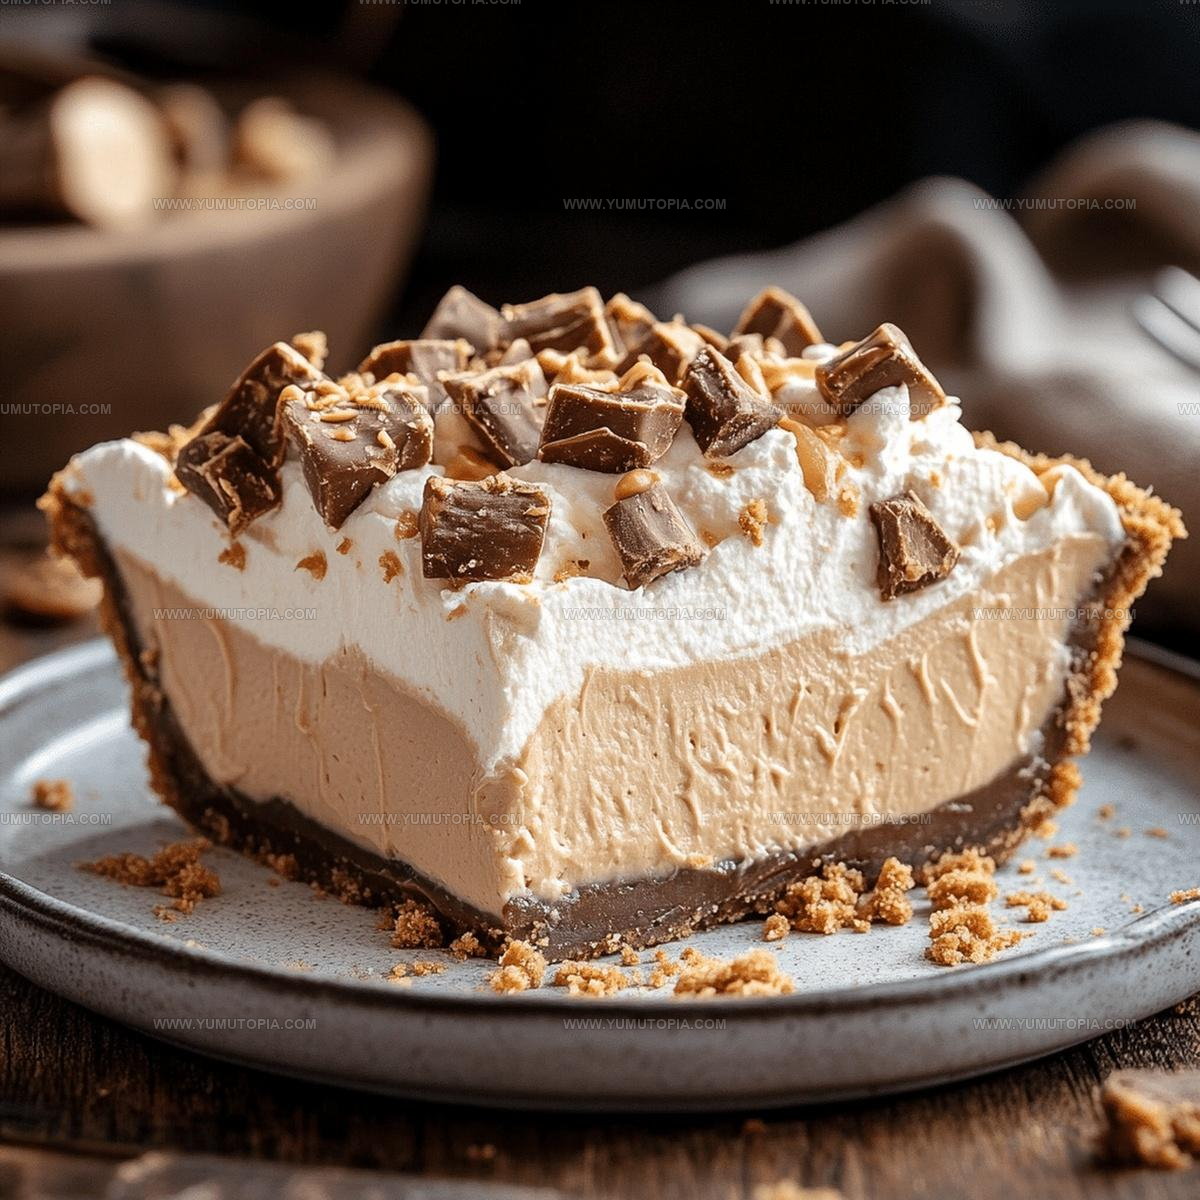
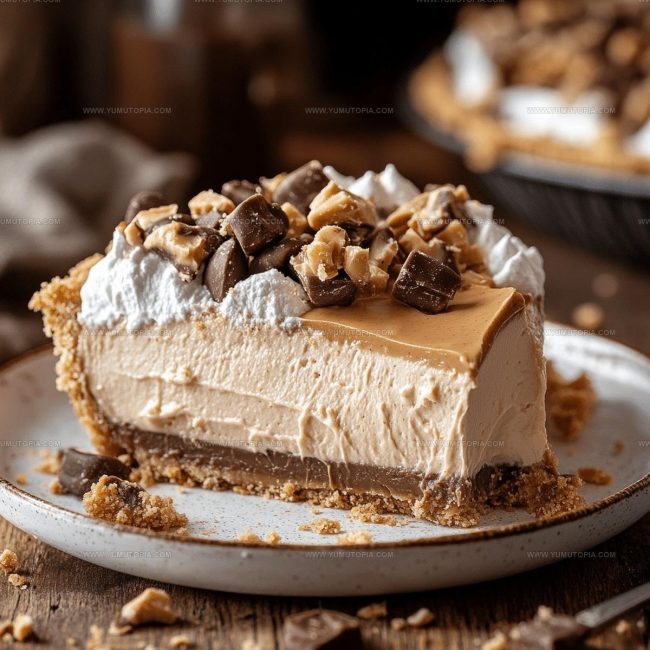
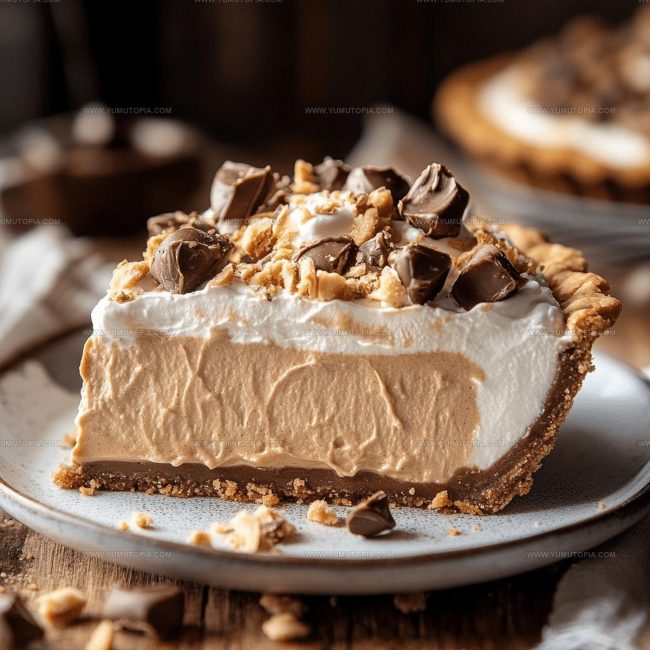
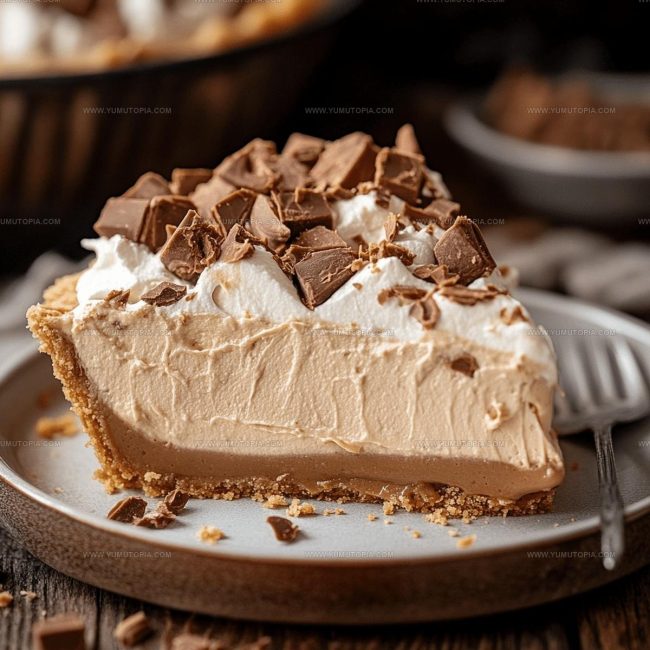
Crust:Filling Base:Flavor Stars:Optional Topping:Tools That Bring Peanut Butter Pie Together
Peanut Butter Pie Preparation Guide
Prep the Creamy Base
Grab your mixing bowl and toss in 8 ounces of softened cream cheese with 1 cup of powdered sugar. Whip these together until they blend into a silky smooth mixture. Your arm might get a little tired, but keep mixing until there are no lumps.
Blend in Peanut Butter
Add 1 cup of creamy peanut butter to your cream cheese mixture. Mix thoroughly until everything looks perfectly combined and has a consistent color and texture.
Fold in Whipped Topping
Gently incorporate the entire 8-ounce tub of thawed whipped topping into your peanut butter mixture. Fold carefully to keep the mixture light and airy – you want those delicate little air pockets that make the filling so dreamy.
Fill the Crust
Take your prepared graham cracker crust and carefully spoon the peanut butter mixture into it. Use a spatula to spread the filling evenly, making sure to create a smooth surface across the entire pie.
Chill and Set
Pop the pie into the refrigerator for exactly 3 hours at 40 degrees Fahrenheit. This gives the filling time to firm up and develop a perfect creamy consistency.
Final Touch
After chilling, drizzle some chocolate syrup across the top of the pie if you’re feeling fancy. Slice into 8 equal pieces and serve cold straight from the refrigerator.
Helpful Notes for Peanut Butter Pie
Peanut Butter Pie Alternate Takes
How to Serve Peanut Butter Pie for Clean Slices?
How Should Peanut Butter Pie Be Stored
Peanut Butter Pie Reader Questions
Can I use a different type of nut butter?
Absolutely! Almond or cashew butter works great as a substitute if you prefer a different flavor in your pie.
Do I need to use full-fat cream cheese?
Full-fat cream cheese helps create the richest, smoothest texture. Low-fat versions can make the filling less creamy.
How long can this pie stay fresh?
When stored in the refrigerator with plastic wrap, the pie stays delicious for 3-4 days after preparing.
Is a homemade graham cracker crust better than store-bought?
A homemade crust adds more flavor and texture, but a pre-made crust works perfectly for saving time.
Can this dessert be frozen?
Wrap the pie tightly in plastic wrap and aluminum foil. It will keep well in the freezer for up to one month.
What if my mixture seems too thick?
Add a splash of milk to help thin out the filling and create a smoother consistency.

Creamy Peanut Butter Pie Recipe
- Total Time: 15 minutes
- Yield: 8 1x
Description
Peanut Butter Pie is a creamy dream that melts in your mouth, leaving you craving another slice. Whip up this simple dessert with graham cracker crust, smooth peanut butter filling, and a drizzle of chocolate that makes taste buds dance.
Ingredients
Primary Ingredients:
- 1 cup creamy peanut butter
- 1 8 oz package cream cheese, softened
- 1 cup powdered sugar
Supporting Ingredients:
- 1 prepared graham cracker crust
- 1 8 oz tub whipped topping, thawed
Garnish:
- Chocolate syrup
Instructions
- Grab your electric mixer and whip 8 ounces of softened cream cheese with 1 cup powdered sugar until your mixture transforms into a silky, smooth consistency.
- Incorporate 1 cup creamy peanut butter into the cream cheese blend, stirring until everything merges perfectly without any lumps.
- Delicately incorporate the entire 8-ounce tub of thawed whipped topping, folding gently to maintain a light, airy texture that will make your pie delightfully creamy.
- Transfer your luxurious mixture into the prepared graham cracker crust, using a spatula to spread it evenly and create a pristine surface.
- Slide the pie into the refrigerator for 3 hours at 38°F, allowing it to set completely and develop a perfect, firm texture.
- Just before serving, drizzle 2 tablespoons of chocolate syrup across the top in an elegant pattern that adds visual appeal to your dessert.
- Slice the chilled pie with a sharp knife, ensuring each piece captures the beautiful layers of your carefully crafted creation.
Notes
- Softened cream cheese blends much easier, so let it sit at room temperature for about 30 minutes before starting the recipe.
- For a lighter texture, whip the cream cheese mixture on medium-high speed to incorporate more air.
- If dairy-free, substitute cream cheese with vegan cream cheese and use coconut whipped topping for a similar creamy consistency.
- Chocolate lovers can add extra drizzle or sprinkle chopped peanut butter cups on top for more decadent flavor.
- Prep Time: 15 minutes
- Cook Time: 0 minutes
- Category: Pies
- Method: Chilling
- Cuisine: American
Nutrition
- Serving Size: 8
- Calories: 410 kcal
- Sugar: 30 g
- Sodium: 250 mg
- Fat: 32 g
- Saturated Fat: 8 g
- Unsaturated Fat: 20 g
- Trans Fat: 0.5 g
- Carbohydrates: 28 g
- Fiber: 3 g
- Protein: 9 g
- Cholesterol: 40 mg
Madison Wyman
Recipe Developer & Food Storyteller
Expertise
Recipe Research and Adaptation, Food Writing and Cultural Storytelling, Sustainable and Ethical Sourcing, Dietary Adaptations (e.g., gluten-free, plant-based)
Education
Oregon Health & Science University
Portland Community College
Madison’s passion for flavor and culture ignited amidst the rich Southern cooking traditions of her upbringing, where cherished family recipes told delicious tales.
Armed with a Master’s in Food Systems and Society from Oregon Health & Science University and a Culinary Arts Certificate from Portland Community College, Madison truly excels at transforming rich, intricate flavors into dishes that are both approachable and heartfelt.
For her, cooking is a vibrant blend of science, art, and heritage – a powerful way to connect us to our roots and each other. Her recipes invite you to delve deeper, uncovering the fascinating stories woven into every ingredient.