Crispy Strawberry Crunch Cheesecake Tacos Recipe
Strawberry crunch cheesececake tacos combine two beloved desserts into one fun handheld treat that everyone loves.
Sweet and creamy with a satisfying crunch, they’re simple enough for weeknight enjoyment yet impressive enough for special gatherings.
Kids go wild for them, adults can’t resist seconds, and anyone who craves something different will find plenty to celebrate here.
The playful presentation makes dessert time feel like an event worth remembering.
No complicated techniques stand between you and success with such a crowd-pleasing creation.
Perfect for parties, potlucks, or just because you deserve something delightful, they deliver smiles with every bite.
Head to the recipe and see just how easy happiness can be.
Why Strawberry Crunch Cheesecake Tacos Are So Popular
Ingredient Lineup for Strawberry Crunch Cheesecake Tacos
Cheesecake Base:Fruity Layer:Crunchy Shell:Optional Garnish:What Tools Crunch Strawberry Cheesecake Tacos
How to Make Crunchy Strawberry Cheesecake Tacos

Whip the Cream Cheese Base
In a large mixing bowl, grab your electric mixer and blend 8 ounces of softened cream cheese with 1/2 cup granulated sugar and 1 teaspoon vanilla extract. Beat these ingredients until they form a silky smooth mixture with no lumps.
Create Creamy Texture
Pour in 1/4 cup heavy cream and continue mixing until the filling becomes light and fluffy. Gently fold in 1 cup of finely chopped fresh strawberries, distributing them evenly throughout the cream cheese mixture.
Prepare Crunchy Taco Shell Base
Grab a bowl and mix the crust ingredients:
Press this mixture into taco shells, making sure to cover the entire surface evenly.
Bake the Taco Shells
Preheat your oven to 350°F. Place the prepared taco shells on a baking sheet and bake for 8-10 minutes until the edges turn a gorgeous golden brown.
Cool and Fill the Shells
Allow the taco shells to cool completely at room temperature. Once cooled, carefully fill each shell with the strawberry cream cheese mixture.
Final Garnish
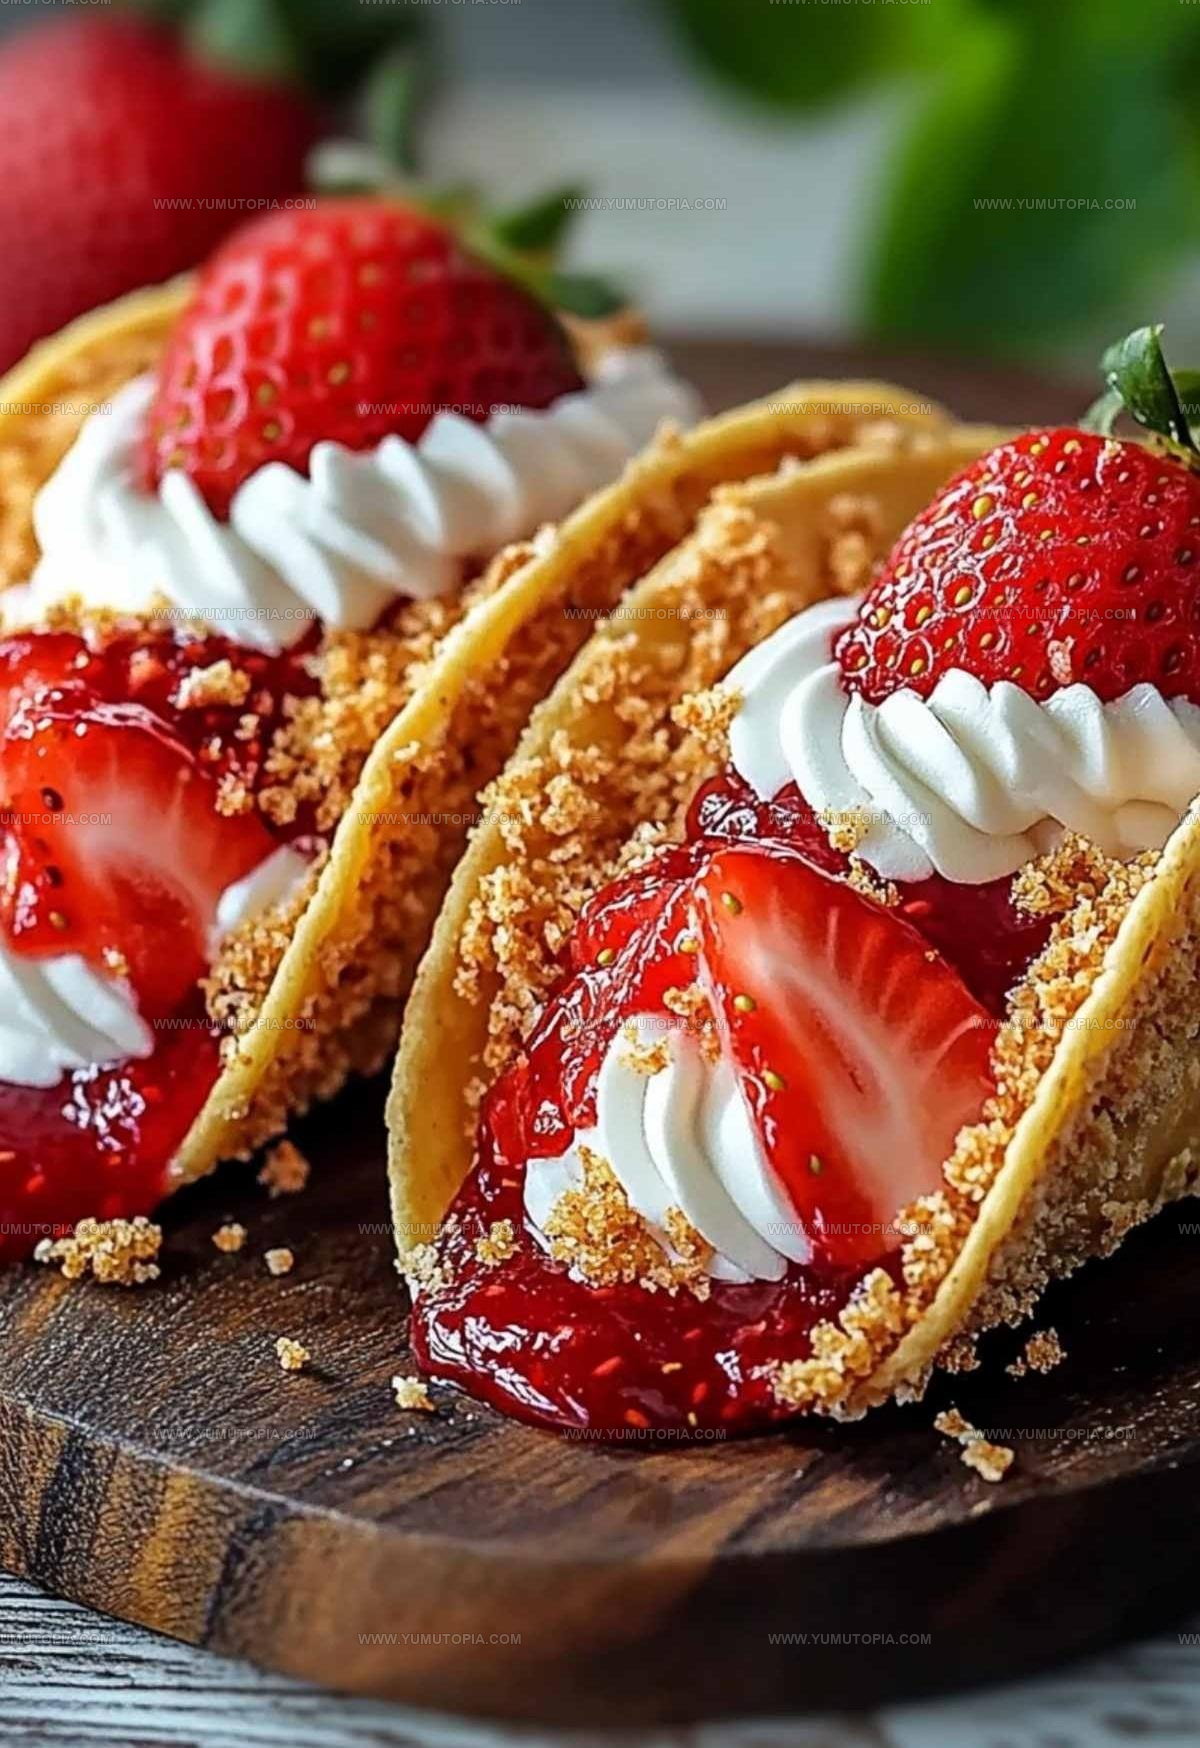
Top each taco with extra chopped strawberries for a fresh burst of flavor. If you’re feeling fancy, sprinkle some additional toasted pecans on top for extra crunch.
Serve and Enjoy
Serve these delightful dessert tacos immediately. They’re best enjoyed fresh and at room temperature, so gather your friends and dig in!
Effective Tips for Crunchy Strawberry Cheesecake Tacos
Easy Variations for Strawberry Cheesecake Tacos
Dessert Pairing Ideas for Cheesecake Tacos
Storage Tips for Strawberry Cheesecake Tacos
Crunchy Strawberry Cheesecake Tacos Frequently Asked Questions
Can I use frozen strawberries?
Fresh strawberries work best. Frozen strawberries release too much liquid and can make the filling runny.
How do I prevent the taco shells from getting soggy?
Bake the graham cracker crust in the shells first to create a protective barrier that keeps the shell crisp.
Are these tacos best served immediately?
Yes, serve them right after filling to maintain the crunch of the taco shell and the fresh texture of the strawberries.
Can I make the cheesecake filling ahead of time?
Prepare the filling up to 24 hours in advance, but wait to fill the shells until just before serving.
What if I don’t have pecans?
Skip them or substitute with chopped almonds or walnuts for a similar nutty crunch.
Do these need to be refrigerated?
Serve immediately or store in the refrigerator for up to 2 hours before the shells start to soften.

Crunchy Strawberry Cheesecake Tacos Recipe
- Total Time: 25 minutes
- Yield: 4 to 6 1x
Description
Sweet meets crisp in these strawberry crunch cheesecake tacos that bring dessert excitement straight to your plate. Creamy cheesecake filling nestled in crunchy taco shells and topped with fresh strawberries creates a playful twist on traditional treats.
Ingredients
Main Ingredients:
- 8 ounces cream cheese, softened
- 1 cup fresh strawberries, finely chopped
- 1 ½ cups graham cracker crumbs
Binding Ingredients:
- ½ cup granulated sugar
- ¼ cup heavy cream
- ¼ cup unsalted butter, melted
- 1 teaspoon vanilla extract
Garnish and Optional Ingredients:
- ¼ cup chopped toasted pecans
- Additional chopped strawberries
Instructions
- Whip 8 ounces cream cheese with ½ cup sugar and 1 teaspoon vanilla in an electric mixer until silky and completely smooth at medium speed for 2-3 minutes.
- Slowly pour ¼ cup heavy cream into the mixture, continuing to beat until the filling becomes light and fluffy, about 1 minute.
- Gently fold 1 cup finely chopped strawberries into the cream cheese mixture using a rubber spatula, ensuring even distribution.
- Mix 1 ½ cups graham cracker crumbs with ¼ cup melted butter and ¼ cup chopped pecans in a separate bowl until the texture resembles wet sand.
- Press the graham cracker mixture into taco shells, creating a firm base that covers the entire interior surface.
- Bake the taco shells with graham cracker crust at 350°F for 8-10 minutes, watching carefully until edges turn golden brown.
- Allow taco shells to cool completely at room temperature for approximately 15 minutes before filling.
- Pipe or spoon the strawberry cheesecake filling into each cooled taco shell, filling to about ¾ full.
- Garnish each taco with additional fresh chopped strawberries on top just before serving.
Notes
- Graham crackers toast quickly, so watch them closely in the oven to prevent burning while creating a crisp, golden crust.
- Chill the cheesecake filling for 30 minutes before piping to help it hold its shape and make assembly easier.
- For a gluten-free version, swap graham cracker crumbs with almond flour or gluten-free cookie crumbs and use corn tortillas as shells.
- Swap fresh strawberries with frozen ones if needed, but drain excess liquid to keep the filling from becoming watery.
- Prep Time: 15 minutes
- Cook Time: 10 minutes
- Category: Cheesecakes
- Method: Baking
- Cuisine: American
Nutrition
- Serving Size: 4 to 6
- Calories: 385 kcal
- Sugar: 27 g
- Sodium: 120 mg
- Fat: 28 g
- Saturated Fat: 14 g
- Unsaturated Fat: 12 g
- Trans Fat: 0.3 g
- Carbohydrates: 26 g
- Fiber: 2 g
- Protein: 6 g
- Cholesterol: 75 mg
Logan Lemaster
Founder & Culinary Innovator
Expertise
Recipe Development and Innovation, Menu Design and Optimization, Fine Dining Techniques, Ingredient Pairing and Flavor Science
Education
Metropolitan Culinary Arts Institute
Logan’s culinary journey kicked off in his vibrant Chicago family kitchen, where fresh, seasonal ingredients and bold flavors were always front and center.
After graduating from the Metropolitan Culinary Arts Institute in Arlington, Virginia, and honing his skills in renowned restaurants, Logan mastered the art of blending classic techniques with exciting, modern twists.
His kitchen is a dynamic lab for flavor exploration. Through Yum Utopia, Logan aims to empower you to cook with both confidence and creativity, turning simple ingredients into spectacular meals.