
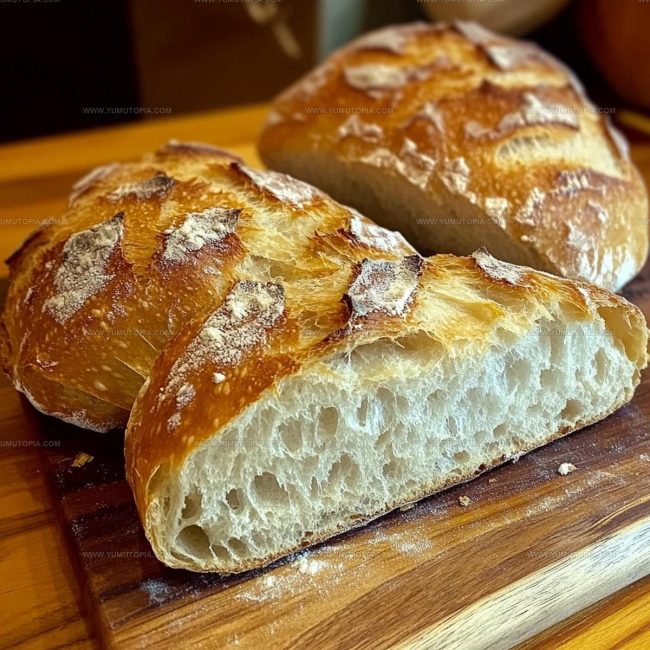
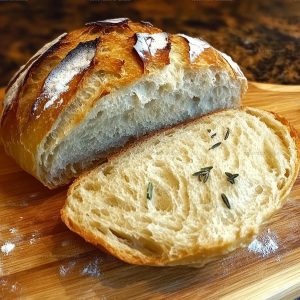
Crusty Italian Bread Recipe That Bakes Golden and Aromatic
Crusty Italian bread stands as a timeless symbol of rustic comfort and simple culinary elegance.
Generations of home bakers have celebrated this classic bread for its remarkable texture and rich heritage.
European bakeries have long treasured traditional techniques that transform basic ingredients into something magical.
Mediterranean kitchens understand how deeply satisfying a perfect loaf can be for connecting people around a shared meal.
Regional baking traditions have carefully preserved methods that create those signature crisp exterior and tender interior qualities.
Professional and home bakers alike recognize crusty Italian bread as more than just a side dish – it represents genuine passion and cultural pride.
Roll up your sleeves and prepare to experience a delightful baking adventure that connects you with time-honored Mediterranean cooking traditions.
What Sets Crusty Italian Bread Apart
Ingredients You’ll Need for Crusty Italian Bread
Flour Base:Yeast Activation:Seasoning:Finishing Touch:Required Kitchen Tools for Crusty Italian Bread
Preparation Steps for Crusty Italian Bread
Activate the Yeast
Grab a large mixing bowl and combine 1 1/4 cup warm water at 110°F, 1 tablespoon granulated sugar, and 2 1/4 teaspoon active dry yeast. Stir everything gently and let it sit for 5-10 minutes. You’ll see the mixture get super foamy and bubbly.
Mix the Dough
Time to add the dry ingredients. Toss in 3 1/2 cup all-purpose flour and 1 1/2 teaspoon salt. Grab a wooden spoon and mix until a shaggy, rough dough starts to come together.
Knead the Dough
Dump the dough onto a floured surface. Roll up your sleeves and start kneading. Your goal is a smooth, stretchy dough that feels soft and pliable. Knead for 8-10 minutes – this develops the bread’s awesome texture.
First Rise
Grease a clean bowl with a little oil. Place your kneaded dough inside and cover with a damp cloth. Find a warm spot in your kitchen and let the dough rise for 1-1 1/2 hours. Watch for it to double in size.
Shape the Loaf
Gently press down on the puffy dough to release air bubbles. Shape it into a round or oval loaf. Sprinkle some cornmeal on a baking sheet and set your shaped bread on top.
Second Rise
Cover the loaf with a clean kitchen towel. Let it rise again for 30-45 minutes. Your bread will get nice and puffy during this time.
Prepare to Bake
Set your oven to 450°F. Place a shallow pan of water on the bottom rack – this creates steam for a crispy crust.
Score and Bake
Take a sharp knife and make a few slashes across the top of your loaf. Slide the baking sheet into the oven and bake for 25-30 minutes. Look for a deep golden-brown crust that sounds hollow when you tap it.
Cool and Serve
Pull the bread out of the oven and transfer to a wire rack. Let it cool completely before slicing. Trust me, the waiting is worth it for that perfect crunch!
Practical Cooking Advice For Crusty Italian Bread
Flavorful Options For Crusty Italian Bread
What Goes Well With Crusty Italian Bread
Proper Storage Guide For Crusty Italian Bread
Crusty Italian Bread Common Questions
What makes the yeast activate properly?
Dissolving sugar in warm water creates the perfect environment for yeast to wake up and get bubbly. Make sure your water feels comfortably warm, not hot, to help the yeast grow.
How do I know if my dough is kneaded correctly?
When the dough becomes smooth and springs back when gently pressed, it’s ready. Your hands will feel the transformation from rough to silky during kneading.
Can I make this bread without a stand mixer?
Absolutely! This recipe works perfectly with hand kneading. Embrace the traditional method and enjoy feeling the dough change texture under your hands.
Why add water to the oven while baking?
Steam helps create that gorgeous crispy crust Italian bread is famous for. The moisture allows the bread’s outer layer to expand before setting into a beautiful golden shell.
How can I tell the bread is fully baked?
Tap the bottom of the loaf – it should sound hollow. The crust needs to be deep golden-brown, indicating a perfectly baked bread with a crisp exterior.
What flour works best for this recipe?
Bread flour is ideal because it has higher protein content, which helps develop strong gluten and create a chewy, robust texture.
Crusty Italian Bread Recipe
- Total Time: 2 hours 50-55 minutes
- Yield: 8 1x
Description
Crusty Italian Bread brings the warmth of a rustic bakery straight to your kitchen, with a golden-brown exterior that crackles beautifully when torn. Simple ingredients and classic techniques help you craft this authentic European treasure that connects generations through one delicious slice.
Ingredients
Main Ingredients:
- 3.5 cups all-purpose flour
- 1.25 cups warm water
Leavening Agents:
- 2.25 teaspoons active dry yeast
Seasoning and Support:
- 1.5 teaspoons salt
- 1 tablespoon granulated sugar
- Cornmeal (for dusting)
Instructions
- Combine 1 ¼ cup warm water at 110°F, 1 tablespoon sugar, and 2 ¼ teaspoon active dry yeast in a large bowl. Let the mixture sit and develop bubbles for 5-10 minutes.
- Add 3 ½ cups all-purpose flour and 1 ½ teaspoon salt to the activated yeast mixture. Stir with a wooden spoon until a shaggy dough forms.
- Transfer the dough onto a floured surface. Knead thoroughly for 8-10 minutes until the texture becomes smooth and elastic.
- Grease a clean bowl with olive oil. Place the kneaded dough inside and cover with a damp kitchen towel. Allow the dough to rise in a warm location for 1-1 ½ hours until it doubles in volume.
- Gently deflate the risen dough by pressing down with your palm. Shape the dough into a round or oval loaf.
- Dust a baking sheet with cornmeal. Position the shaped loaf on the sheet and cover with a clean kitchen towel. Let it rise an additional 30-45 minutes.
- Arrange your oven rack and place a shallow pan of water on the bottom rack. Preheat the oven to 450°F.
- Make 3-4 diagonal slashes across the loaf surface using a sharp knife. This helps steam escape during baking.
- Bake the bread for 25-30 minutes until the crust turns deep golden-brown. Test doneness by tapping the bottom – it should sound hollow.
- Transfer the bread to a wire rack. Allow it to cool completely before slicing to maintain the perfect texture.
Notes
- Check water temperature carefully, as too hot or cold can kill the yeast and prevent proper rising.
- Kneading develops gluten, so take time to work the dough until it becomes smooth and stretchy.
- Creating steam in the oven helps develop a crisp, golden crust that crackles when sliced.
- For a gluten-free version, swap wheat flour with a blend of rice, almond, and tapioca flours, and add xanthan gum for structure.
- Prep Time: 2 hours 25 minutes
- Cook Time: 25-30 minutes
- Category: Breads
- Method: Baking
- Cuisine: Italian
Nutrition
- Serving Size: 8
- Calories: 147 kcal
- Sugar: 1 g
- Sodium: 186 mg
- Fat: 0.4 g
- Saturated Fat: 0.1 g
- Unsaturated Fat: 0.3 g
- Trans Fat: 0 g
- Carbohydrates: 30 g
- Fiber: 1.3 g
- Protein: 4.5 g
- Cholesterol: 0 mg
Madison Wyman
Recipe Developer & Food Storyteller
Expertise
Recipe Research and Adaptation, Food Writing and Cultural Storytelling, Sustainable and Ethical Sourcing, Dietary Adaptations (e.g., gluten-free, plant-based)
Education
Oregon Health & Science University
Portland Community College
Madison’s passion for flavor and culture ignited amidst the rich Southern cooking traditions of her upbringing, where cherished family recipes told delicious tales.
Armed with a Master’s in Food Systems and Society from Oregon Health & Science University and a Culinary Arts Certificate from Portland Community College, Madison truly excels at transforming rich, intricate flavors into dishes that are both approachable and heartfelt.
For her, cooking is a vibrant blend of science, art, and heritage – a powerful way to connect us to our roots and each other. Her recipes invite you to delve deeper, uncovering the fascinating stories woven into every ingredient.