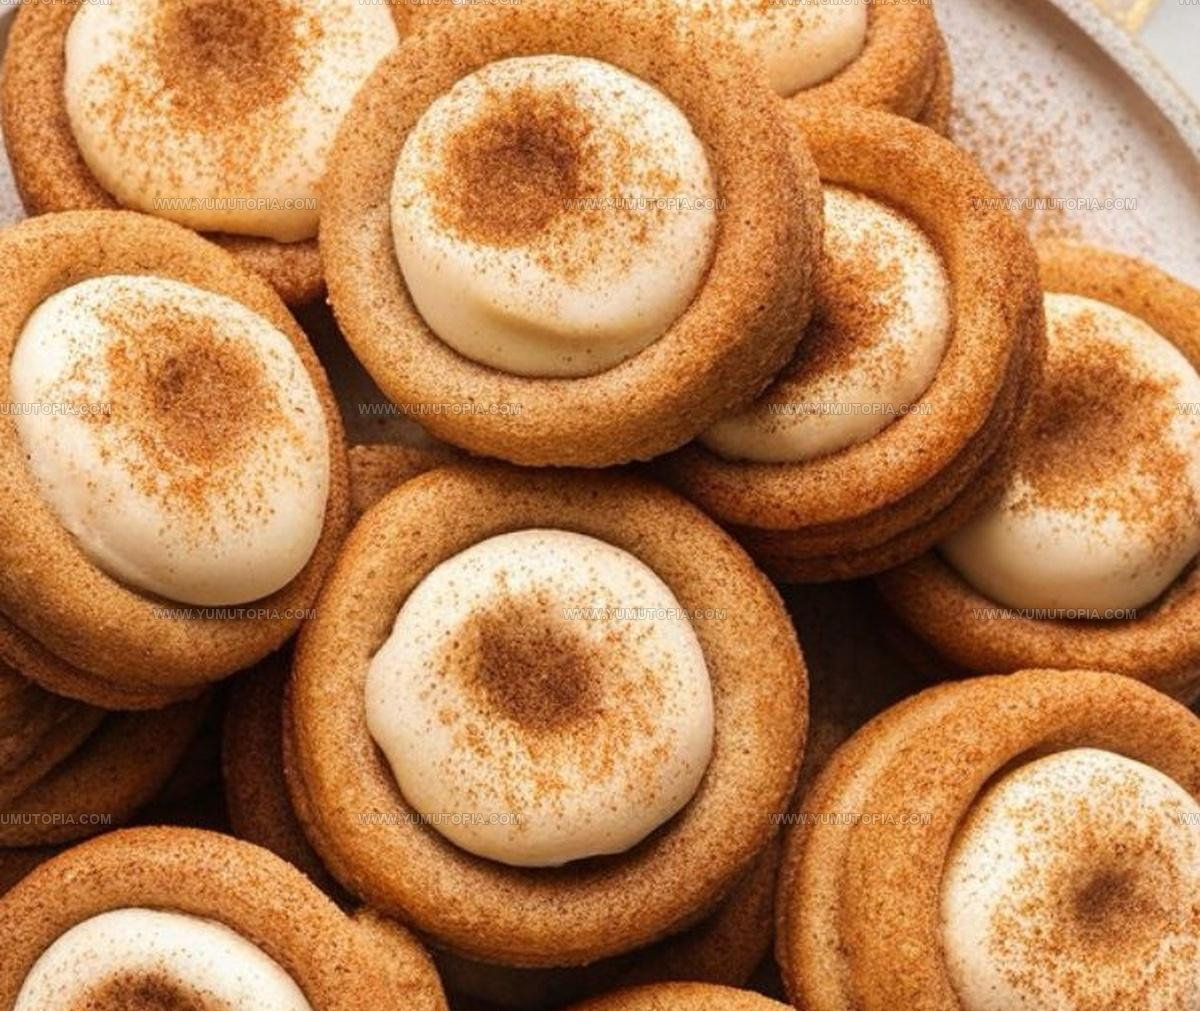
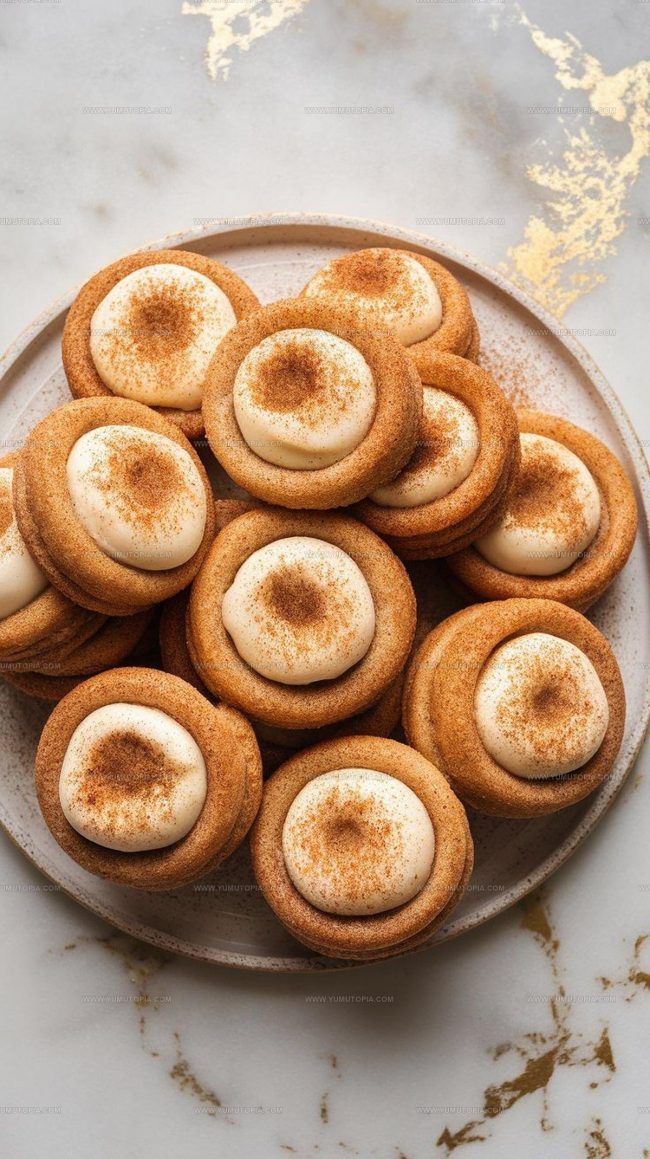
Eggnog Snickerdoodle Thumbprint Cookie Recipe for the Holidays
Eggnog Snickerdoodle Thumbprint Cookies Recipe blends two beloved holiday favorites into one delightful treat that feels both familiar and special.
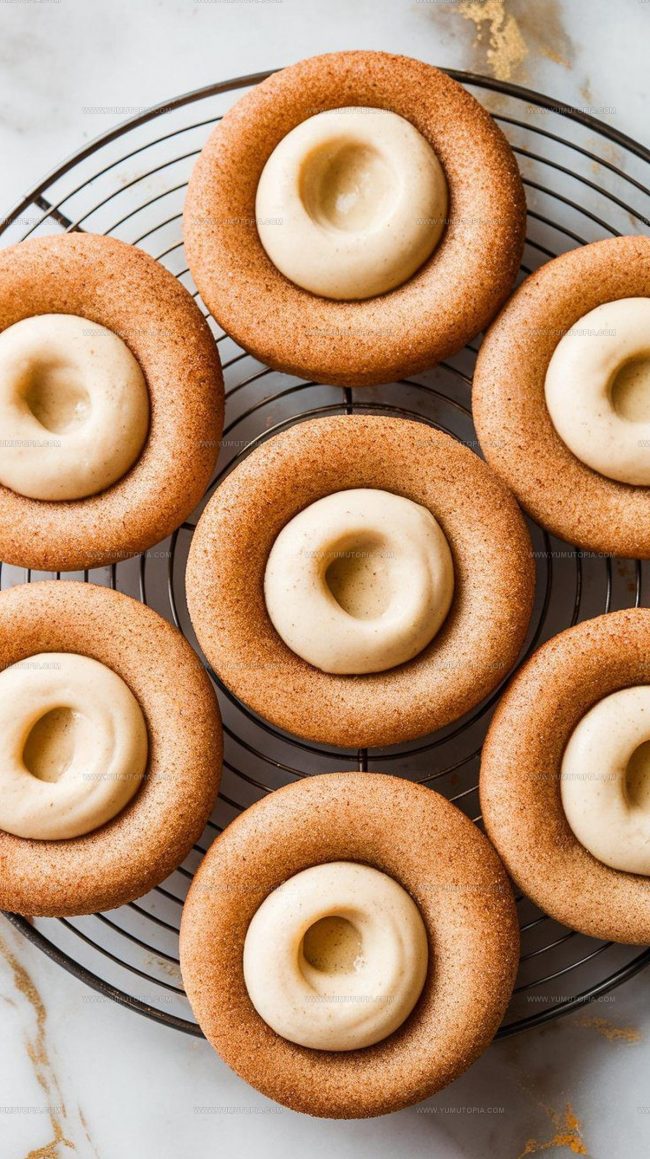
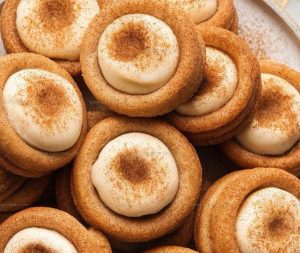
Soft, cinnamon-sugar coated cookies meet creamy eggnog filling in a pairing that belongs at every festive gathering.
The warm spices and rich, custard-like center create an instant mood lifter during the busy season.
Each bite offers comfort and celebration rolled into a single cookie that looks as beautiful as it tastes.
Perfect for cookie exchanges, gift boxes, or simply enjoying with hot cocoa by the fire, this dessert has something for everyone.
You won’t need fancy skills or hard-to-find equipment to pull off something truly memorable.
Baking a batch means filling your kitchen with the scents of cinnamon and nutmeg that make the holidays complete.
Reasons to Enjoy Eggnog Thumbprint Cookies
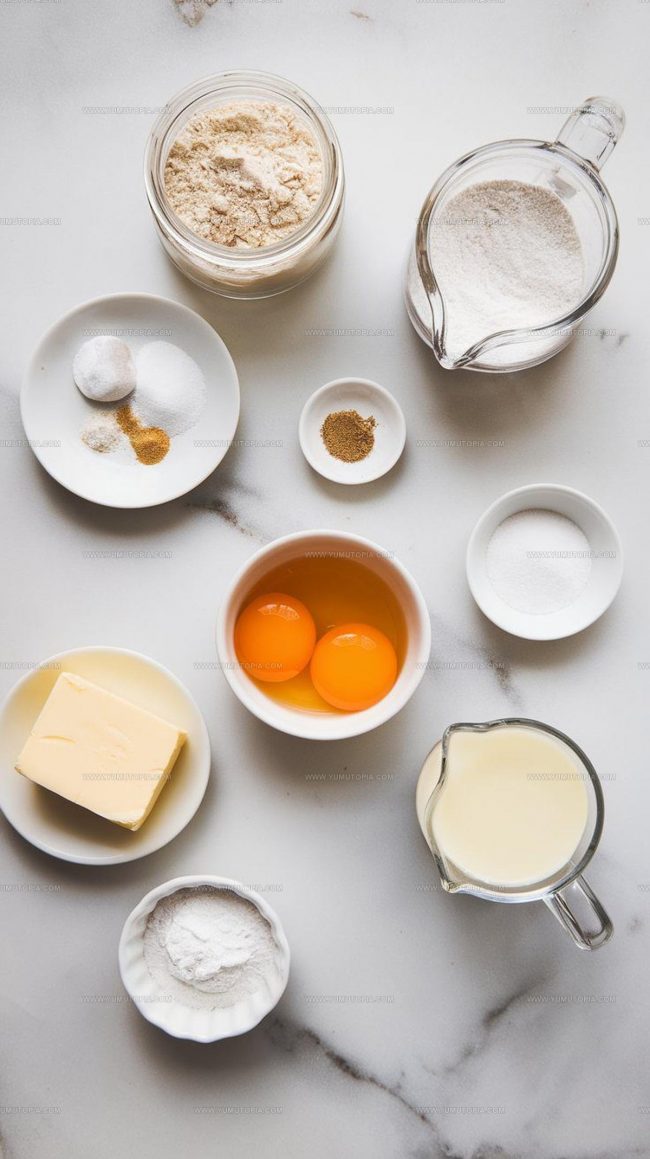
Eggnog Snickerdoodle Thumbprints Ingredient Mix
Required Kitchen Tools for Eggnog Thumbprint Cookies
Eggnog Snickerdoodle Thumbprint Cookies Baking Guide

Prep the Dry Mix
Grab a medium bowl and whisk together the flour, cream of tartar, baking soda, and salt. This dry mix is your flavor foundation, so make sure everything is well combined. Set the bowl aside for now.
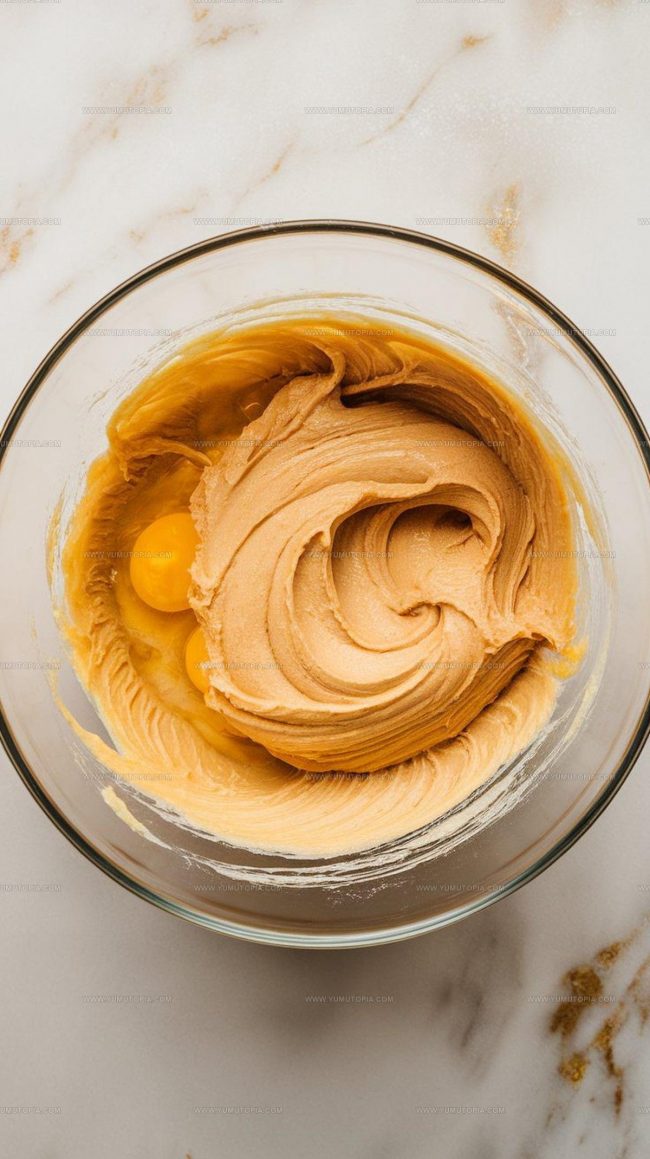
Cream Butter and Sugar
Pull out your electric mixer and a large bowl. Toss in the softened butter and granulated sugar. Beat them together on medium speed until the mixture looks light and fluffy – this should take about 2-3 minutes. Your arm might get a little tired, but keep going!
Add Wet Ingredients
Drop in the eggs one at a time, beating after each addition. Pour in the vanilla extract and mix until everything looks smooth and well blended.
Combine Wet and Dry Ingredients
Slowly add the dry ingredient mix to your wet ingredients. Stir gently until just combined – you want a soft dough that isn’t overmixed.
Chill the Dough
Cover your dough and slide it into the refrigerator. Let it chill for at least 1 hour. This helps the flavors meld and makes the dough easier to handle.
Prepare Cinnamon Sugar Coating
Mix the sugar and cinnamon in a shallow bowl. This will be your cookie’s delicious outer layer.
Shape the Cookies
Scoop out tablespoon-sized portions of dough and roll them into balls. Roll each ball in the cinnamon sugar mixture, then place on a parchment-lined baking sheet. Use your thumb to create a gentle indent in the center of each cookie.
Bake the Cookies
Heat the oven to 350°F. Bake the cookies for 10-12 minutes until the edges look golden. Watch carefully to avoid overbaking.
Create Eggnog Filling
In a small saucepan over medium heat, whisk together:
Stir until the mixture thickens, about 3-5 minutes. Let it cool down.
Fill and Finish
Once the cookies are completely cool, spoon about 1 teaspoon of eggnog filling into each thumbprint center. Let the filling set for 10-15 minutes before serving.
Things Worth Knowing for Eggnog Thumbprint Cookies
Easy Variations for Eggnog Snickerdoodle Thumbprints
Serving Suggestions for Eggnog Thumbprint Cookies
Best Storage Practices For Eggnog Thumbprint Cookies
Common Recipe Questions for Eggnog Snickerdoodle Thumbprints
Why use cream of tartar in snickerdoodles?
Cream of tartar gives these cookies their classic tangy flavor and helps create a softer, chewier texture that makes snickerdoodles so delightful.
Can I make the dough ahead of time?
Absolutely! The dough can be chilled for up to 3 days before baking, which helps develop richer flavors and makes prep easier.
What if my thumbprints collapse during baking?
Gently remake the indent right after removing the cookies from the oven while they’re still warm and soft. A clean back of a teaspoon works perfectly.
How do I know when the eggnog filling is thick enough?
The filling should coat the back of a spoon and leave a clear trail when you run your finger through it. It will continue to thicken as it cools.
Can I freeze these cookies?
These cookies freeze beautifully for up to 2 months. Store them in a single layer between parchment paper to prevent sticking.
Eggnog Snickerdoodle Thumbprint Cookies Recipe
- Total Time: 1 hour 25-27 minutes
- Yield: 24 1x
Description
Eggnog Snickerdoodle Thumbprint Cookies blend holiday cheer with classic cookie comfort, delivering a festive twist that’ll make your taste buds dance with seasonal delight. Warm cinnamon, creamy eggnog filling, and a tender cookie base come together in one irresistible Christmas treat your friends and family will absolutely adore.
Ingredients
Cookies:
- 2 ¾ cups all-purpose flour
- 1 cup unsalted butter
- 1 ½ cups granulated sugar
- 2 large eggs
- ¼ cup eggnog
Spices and Leaveners:
- 1 ½ teaspoons cream of tartar
- ½ teaspoon baking soda
- ½ teaspoon salt
- ½ teaspoon ground nutmeg
- 1 teaspoon vanilla extract
Rolling and Filling:
- ½ cup powdered sugar
- 1 tablespoon cornstarch
- 1 teaspoon cinnamon
- ¼ cup sugar
Instructions
- Whisk 2 ¾ cups flour, 1 ½ teaspoons cream of tartar, ½ teaspoon baking soda, and ½ teaspoon salt in a medium bowl until your dry ingredients are perfectly combined.
- Beat 1 cup softened butter and 1 ½ cups granulated sugar with an electric mixer at medium speed for 2-3 minutes until the mixture looks light and fluffy.
- Add 2 eggs one at a time to your butter mixture, then incorporate 1 teaspoon vanilla extract until everything blends smoothly.
- Gradually fold dry ingredients into wet ingredients, mixing just until a soft dough forms without overworking the mixture.
- Wrap the dough and refrigerate for at least 1 hour to help your cookies hold their shape.
- Create a coating by mixing ¼ cup sugar and 1 teaspoon cinnamon in a shallow bowl.
- Scoop tablespoon-sized dough portions, roll into balls, and thoroughly coat each in the cinnamon-sugar mixture.
- Place coated dough balls on a parchment-lined baking sheet and gently press your thumb into the center of each to create a shallow indentation.
- Bake at 350°F for 10-12 minutes, watching carefully to ensure edges turn just golden without overbaking.
- Prepare filling by whisking ¼ cup eggnog, ½ cup powdered sugar, 1 tablespoon cornstarch, and ½ teaspoon ground nutmeg in a saucepan over medium heat for 3-5 minutes until thickened.
- Allow cookies to cool completely, then spoon about 1 teaspoon of cooled eggnog filling into each thumbprint center.
- Let the filling set for 10-15 minutes before transferring cookies to a serving plate.
Notes
- Chill the dough thoroughly to prevent spreading and maintain the cookies’ shape during baking.
- Create uniform thumbprints by using the back of a measuring spoon for consistent wells in each cookie.
- For a dairy-free version, substitute butter with coconut oil and use non-dairy eggnog in the filling.
- Test the filling’s consistency by ensuring it coats the back of a spoon without being too runny or too thick.
- Prep Time: 1 hour 15 minutes
- Cook Time: 10-12 minutes
- Category: Cookies
- Method: Baking
- Cuisine: American
Nutrition
- Serving Size: 24
- Calories: 147 kcal
- Sugar: 10 g
- Sodium: 82 mg
- Fat: 7 g
- Saturated Fat: 4 g
- Unsaturated Fat: 3 g
- Trans Fat: 0 g
- Carbohydrates: 20 g
- Fiber: 1 g
- Protein: 2 g
- Cholesterol: 29 mg
Madison Wyman
Recipe Developer & Food Storyteller
Expertise
Recipe Research and Adaptation, Food Writing and Cultural Storytelling, Sustainable and Ethical Sourcing, Dietary Adaptations (e.g., gluten-free, plant-based)
Education
Oregon Health & Science University
Portland Community College
Madison’s passion for flavor and culture ignited amidst the rich Southern cooking traditions of her upbringing, where cherished family recipes told delicious tales.
Armed with a Master’s in Food Systems and Society from Oregon Health & Science University and a Culinary Arts Certificate from Portland Community College, Madison truly excels at transforming rich, intricate flavors into dishes that are both approachable and heartfelt.
For her, cooking is a vibrant blend of science, art, and heritage – a powerful way to connect us to our roots and each other. Her recipes invite you to delve deeper, uncovering the fascinating stories woven into every ingredient.