
Leaf-Pattern Pie Crust Tutorial Recipe for Creative Bakers
A leaf-pattern pie crust tutorial opens up a whole new world of baking creativity that makes any dessert feel special and memorable.
Decorating pastry with delicate botanical designs has become incredibly popular because it looks absolutely stunning without requiring professional skills.
The technique works beautifully for holidays, celebrations, or simply when you want to impress dinner guests with something unexpectedly gorgeous.
Anyone can master the process once you understand the basic approach and practice a few times.
The finished result feels like edible art that belongs on a magazine cover rather than coming from a home kitchen.
Friends will wonder how you managed such intricate detail, yet the method stays surprisingly straightforward and forgiving.
Even beginners find success with this decorative style because mistakes blend right into the organic, natural aesthetic.
Start creating beautiful pies that taste amazing and look like they came from a fancy bakery.
What Makes This Decorative Leaf Pie Crust So Stunning
Ingredients That Create a Canvas for Leaf Designs
Main Dough:Egg Wash Ingredients:Kitchen Pieces for Sharp, Distinct Pie Leaves
Full Guide to Decorative Leaf Pie Crust
Prepare Dough
Roll out your pie dough on a clean countertop dusted with 30 grams (¼ cup) flour until it’s about 3 millimeters (⅛ inch) thick. Keep the surface lightly floured to prevent sticking.
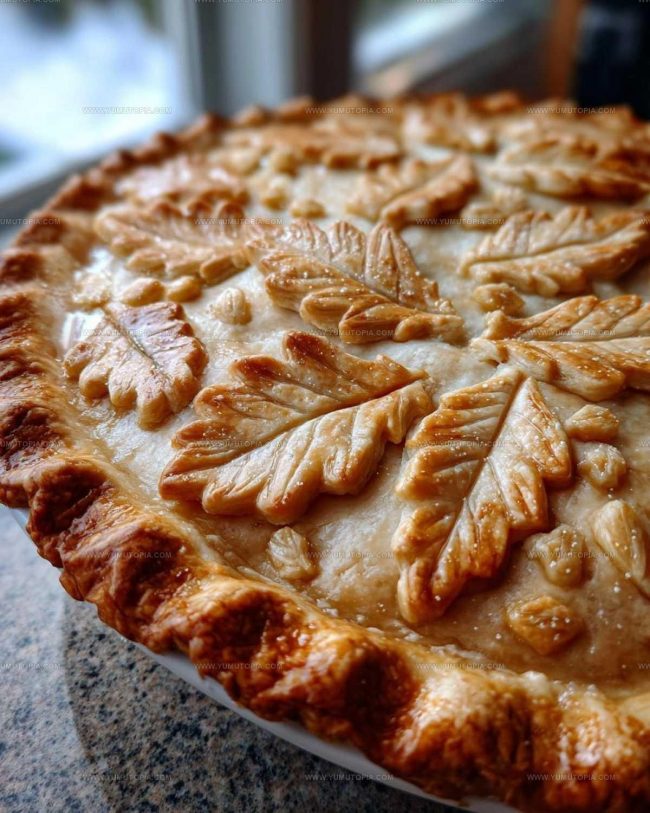
Create Leaf Shapes
Grab your favorite leaf-shaped cookie cutter and press it firmly into the rolled dough. Cut out multiple leaf shapes with smooth, gentle movements. Make sure each leaf looks clean and crisp.
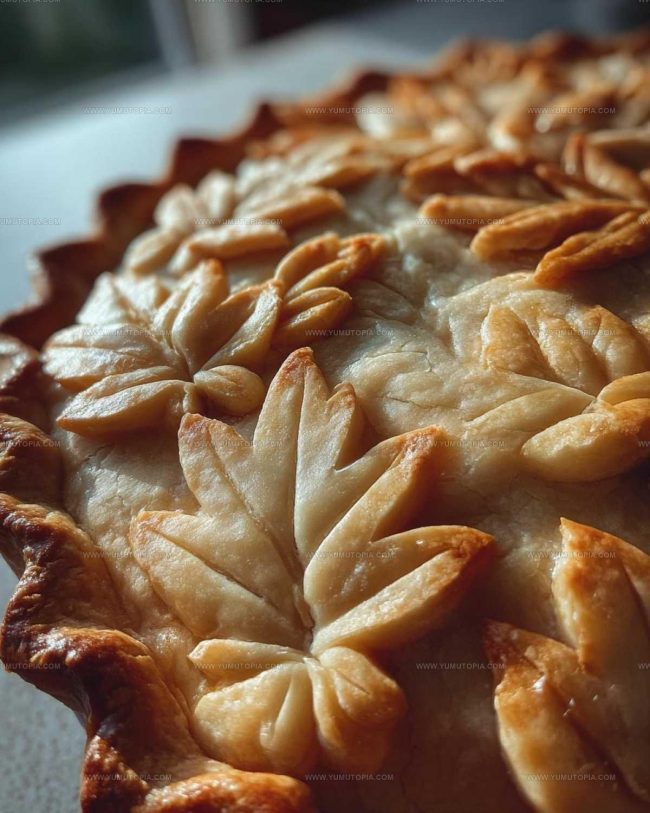
Add Texture Details
Use a sharp knife to carefully trace delicate vein lines on each leaf. Press lightly to create natural-looking texture without cutting completely through the dough. These small details make your leaves look more realistic.
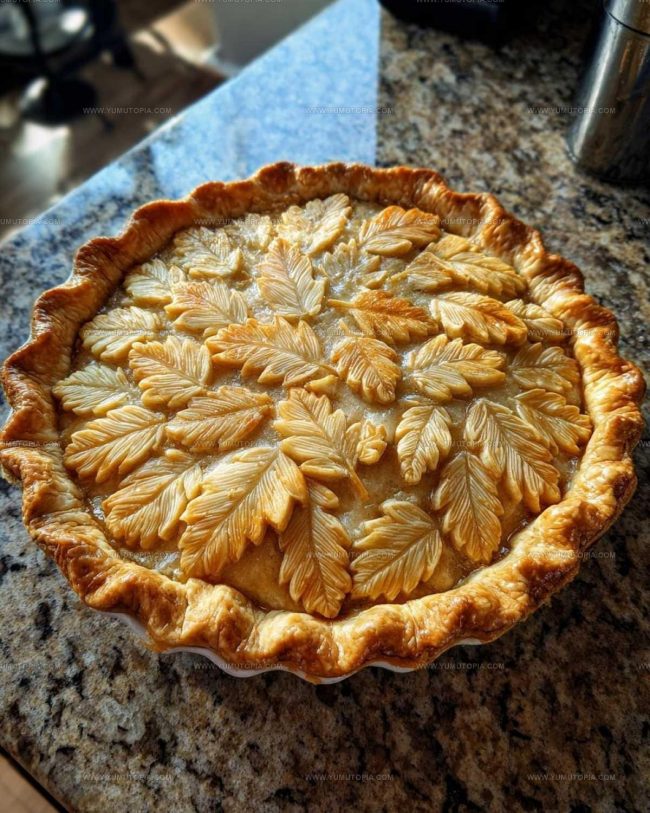
Arrange Decorative Pattern
Start placing your leaf cutouts onto the pie surface, overlapping them slightly for depth and visual interest. Arrange the leaves in a circular or flowing pattern that looks organic and elegant.
Create Egg Wash
Whisk together 1 whole egg and 5 milliliters (1 teaspoon) water in a small bowl until completely blended. This mixture will help your leaves turn a beautiful golden brown when baked.
Apply Finishing Touch
Carefully brush the egg wash over each leaf and the surrounding pie crust using a pastry brush. Make sure to cover the entire surface evenly for a consistent shine and color.
Bake and Enjoy
Place the decorated pie into a preheated oven according to your specific pie recipe’s temperature guidelines. Watch as the leaves transform into a gorgeous golden-brown decoration that looks professionally crafted.
Secrets Behind a Stunning Decorative Leaf Pie Crust

Creative Varies for Decorative Leaf Pie Crusts
Serving Tips for a Stunning Decorative Leaf Pie
Protecting Intricate Pie Crust Designs During Storage
Curious Leaf-Crust Questions Pastry Lovers Ask
How can I prevent my pie crust leaves from breaking?
Keeping your dough cold and handling it gently helps prevent tearing. Work quickly and use a thin, flexible spatula when transferring leaf shapes to prevent cracking.
Do I need special leaf-shaped cookie cutters?
While dedicated leaf cutters work great, you can also use a sharp knife to hand-cut leaf shapes or trace leaf outlines from a template for unique designs.
Can I make leaves ahead of time?
Absolutely! Cut your pie dough leaves and store them between parchment paper in the refrigerator for several hours before arranging on your pie.
What if I don’t have an egg for the wash?
Substitute with milk or cream for a similar golden sheen. Water also works, though the shine will be less pronounced.
How intricate can my leaf design get?
Start simple with basic overlapping leaves. As your confidence grows, experiment with more complex patterns and layering techniques.
What dough works best for decorative leaves?
Firm, cold pie dough with good butter content holds shape best. Avoid overly soft or warm dough that won’t maintain crisp leaf details.
Elegant Leaf-Pattern Pie Crust Tutorial Recipe
- Total Time: 1 hour 5 minutes
- Yield: 8 1x
Description
Decorative Leaf Pie Crust becomes your artistic baking adventure where pastry turns into a canvas for seasonal creativity. Crafting delicate leaf patterns lets your pie look professionally designed while keeping the process simple and enjoyable.
Ingredients
Main Ingredients:
- 1 recipe pie dough
Supporting Ingredients:
- 1 egg
Finishing Ingredients:
- 1 teaspoon water
Instructions
- Prepare the homemade pie dough using your preferred recipe, ensuring it’s chilled and ready to work with.
- Dust your work surface generously with flour to prevent sticking while rolling out the dough to a thin 1/8-inch thickness.
- Select a leaf-shaped cookie cutter and carefully press it into the rolled-out dough, creating delicate leaf shapes with clean edges.
- Arrange the cut leaf shapes across the pie surface, allowing gentle overlapping to create a natural, organic design that looks effortlessly beautiful.
- Add subtle texture by gently tracing fine vein lines on each leaf using the back edge of a small knife, which will enhance the realistic appearance.
- Combine the beaten egg with water in a small mixing bowl, whisking until the mixture is smooth and consistent.
- Apply the egg wash carefully over each leaf and the surrounding pie crust using a soft pastry brush, ensuring even coverage for a glossy golden finish.
- Transfer the decorated pie to the oven and bake according to the specific recipe’s temperature and time recommendations.
Notes
- Create pie dough ahead of time and chill it thoroughly to ensure a flaky, tender crust that’s easy to work with.
- Select small, varied leaf-shaped cookie cutters to add visual depth and complexity to your pie decoration.
- Score delicate vein details on leaves using a sharp paring knife before placing them on the pie for a natural, botanical appearance.
- Experiment with leaf arrangements by practicing different overlapping patterns on a clean surface before committing to your final pie design.
- Prep Time: 20 minutes
- Cook Time: 45 minutes
- Category: Pies
- Method: Baking
- Cuisine: American
Nutrition
- Serving Size: 8
- Calories: 150 kcal
- Sugar: 1 g
- Sodium: 120 mg
- Fat: 7 g
- Saturated Fat: 3 g
- Unsaturated Fat: 3 g
- Trans Fat: 0.2 g
- Carbohydrates: 19 g
- Fiber: 1 g
- Protein: 2 g
- Cholesterol: 40 mg
Madison Wyman
Recipe Developer & Food Storyteller
Expertise
Recipe Research and Adaptation, Food Writing and Cultural Storytelling, Sustainable and Ethical Sourcing, Dietary Adaptations (e.g., gluten-free, plant-based)
Education
Oregon Health & Science University
Portland Community College
Madison’s passion for flavor and culture ignited amidst the rich Southern cooking traditions of her upbringing, where cherished family recipes told delicious tales.
Armed with a Master’s in Food Systems and Society from Oregon Health & Science University and a Culinary Arts Certificate from Portland Community College, Madison truly excels at transforming rich, intricate flavors into dishes that are both approachable and heartfelt.
For her, cooking is a vibrant blend of science, art, and heritage – a powerful way to connect us to our roots and each other. Her recipes invite you to delve deeper, uncovering the fascinating stories woven into every ingredient.