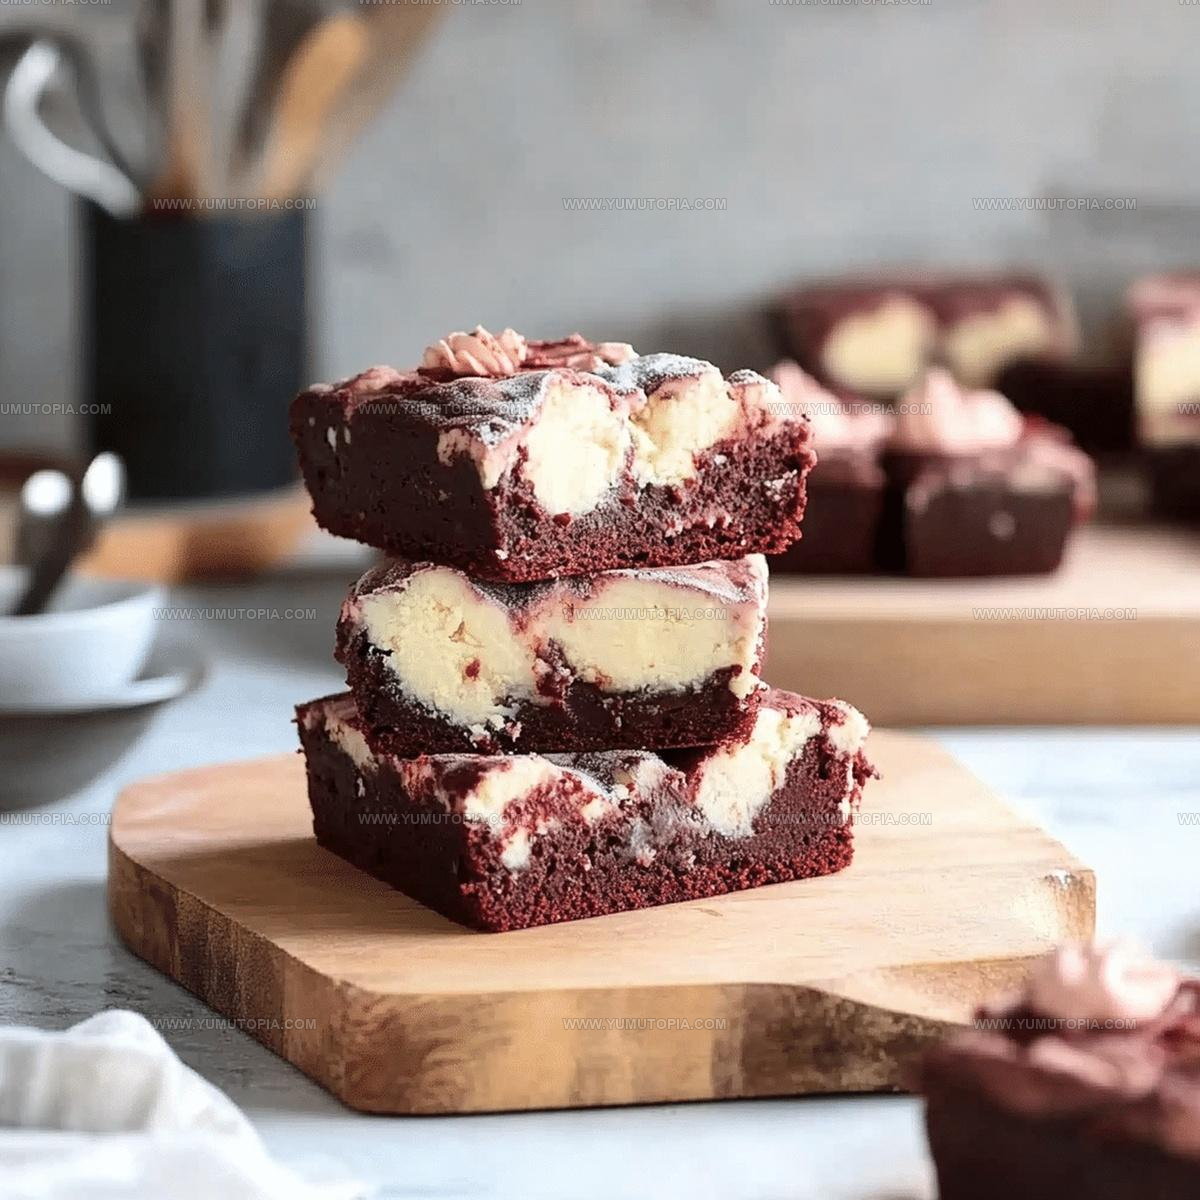
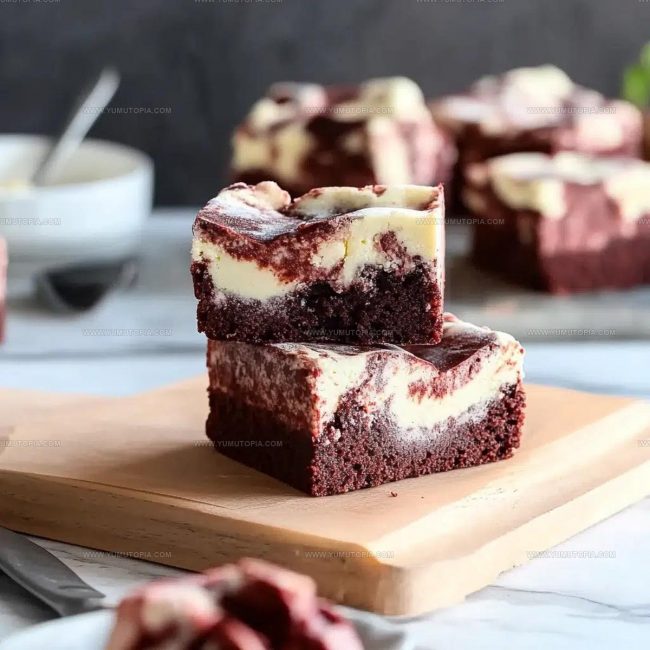
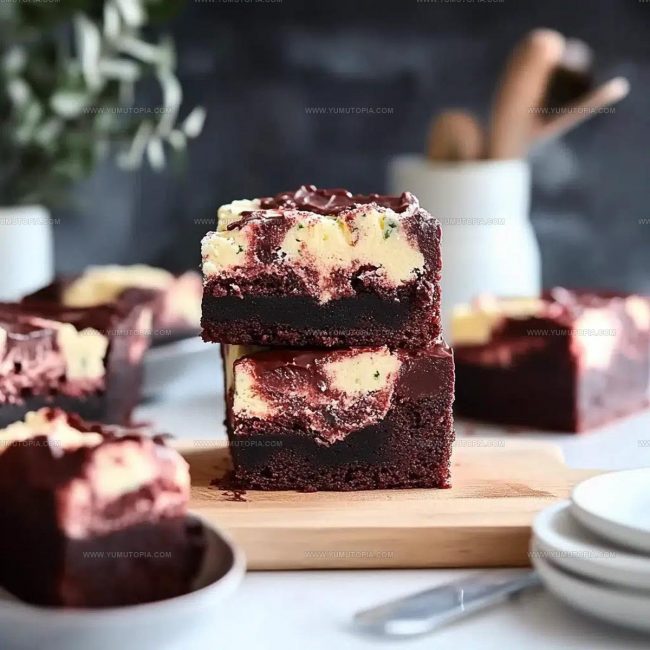
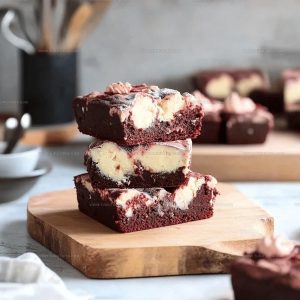
Red Velvet Cheesecake Brownies Recipe for Elegant Sweet Layers
Red velvet cheesecake brownies combine three beloved desserts into one showstopping treat that wins hearts at every gathering.
The rich cocoa undertones meet creamy sweetness in a way that feels both indulgent and comforting.
Everyone from dessert enthusiasts to casual bakers can appreciate how impressive these turn out with surprisingly little fuss.
The marbled appearance alone makes them look bakery-worthy, yet the process remains approachable for home cooks.
They work beautifully for celebrations, potlucks, or those moments when you deserve something special.
The contrast of textures creates an eating experience that keeps people coming back for seconds.
Each bite delivers satisfaction that makes any occasion feel more memorable.
So scroll down and see just how easy it is to make these crowd-pleasers happen in the comfort of home.
Highlights of Red Velvet Cheesecake Brownies

Red Velvet Cheesecake Brownie Ingredients For Velvety, Tangy Contrast
Cheesecake Layer:Brownie Base Layer:Dry Ingredients:Tools That Support Clean Layers In Red Velvet Cheesecake Brownies
Directions for Red Velvet Cheesecake Brownies
Prepare the Oven
Preheat your oven to 350°F (175°C). Line an 8×8-inch baking pan with parchment paper and give it a light greasing so your brownies won’t stick.
Create the Cheesecake Mixture
Grab your electric mixer and blend 8 ounces (226 grams) of softened cream cheese with ⅓ cup (67 grams) granulated sugar. Add 1 large egg and ½ teaspoon vanilla extract. Mix until the texture is completely smooth and creamy. Set this mixture aside for later.
Mix the Brownie Base
In a large mixing bowl, whisk together these ingredients:
Combine Dry Ingredients
Sift the following dry ingredients into your wet brownie mixture:
Stir gently until the ingredients are just combined. Don’t overmix your batter.
Layer the Batter
Pour most of the brownie batter into your prepared pan, saving about ¼ cup for topping. Spread the cream cheese mixture evenly over the brownie base. Drop small dollops of the reserved brownie batter on top.
Create Swirl Design
Take a knife and gently swirl the batters together, creating a marbled effect. Make sure not to mix them too much.
Bake the Brownies
Slide the pan into the preheated oven and bake for 30-35 minutes. Your brownies are done when the edges look set and the center is slightly soft.
Cool and Serve
Let the brownies cool completely in the pan. Once cooled, lift them out using the parchment paper and cut into squares. These red velvet cheesecake brownies are ready to enjoy!
Little Additions That Amplify Red Velvet Cheesecake Brownie Luxury
Red Velvet Cheesecake Brownie Flavor Routes To Explore
Times When Red Velvet Cheesecake Brownies Steal The Dessert Table
Keeping Red Velvet Cheesecake Brownies Moist And Gorgeous
Red Velvet Cheesecake Brownie Curiosities From Home Bakers
Can cream cheese be replaced with another ingredient?
Cream cheese provides the signature tangy texture. Mascarpone works as a substitute, but the flavor will change slightly.
What makes these brownies red velvet style?
The red food coloring and cocoa powder give the classic red velvet color and subtle chocolate undertone.
Does buttermilk matter in this recipe?
Buttermilk adds tenderness and helps activate the cocoa’s deep flavor. Regular milk won’t create the same rich results.
How do experts get perfect swirl patterns?
Drag a knife gently through the cheesecake and brownie layers in figure-eight or zigzag motions. Less movement creates cleaner, more distinct swirls.
Why sift dry ingredients?
Sifting prevents flour and cocoa powder lumps, ensuring a smooth, consistent brownie texture without clumps.
Can these be frozen for later?
These brownies freeze wonderfully for up to 3 weeks. Wrap tightly in plastic wrap, then aluminum foil to preserve freshness.
Elegant Red Velvet Cheesecake Brownies Recipe
- Total Time: 45-50 minutes
- Yield: 9 1x
Description
Red Velvet Cheesecake Brownies are my weekend baking adventure that combines two classic desserts into one delectable treat. Creamy cheesecake swirls dance through rich chocolate brownies, creating a dessert that disappears faster than I can set them on the table.
Ingredients
Main Ingredients:
- 1 cup granulated sugar
- ¾ cup all-purpose flour
- ½ cup unsalted butter, melted
- 8 oz cream cheese, softened
- 2 large eggs, room temperature
- 1 large egg
Supporting Ingredients:
- ½ cup buttermilk
- ¼ cup unsweetened cocoa powder
- 1 tablespoon red food coloring
Finishing Ingredients:
- ½ teaspoon vanilla extract
- 1 teaspoon vanilla extract
- ¼ teaspoon salt
- ⅓ cup granulated sugar
Instructions
- Prepare your workspace by setting the oven to 350°F (175°C). Line an 8×8-inch baking pan with parchment paper, ensuring the edges slightly overhang for easy removal. Lightly coat the paper with cooking spray.
- Create the cheesecake layer by combining 8 oz softened cream cheese, ⅓ cup granulated sugar, 1 large egg, and ½ teaspoon vanilla extract. Whisk until the mixture becomes silky and uniform, with no lumps visible.
- Melt ½ cup unsalted butter completely. In a separate large mixing bowl, blend the melted butter with 1 cup granulated sugar until thoroughly incorporated.
- Add 2 large room-temperature eggs to the butter-sugar mixture. Stir vigorously until the mixture looks smooth and slightly glossy.
- Pour ½ cup buttermilk, 1 teaspoon vanilla extract, and 1 tablespoon red food coloring into the wet ingredients. Mix until the color is consistent and vibrant.
- Sift ¾ cup all-purpose flour, ¼ cup unsweetened cocoa powder, and ¼ teaspoon salt directly into the liquid ingredients. Fold gently until just combined, avoiding overmixing.
- Transfer approximately ¾ of the red velvet batter into the prepared pan, spreading evenly with a spatula. Reserve the remaining ¼ of batter for swirling.
- Carefully spread the entire cheesecake mixture over the red velvet base, creating a smooth, even layer.
- Drop small dollops of the reserved red velvet batter across the cheesecake surface. Use a knife to create gentle swirl patterns, connecting the dots.
- Bake for 30-35 minutes at 350°F (175°C). The edges should look set, with a slight jiggle in the center indicating perfect moisture.
- Remove from the oven and let the brownies cool completely in the pan. This helps them set and develop a rich, fudgy texture.
- Use the parchment paper handles to lift the brownies from the pan. Slice into 16 equal squares using a sharp knife, wiping the blade clean between cuts for neat edges.
Notes
- Chill cream cheese to room temperature before beating to ensure a smooth, lump-free cheesecake layer that blends perfectly into the brownie base.
- Use gel food coloring for a more vibrant red color without thinning the batter, and add it gradually to control the intensity of the red tone.
- Swirl the batters gently with a knife or toothpick to create beautiful marbled patterns without overmixing, which can muddle the distinct layers.
- Let the brownies cool completely before cutting to help them set and achieve clean, neat slices that showcase the beautiful red and cream swirls.
- Prep Time: 15 minutes
- Cook Time: 30-35 minutes
- Category: Brownies
- Method: Baking
- Cuisine: American
Nutrition
- Serving Size: 9
- Calories: 315 kcal
- Sugar: 29 g
- Sodium: 160 mg
- Fat: 22 g
- Saturated Fat: 13 g
- Unsaturated Fat: 8 g
- Trans Fat: 0.5 g
- Carbohydrates: 30 g
- Fiber: 2 g
- Protein: 5 g
- Cholesterol: 75 mg
Madison Wyman
Recipe Developer & Food Storyteller
Expertise
Recipe Research and Adaptation, Food Writing and Cultural Storytelling, Sustainable and Ethical Sourcing, Dietary Adaptations (e.g., gluten-free, plant-based)
Education
Oregon Health & Science University
Portland Community College
Madison’s passion for flavor and culture ignited amidst the rich Southern cooking traditions of her upbringing, where cherished family recipes told delicious tales.
Armed with a Master’s in Food Systems and Society from Oregon Health & Science University and a Culinary Arts Certificate from Portland Community College, Madison truly excels at transforming rich, intricate flavors into dishes that are both approachable and heartfelt.
For her, cooking is a vibrant blend of science, art, and heritage – a powerful way to connect us to our roots and each other. Her recipes invite you to delve deeper, uncovering the fascinating stories woven into every ingredient.