
Fruity Pebbles Cheesecake Tacos Recipe for Colorful Dessert Lovers
Sweet breakfast meets dessert in these fruity pebbles cheesecake tacos that promise pure morning magic.
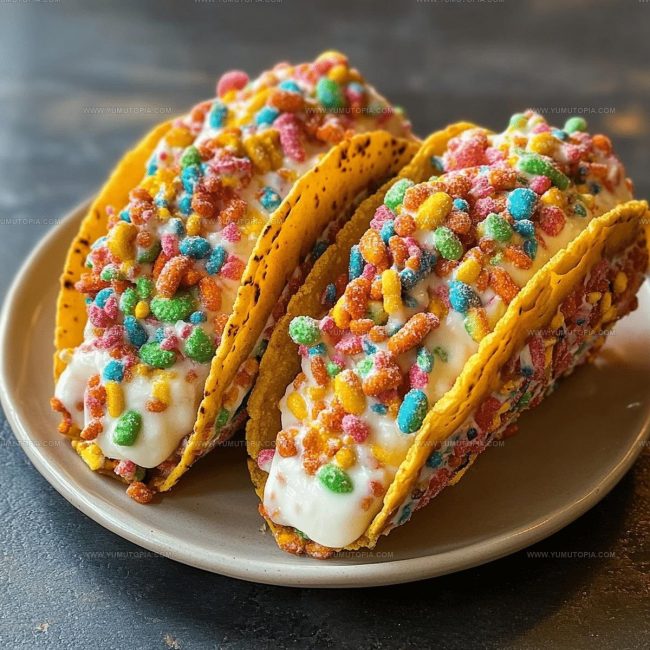
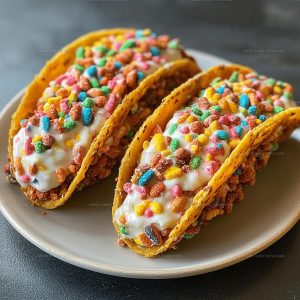
Crispy taco shells coated with colorful cereal create a playful twist on traditional treats.
Combining unexpected textures and flavors, this dessert breaks all the standard rules of breakfast and confectionery.
Snack enthusiasts and adventurous food lovers will absolutely adore this whimsical creation that blurs delicious boundaries.
Cheerful and Instagram-worthy, the recipe transforms simple ingredients into something extraordinary that sparks joy and conversation.
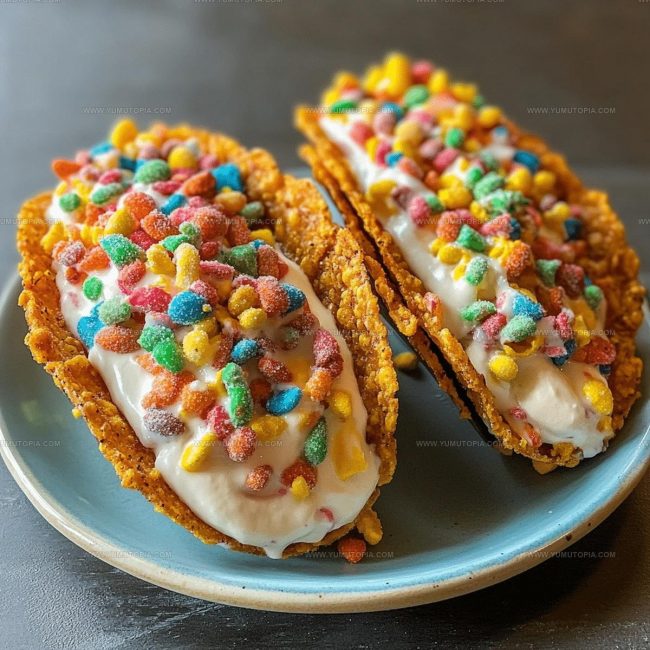
Creamy cheesecake filling nestled inside crunchy, cereal-crusted shells delivers a delightful surprise with every single bite.
Your friends and family will be stunned by how something so unique can taste so incredibly amazing.
What Makes Fruity Pebbles Cheesecake Tacos So Fun

Full Ingredient List for Fruity Pebbles Cheesecake Tacos
Handy Kitchen Tools for Fruity Pebbles Cheesecake Tacos
How to Prepare Fruity Pebbles Cheesecake Tacos
Prepare Taco Shell Base
Grab a saucepan and melt 1/4 cup unsalted butter over low heat at 250°F. Toss in the entire 10 oz bag of mini marshmallows and stir until they become super smooth. Take the pan off the heat and gently fold in 2 1/2 cups of Fruity Pebbles cereal until everything is evenly coated.
Shape Taco Shells
Spread some wax paper on your counter. Scoop out the cereal mixture and press it carefully over the back of a muffin tin to create those cute taco shell shapes. Let them cool down completely at room temperature.
Make Cheesecake Filling
Grab your mixing bowl and beat 8 oz of softened cream cheese until it’s silky smooth. Add 1/2 cup powdered sugar and 1 tsp vanilla extract, mixing until combined. In a separate bowl, whip 1 cup cold heavy whipping cream until it forms stiff peaks.
Combine Filling
Fold the whipped cream into the cream cheese mixture, creating a light and fluffy filling that’ll make your taste buds dance.
Fill and Decorate
Carefully spoon the cheesecake mixture into each cereal shell. Go wild with toppings like:
Chill and Serve
Pop these treats into the refrigerator for 15-30 minutes at 40°F to set. Then grab a taco and enjoy your sweet creation!
Cooking Notes for Fruity Pebbles Cheesecake Tacos
What Other Variations Work For Fruity Pebbles Cheesecake Tacos
Fun Serving Ideas For Fruity Pebbles Cheesecake Tacos
Proper Storage Method For Fruity Pebbles Cheesecake Tacos
Fruity Pebbles Cheesecake Tacos Popular Questions
Do marshmallows sometimes burn when melting?
Stir constantly over low heat and remove from stove immediately after they melt to prevent burning and ensure smooth mixture.
Can kids help make these tacos?
Absolutely! Kids can press cereal mixture over muffin tin backs and add fun toppings, but an adult should handle the stove and melting steps.
What if my cereal mixture doesn’t hold shape?
Pack the mixture firmly against the muffin tin and allow complete cooling before removing to help maintain taco shell structure.
Does the cheesecake filling need to be super cold?
Room temperature cream cheese helps create smoother filling, but chill the entire dessert before serving for best texture.
How do I prevent cheesecake from getting runny?
Whip cream to very stiff peaks and fold gently into cream cheese to keep filling thick and stable.
Can these be made ahead of time?
Prepare cereal shells and cheesecake filling separately, then assemble just before serving to keep shells crisp and fresh.
Ffruity Pebbles Cheesecake Tacos Recipe
- Total Time: 30-45 minutes
- Yield: 6 1x
Description
Fruity Pebbles Cheesecake Tacos bring childhood nostalgia and dessert creativity right to your plate. Sweet graham shells cradle creamy cheesecake filling sprinkled with colorful cereal crunch.
Ingredients
Taco Shells:
- 2.5 cups Fruity Pebbles cereal
- 1 10-ounce bag mini marshmallows
- 0.25 cup unsalted butter
Cheesecake Filling:
- 8 ounces cream cheese
- 1 cup cold heavy whipping cream
- 0.5 cup powdered sugar
- 1 teaspoon vanilla extract
Optional Toppings:
- Whipped cream
- Sprinkles
- Extra Fruity Pebbles
- Sliced strawberries
- Sliced bananas
- Melted white chocolate drizzle
Instructions
- Melt ¼ cup unsalted butter in a saucepan over low heat at 200°F, stirring constantly to prevent burning.
- Add entire 10 oz bag of mini marshmallows to melted butter, stirring until completely smooth and glossy.
- Remove marshmallow mixture from heat and fold in 2 ½ cups Fruity Pebbles cereal until evenly coated.
- Spread wax paper over the back of a muffin tin to create curved taco shell molds.
- Press cereal mixture onto wax paper, shaping into delicate taco shells using gentle fingers.
- Allow cereal shells to cool and harden at room temperature for 15-20 minutes.
- In a clean mixing bowl, beat 8 oz softened cream cheese until completely smooth and creamy.
- Mix in ½ cup powdered sugar and 1 tsp vanilla extract until fully incorporated.
- In a separate chilled bowl, whip 1 cup cold heavy cream until stiff, peaked peaks form.
- Gently fold whipped cream into cream cheese mixture, creating a light, fluffy filling.
- Carefully spoon cheesecake filling into each cooled cereal taco shell.
- Decorate with optional toppings like whipped cream, sprinkles, or sliced strawberries.
- Refrigerate completed Fruity Pebbles Cheesecake Tacos for 15-30 minutes before serving.
Notes
- Grease your hands with cooking spray when shaping the Fruity Pebbles taco shells to prevent sticking and create smoother edges.
- Let the cereal shells cool completely before filling to ensure they maintain their crisp, structured shape and don’t become soggy.
- Whip the cream to stiff peaks for a lighter, more airy cheesecake filling that will hold its shape inside the delicate cereal shell.
- For a gluten-free version, confirm that your marshmallows and cream cheese are certified gluten-free, and the recipe remains unchanged.
- Prep Time: 15 minutes
- Cook Time: 5 minutes
- Category: Cheesecakes
- Method: Melting
- Cuisine: American
Nutrition
- Serving Size: 6
- Calories: 399 kcal
- Sugar: 32 g
- Sodium: 182 mg
- Fat: 24 g
- Saturated Fat: 14 g
- Unsaturated Fat: 10 g
- Trans Fat: 0.5 g
- Carbohydrates: 38 g
- Fiber: 1 g
- Protein: 4 g
- Cholesterol: 69 mg
Logan Lemaster
Founder & Culinary Innovator
Expertise
Recipe Development and Innovation, Menu Design and Optimization, Fine Dining Techniques, Ingredient Pairing and Flavor Science
Education
Metropolitan Culinary Arts Institute
Logan’s culinary journey kicked off in his vibrant Chicago family kitchen, where fresh, seasonal ingredients and bold flavors were always front and center.
After graduating from the Metropolitan Culinary Arts Institute in Arlington, Virginia, and honing his skills in renowned restaurants, Logan mastered the art of blending classic techniques with exciting, modern twists.
His kitchen is a dynamic lab for flavor exploration. Through Yum Utopia, Logan aims to empower you to cook with both confidence and creativity, turning simple ingredients into spectacular meals.