
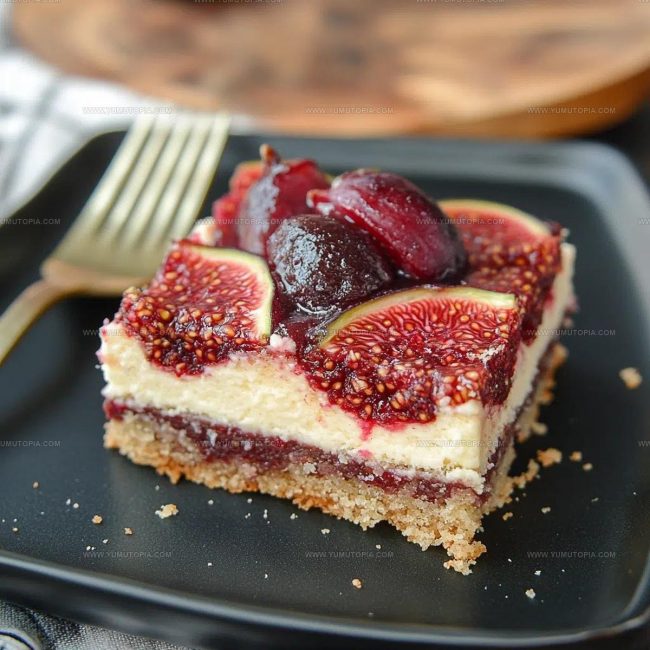
Fig Dessert Bars Recipe for a Nutty Fruity Snack
A fig dessert bars recipe delivers sweet satisfaction that feels both homegrown and special, perfect when you want something delicious without spending hours in the kitchen.
The natural richness makes every bite feel indulgent while keeping things surprisingly simple.
Everyone seems to love the combination of soft textures and concentrated sweetness that comes together so easily.
Whether you’re celebrating a weekend gathering or just treating yourself on a quiet afternoon, these bars fit right in.
They look impressive on any dessert table yet feel approachable enough for everyday enjoyment.
The balanced flavors appeal to adventurous eaters and comfort food lovers alike, which makes sharing them such a joy.
Best of all, you can whip up a batch and have something truly memorable ready to serve.
Special Highlights of Fig Dessert Bars
Ingredients For Lush And Creamy Fig Dessert Bars
Almond Shortbread Crust:Cheesecake Filling:Fig Topping:Pans Knives And Tools For Fig Bar Prep
How to Prepare Fig Dessert Bars
Prepare the Oven and Pan
Preheat your oven to 350°F (175°C). Take an 8×8-inch baking pan and line it with parchment paper, letting the edges hang over so your dessert bars will be easy to remove later.
Create the Almond Shortbread Crust
Grab a mixing bowl and combine these ingredients:
Cut in ½ cup cold unsalted butter until the mixture looks like coarse crumbs. Press this mixture firmly into the bottom of your prepared pan. Bake for 15-18 minutes, watching for golden edges. Let the crust cool completely.
Mix the Cheesecake Filling
Grab your mixer and beat 16 oz of room temperature cream cheese until smooth. Add in ½ cup honey, 2 large eggs, 1 teaspoon vanilla extract, and lemon zest if desired. Mix until the filling becomes creamy and well combined.
Bake the Cheesecake Layer
Pour the cheesecake mixture over your cooled crust, smoothing the top with a spatula. Bake at 350°F (175°C) for 20-25 minutes. The center should look slightly jiggly but set. Remove and let cool completely.
Prepare the Fig Topping
In a saucepan, combine:
Simmer the mixture for 8-10 minutes until it becomes thick and jammy. Let it cool slightly.
Finish and Chill the Dessert
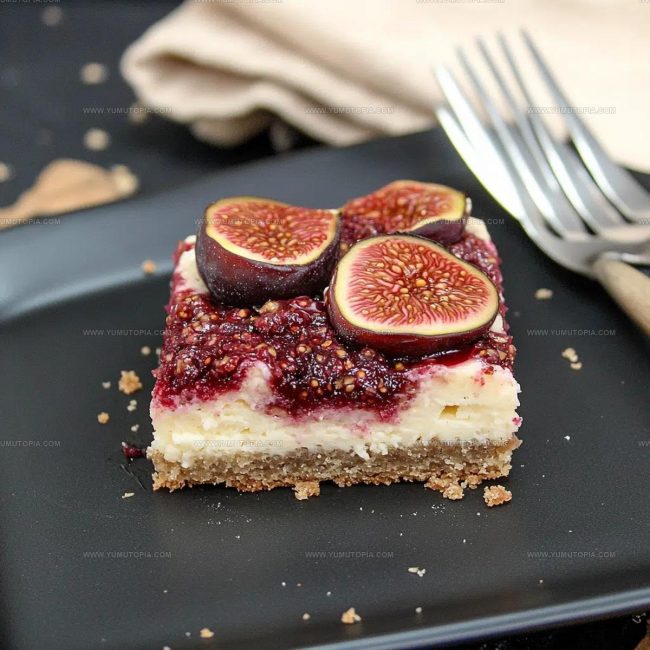
Spread the fig topping evenly over the cooled cheesecake layer. Refrigerate for at least 2 hours or overnight to help everything set perfectly.
Serve the Dessert
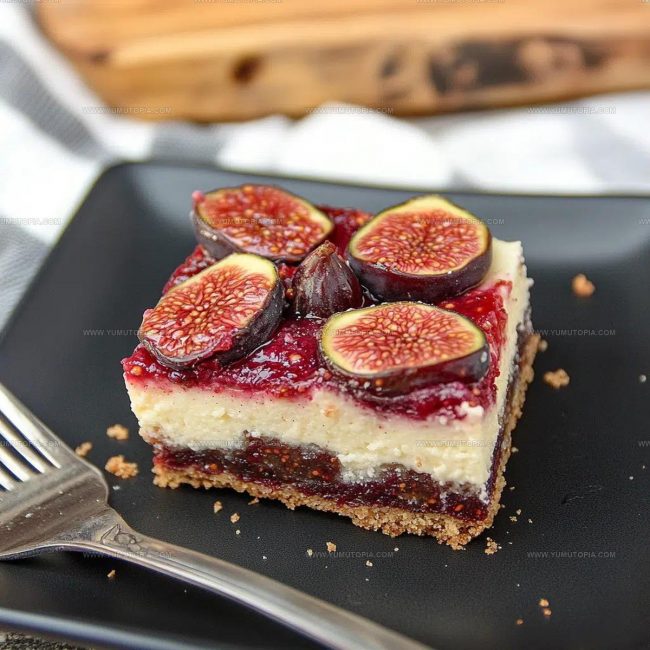
Lift the bars out of the pan using the parchment paper edges. Slice into neat squares. Serve chilled, and if desired, sprinkle with a light dusting of powdered sugar or add a few fresh fig slices on top.
Techniques For Smooth Layers And Strong Fig Flavor
Variations For Fig Dessert Bar Lovers
Serving Fig Dessert Bars Chilled For Dessert
Storing Fig Bars For Clean Slices
Fig Dessert Bar Q&A
Can fresh and frozen figs work equally well?
Absolutely! Fresh or frozen figs perform wonderfully. When using frozen figs, thaw them first and gently pat dry to remove excess moisture before cooking.
How ripe should the figs be for this dessert?
Select figs that are soft but not mushy. Slightly overripe figs create the most intense flavor for the topping, which makes the bars super delicious.
What if cream cheese is not completely smooth?
Ensure cream cheese is at room temperature and beat thoroughly to eliminate lumps. A hand mixer helps create that silky-smooth texture we want in cheesecake layers.
Does the crust need to be completely cool before adding cheesecake layer?
Yes, cooling the crust prevents soggy bottoms and helps layers set properly. Let the crust cool at room temperature for about 15-20 minutes.
Can the dessert bars be made ahead of time?
These bars are perfect for advance preparation. Wrap tightly and store in the refrigerator up to 3 days before serving – the flavors actually improve as they rest.
What substitutions work for honey?
Maple syrup or agave nectar can replace honey in both the cheesecake and fig topping layers. Each will contribute a slightly different sweetness profile.
Fig Dessert Bars Recipe
- Total Time: 2 hours 63 minutes to overnight (including chilling)
- Yield: 8 1x
Description
Homemade fig dessert bars bring warmth from my grandmother’s kitchen straight to your plate. Sweet fig filling nestled between buttery crumble layers creates a simple, delightful treat that makes family gatherings extra special.
Ingredients
Main Ingredients:
- 1 cup all-purpose flour
- ½ cup almond flour
- 16 ounces (454 grams) cream cheese
- 1 ½ cups chopped figs
- 2 large eggs
Supporting Ingredients:
- ½ cup cold unsalted butter
- ½ cup honey
- ¼ cup sugar
- 1 teaspoon vanilla extract
- 1 teaspoon lemon juice
- ½ teaspoon salt
Thickening/Binding Agents:
- 1 teaspoon cornstarch
- 1 lemon zest
- 1 teaspoon vanilla extract
Instructions
- Gather all ingredients and prep your 8×8-inch baking pan by lining it with parchment paper, ensuring the edges overhang for easy removal later.
- Mix 1 cup all-purpose flour, ½ cup almond flour, ¼ cup sugar, and ½ teaspoon salt in a medium bowl. Cut ½ cup cold unsalted butter into small cubes and work into the dry mixture until it resembles coarse crumbs.
- Press the crust mixture firmly and evenly into the bottom of the prepared pan. Bake at 350°F (175°C) for 15-18 minutes until the edges turn golden brown.
- Allow the crust to cool completely at room temperature, which takes approximately 30 minutes.
- In a large mixing bowl, beat 16 oz room temperature cream cheese until smooth and creamy using an electric mixer.
- Add ½ cup honey, 2 large eggs, 1 teaspoon vanilla extract, and optional lemon zest to the cream cheese. Mix until the filling becomes completely uniform and silky.
- Pour the cheesecake mixture over the cooled crust, smoothing the top with a spatula to ensure an even layer.
- Bake at 350°F (175°C) for 20-25 minutes, watching for a set but slightly wobbly center. Remove and let cool completely.
- Combine 1 ½ cups chopped figs, 2 tablespoons honey, and 1 teaspoon lemon juice in a saucepan. Add 1 teaspoon cornstarch if the figs seem watery.
- Simmer the fig mixture over medium heat for 8-10 minutes, stirring occasionally until it thickens into a jam-like consistency.
- Allow the fig topping to cool for 10-15 minutes, then spread evenly over the cooled cheesecake layer.
- Refrigerate the dessert for at least 2 hours or overnight to set completely.
- When ready to serve, lift the dessert out using the parchment paper overhang. Slice into 9-12 square bars and serve chilled.
Notes
- Fresh figs work best, but frozen can be substituted by thawing and draining excess moisture before cooking.
- Bring cream cheese to room temperature to ensure a smooth, lump-free cheesecake layer without overbeating.
- For a gluten-free version, replace all-purpose flour with a 1:1 gluten-free baking blend in the crust.
- Cooling each layer completely prevents cracking and helps layers set properly for clean, beautiful bars.
- Prep Time: 20 minutes
- Cook Time: 43-53 minutes
- Category: Dessert Bars
- Method: Baking
- Cuisine: American
Nutrition
- Serving Size: 8
- Calories: 282 kcal
- Sugar: 17 g
- Sodium: 94 mg
- Fat: 20 g
- Saturated Fat: 8 g
- Unsaturated Fat: 11 g
- Trans Fat: 0 g
- Carbohydrates: 19 g
- Fiber: 1 g
- Protein: 5 g
- Cholesterol: 64 mg
Madison Wyman
Recipe Developer & Food Storyteller
Expertise
Recipe Research and Adaptation, Food Writing and Cultural Storytelling, Sustainable and Ethical Sourcing, Dietary Adaptations (e.g., gluten-free, plant-based)
Education
Oregon Health & Science University
Portland Community College
Madison’s passion for flavor and culture ignited amidst the rich Southern cooking traditions of her upbringing, where cherished family recipes told delicious tales.
Armed with a Master’s in Food Systems and Society from Oregon Health & Science University and a Culinary Arts Certificate from Portland Community College, Madison truly excels at transforming rich, intricate flavors into dishes that are both approachable and heartfelt.
For her, cooking is a vibrant blend of science, art, and heritage – a powerful way to connect us to our roots and each other. Her recipes invite you to delve deeper, uncovering the fascinating stories woven into every ingredient.