
Fluffy Ice Cream Bread Recipe in 3 Simple Steps
Fluffy ice cream bread recipe enthusiasts know that some of the best treats come from wonderfully unexpected combinations.
When comfort meets convenience in one simple creation, you end up with something both familiar and exciting at once.
Kids adore it for its sweet appeal, while adults appreciate how quickly it comes together on busy weekends.
Soft texture combines with subtle sweetness to deliver satisfaction without requiring hours in the kitchen.
Breakfast, dessert, or afternoon snack; it fits seamlessly into any part of the day.
Minimal effort yields maximum enjoyment when you need something special without the usual fuss.
What Makes Ice Cream Bread So Clever
A Closer Look at Ice Cream Bread Ingredients
Main Ingredients:Topping:Baking Details:Tools Used Along the Way for Ice Cream Bread
Fluffy Ice Cream Bread Baking Steps
Warm Up the Oven
Crank that oven dial to exactly 350°F and get ready for some seriously simple baking magic.
Pan Prep
Grab your 8 1/2 x 4 1/2 x 2 1/2-inch loaf pan and give it a quick spray or butter rub so nothing sticks later.
Ice Cream Softening
Pull out 2 cups of softened ice cream and use a spoon to smooth it out until it’s nice and creamy.
Mix the Base
Grab a mixing bowl and combine these ingredients:
Stir just enough to blend – don’t go crazy with mixing or your bread will turn tough.
Fill the Pan
Pour that dreamy batter into your prepped loaf pan, spreading it evenly across the bottom.
Sprinkle Fun
If you’re feeling festive, scatter some multicolored sprinkles across the top of the batter.
Bake to Perfection
Slide the pan into the 350°F oven and bake for 40-45 minutes. Check doneness by poking a toothpick into the center – it should come out clean.
Cooling Down
Let the bread hang out in the pan for 5 minutes, then move it to a wire rack to cool completely. Slice and enjoy whenever the mood strikes!
Which Tips Keep Ice Cream Bread Fluffy
Ice Cream Bread Variations With Alternate Ideas
How to Serve Ice Cream Bread
How to Store Ice Cream Bread
Ice Cream Bread FAQ Guide
Can I use any flavor of ice cream?
Absolutely! Pick your favorite flavor. Chocolate, strawberry, or vanilla all work great. The fun is experimenting with different tastes.
Does the ice cream need to be completely thawed?
No, just stir it until mostly soft and smooth. Cold but stirrable is perfect for mixing with flour.
What if I don’t have self-rising flour?
Simply mix 1 cup all-purpose flour with 1½ teaspoons baking powder and ¼ teaspoon salt to create a substitute.
How do I know when the bread is done?
Insert a toothpick in the center. When it comes out clean without wet batter, your bread is ready.
Can children help make this recipe?
Definitely! Stirring ice cream and mixing ingredients are simple tasks kids can safely do with adult supervision.
How crispy will the bread’s crust be?
The crust will be slightly golden and have a gentle crunch, not super hard or tough.
Fluffy Ice Cream Bread Recipe
- Total Time: 50-55 minutes
- Yield: 3 to 4 1x
Description
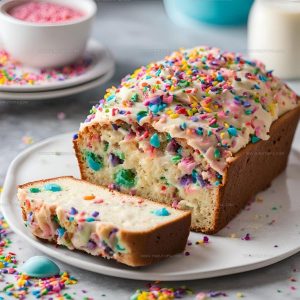
Whipping up ice cream bread brings pure joy to baking adventures! Simple ingredients like melted ice cream and self-rising flour create a surprisingly delightful quick bread that’ll make your kitchen smell amazing.
Ingredients
Main Ingredients:
- 2 cups softened ice cream
- 1 ½ cups self-rising flour
Supporting Ingredients:
- Multicolored sprinkles
Instructions
- Heat your oven to precisely 350°F and position the rack in the center position.
- Generously coat an 8 ½ x 4 ½ x 2 ½-inch bread loaf pan with cooking spray or butter.
- Allow 2 cups of ice cream to soften at room temperature for 10-15 minutes until slightly melty.
- Vigorously stir the ice cream for 45-60 seconds until it reaches a smooth, consistent texture.
- Add 1 ½ cups of self-rising flour directly into the softened ice cream bowl.
- Gently fold the flour into the ice cream using 8-10 light strokes, stopping when ingredients are just combined.
- Transfer the batter into your prepared loaf pan, spreading it evenly with a spatula.
- Scatter a handful of multicolored sprinkles across the surface if you want extra color and texture.
- Place the pan in the 350°F oven and bake for exactly 42-45 minutes.
- Check doneness by inserting a toothpick into the center – it should emerge completely clean.
- Remove the pan from the oven and let the bread rest inside for 5 minutes.
- Carefully transfer the bread to a wire cooling rack and allow it to cool for an additional 20 minutes before slicing.
Notes
- Choose a rich, creamy ice cream flavor for the best bread texture and taste.
- Let the ice cream soften at room temperature for easier mixing, but don’t let it completely melt.
- Experiment with different ice cream flavors like chocolate, vanilla, or even rocky road for unique bread variations.
- Line the pan with parchment paper for easier removal and cleanup of your delicious bread.
- Prep Time: 10 minutes
- Cook Time: 40-45 minutes
- Category: Breads
- Method: Baking
- Cuisine: American
Nutrition
- Serving Size: 3 to 4
- Calories: 370 kcal
- Sugar: 27 g
- Sodium: 340 mg
- Fat: 10 g
- Saturated Fat: 6 g
- Unsaturated Fat: 3 g
- Trans Fat: 0.2 g
- Carbohydrates: 65 g
- Fiber: 1.5 g
- Protein: 6 g
- Cholesterol: 45 mg
Madison Wyman
Recipe Developer & Food Storyteller
Expertise
Recipe Research and Adaptation, Food Writing and Cultural Storytelling, Sustainable and Ethical Sourcing, Dietary Adaptations (e.g., gluten-free, plant-based)
Education
Oregon Health & Science University
Portland Community College
Madison’s passion for flavor and culture ignited amidst the rich Southern cooking traditions of her upbringing, where cherished family recipes told delicious tales.
Armed with a Master’s in Food Systems and Society from Oregon Health & Science University and a Culinary Arts Certificate from Portland Community College, Madison truly excels at transforming rich, intricate flavors into dishes that are both approachable and heartfelt.
For her, cooking is a vibrant blend of science, art, and heritage – a powerful way to connect us to our roots and each other. Her recipes invite you to delve deeper, uncovering the fascinating stories woven into every ingredient.